- Stats: 24228 1
- Author: Partyrama
- Posted: 8th December 2015
- Category: Food & Drink
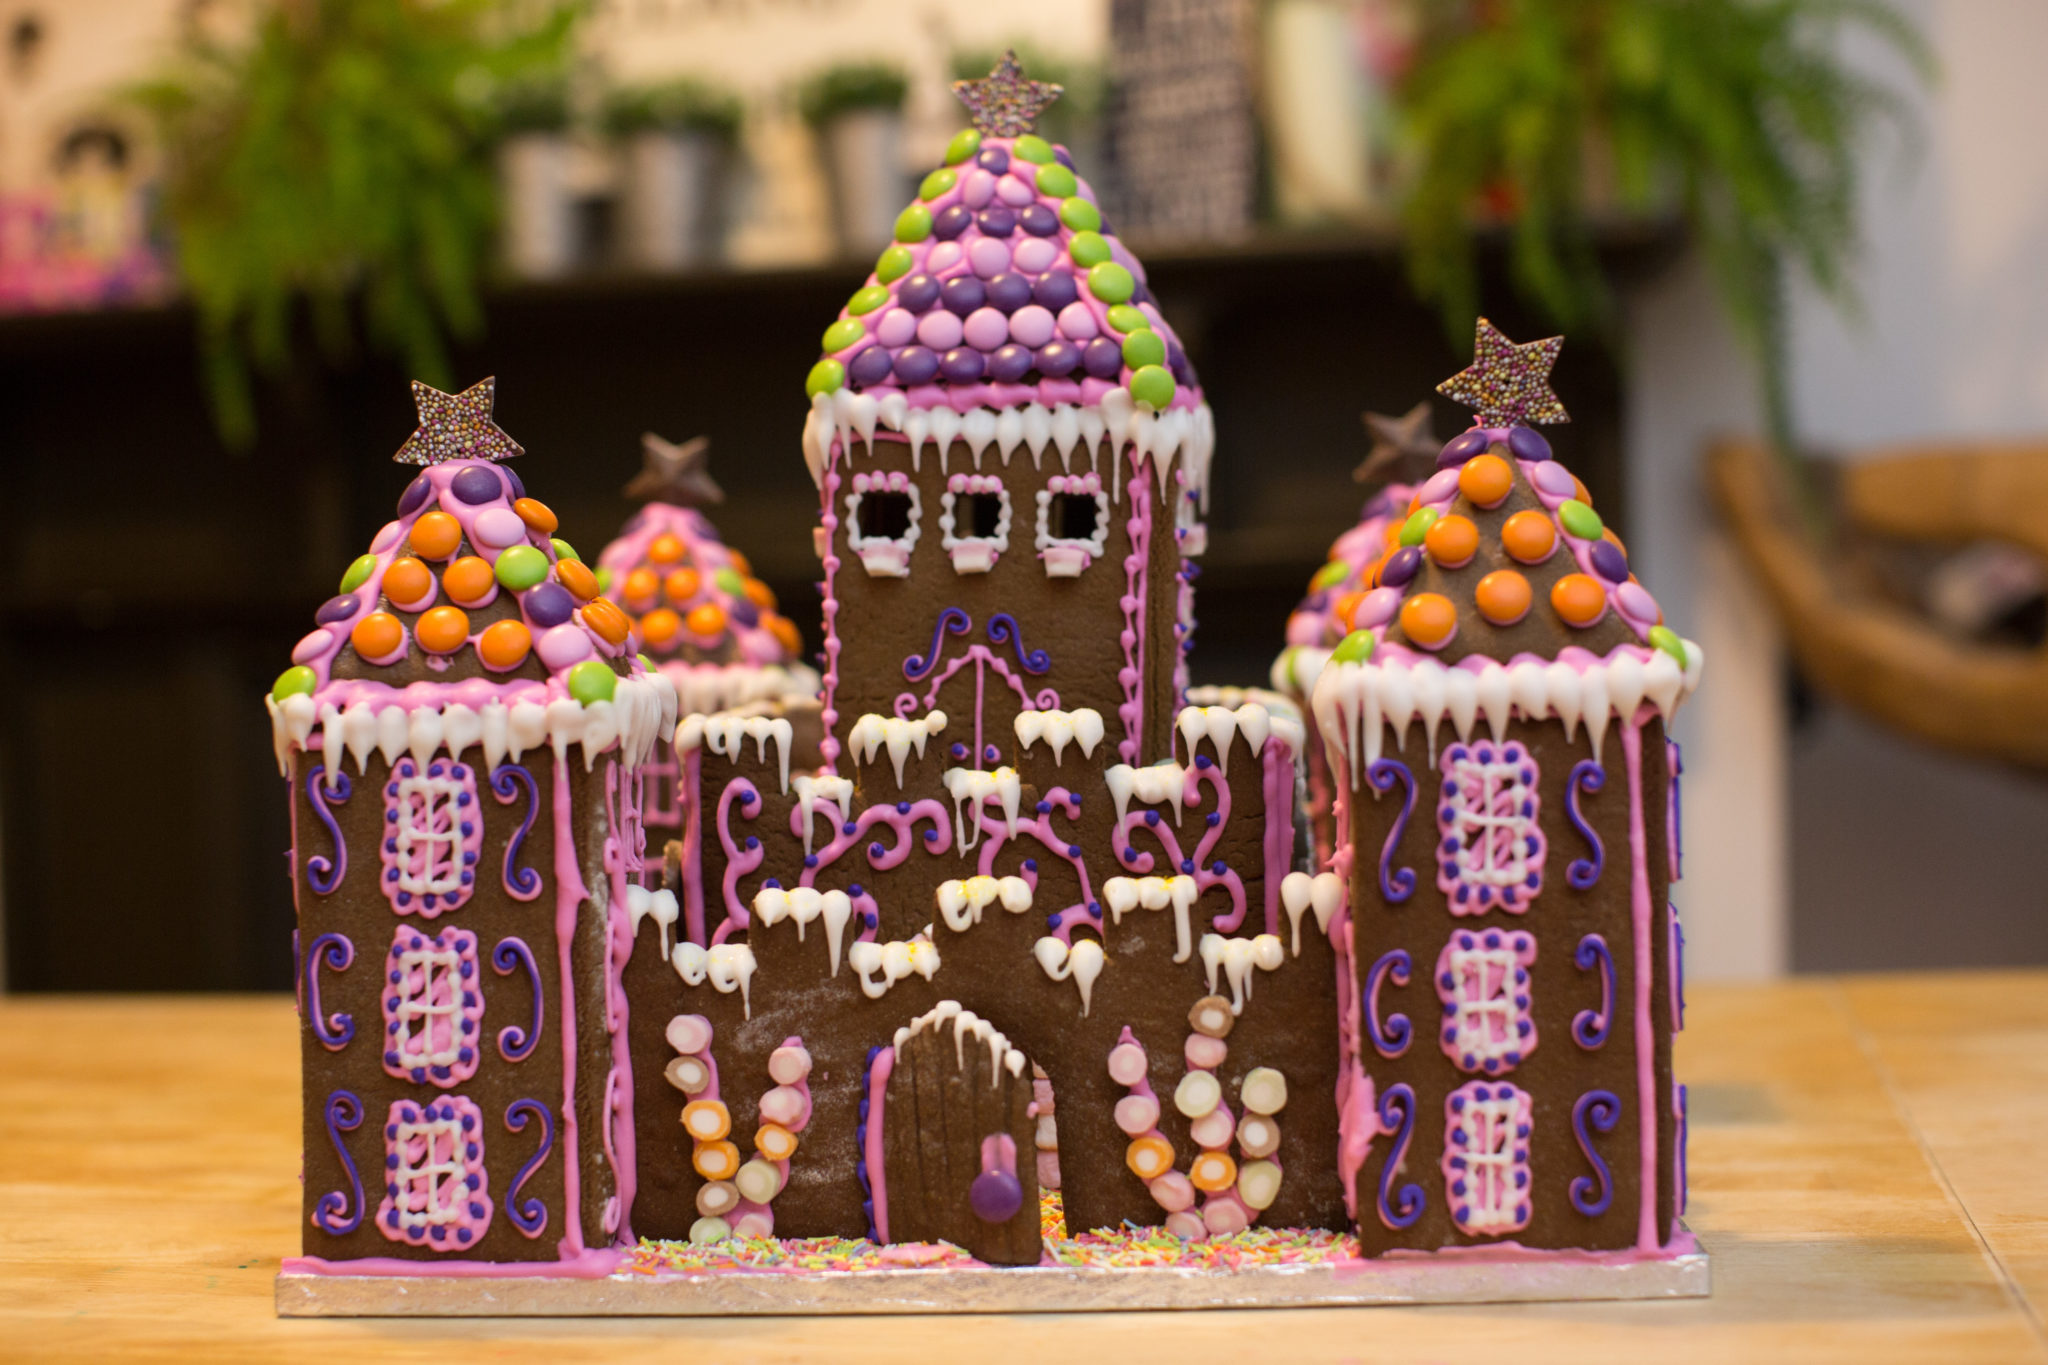
How to Make a Princess Gingerbread Castle
Are you looking for an alternative to the traditional gingerbread house? Make our princess themed Christmas castle for extra fun this festive season!
Gingerbread is a fantastic medium to work with if you are looking for an alternative to sponge cake. Traditionally made at Christmas, gingerbread has a wonderful firm texture and fills your kitchen with the lovely smell of baked-in festive spices as you create it. It doesn’t have to be confined to Christmas, though – there is no reason why you can’t make all sorts of gingerbread creations throughout the year.
This princess gingerbread castle would be perfect for a little girl celebrating her birthday, especially in the run-up to Christmas, but could equally be customised to suit a boy. The beauty of making a gingerbread house is that once you have the basic structure sorted, you can decorate it however you like. For instance, you might opt for ornate piping over the entire structure, or get creative with different types of sweet – it really is down to you!
It does, however, take a few days to make the gingerbread castle so allow enough time to make and decorate it ahead of your celebration.
Download our Gingerbread Castle Template
You Will Need…
Ingredients
- three quantities of gingerbread mixture (if you have any left over you can make cookies with it)
- 750g plain flour
- 5 tsp baking powder
- 4 tsp ground ginger
- 4 tsp ground cinnamon
- 5 tsp mixed spice
- 5 tsp salt
- 170g unsalted butter, softened
- 300g soft light brown sugar
- 2 large eggs
- 350g molasses/treacle
- 1 tbsp water
- four or five quantities of icing sugar
- 1 medium egg white
- 250g sifted icing sugar
- Sweets and chocolates of your choice for decorating
- Paste or gel colours for colouring the icing if you wish
Equipment
- Baking trays
- 5mm spacer guides (optional)
- A minimum 16″ square cake board
- Disposable piping bags
- Number 2 and Number 3 round piping nozzles (optional)
- Cardboard or foam core for cutting templates
- Pizza cutter/wheel
- Long rolling pin
- Small sharp knife (such as a Victorinox paring knife) for cutting smaller shapes
- Circle and square cutters of various sizes
How to Make the Gingerbread Pieces
Sieve together all the dry ingredients until they are completely mixed, and set aside.
Either in a separate bowl or standing mixer fitted with a k-beater, add the butter and sugar. Beat together until just combined.
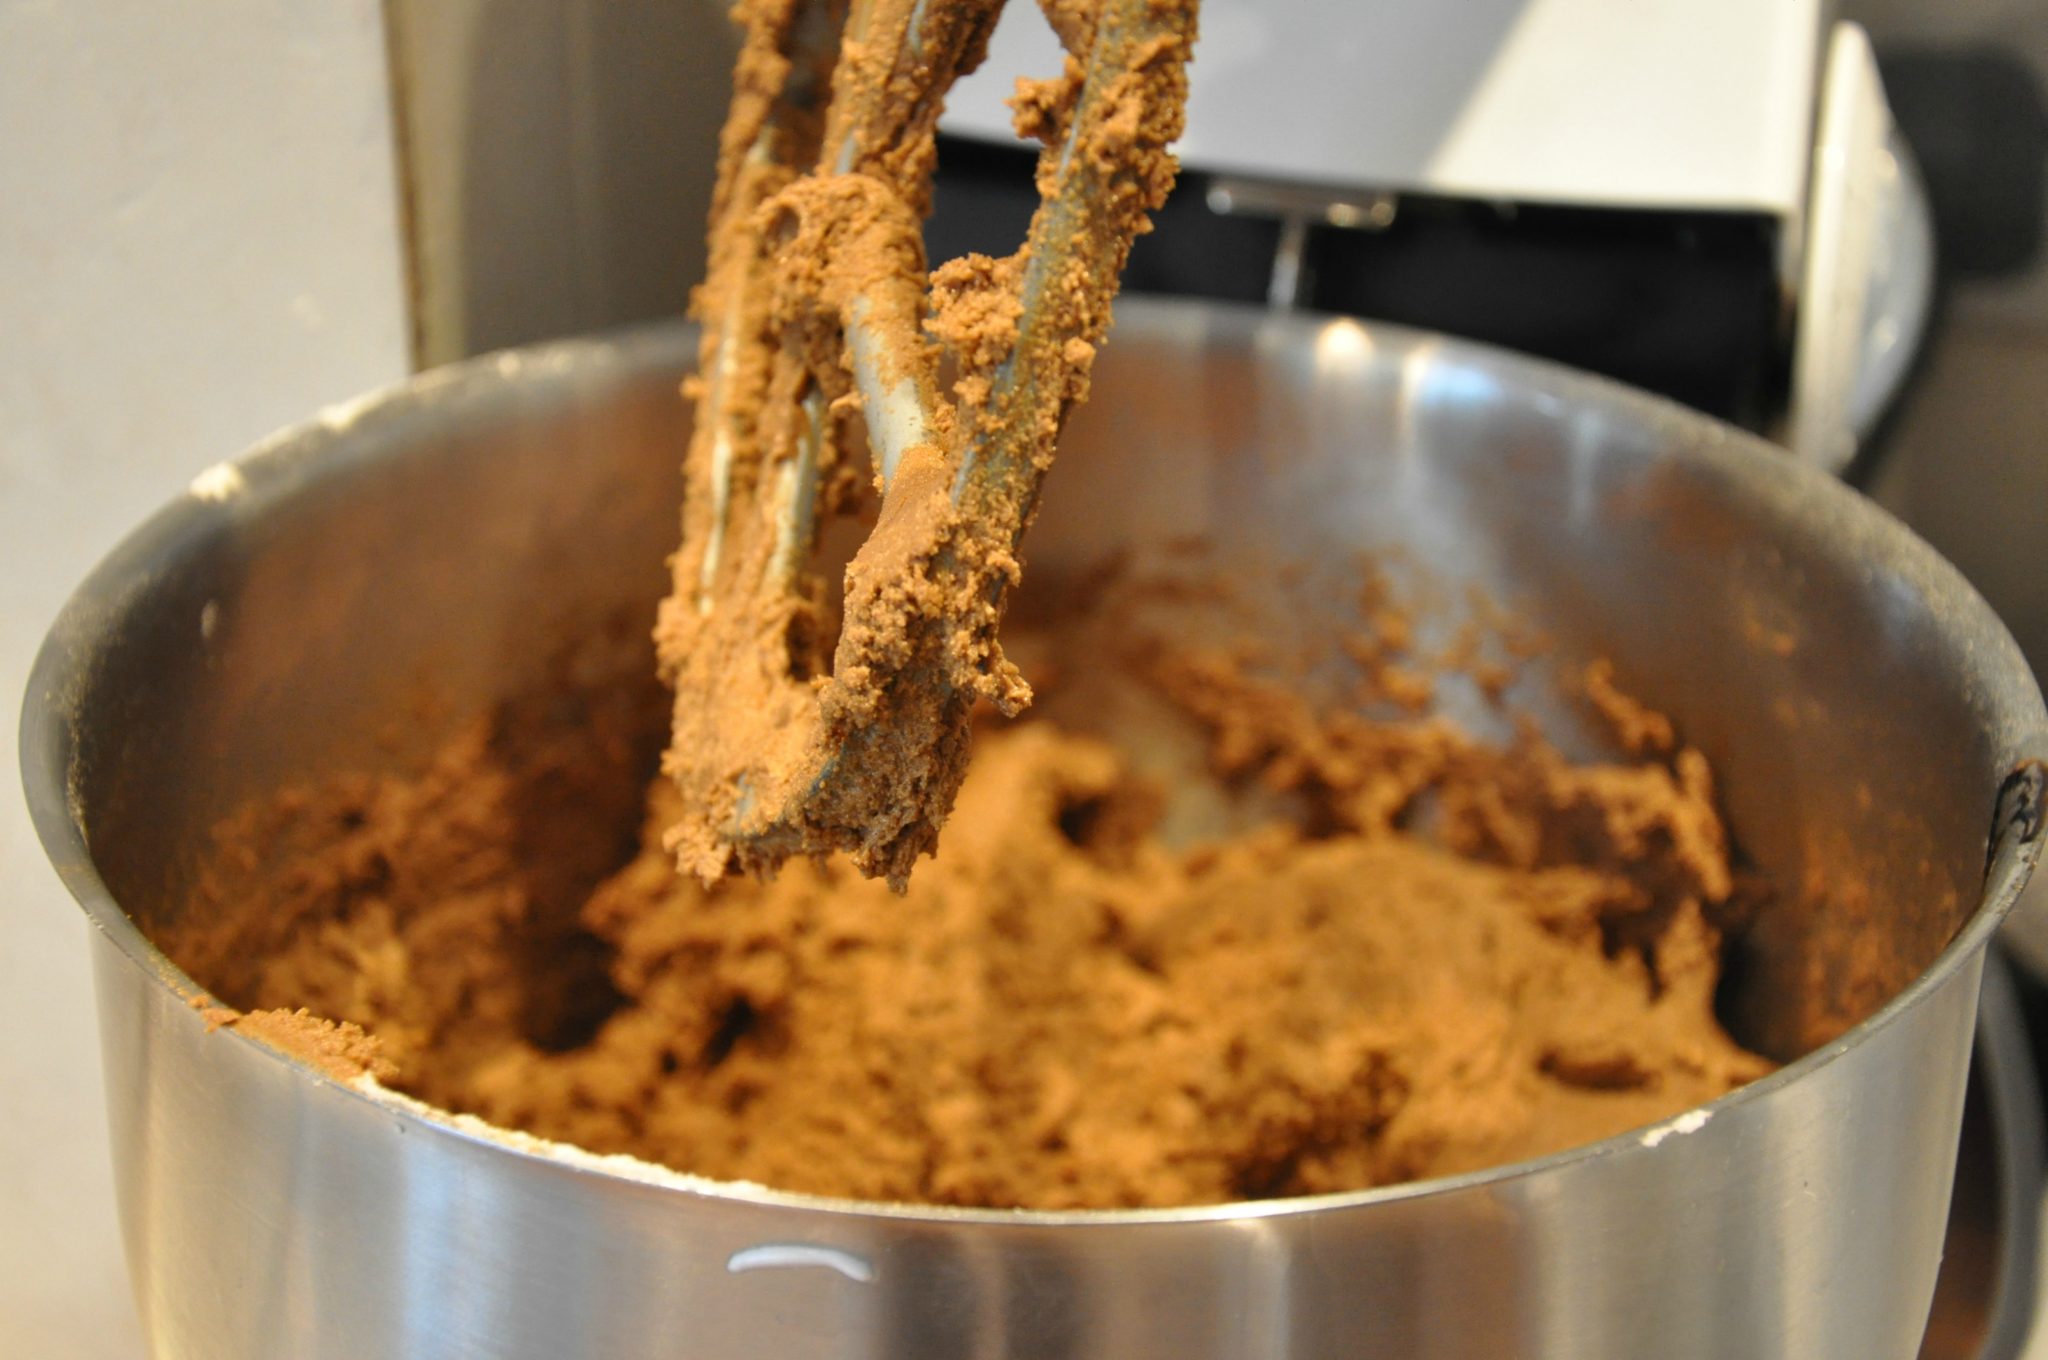
Add in the eggs and a spoonful of flour to prevent curdling.
Slowly add in the treacle and water. Next, add the flour spoonful by spoonful and mix until it comes together to form a dough. Once this is done, wrap the dough in cling film and put in the fridge 20–30 minutes.
Your gingerbread dough will be firm enough to work with now. Preheat the oven to 180°C/350°F. Lightly dust the work surface with plain flour and roll the dough out to a thickness of approximately 5 mm.
Put to one side to allow it to firm up even more, ready for use later. You can put it in the fridge for 20 minutes if you like – just don’t forget to take it out or it will be extra tough to roll!
Measure and cut out your template pieces (download our pre-made Gingerbread Castle template). I tend to use foam core board from art shops to cut them because you can keep and reuse them. If you don’t have any foam core to hand then any cardboard will do – even cereal packets! You just need something that doesn’t bend too easily.
Once you have your templates pre-heat your oven to 180°C. Sprinkle the work surface liberally with plain flour and roll out your gingerbread dough to 5mm thick, using the spacer guides to maintain a uniform thickness (if you have them).
Cut out the pieces required using a pizza wheel and place on non-stick baking trays. You may need to use a palette knife to help you lift the pieces onto the trays. Try and group the pieces according to size.
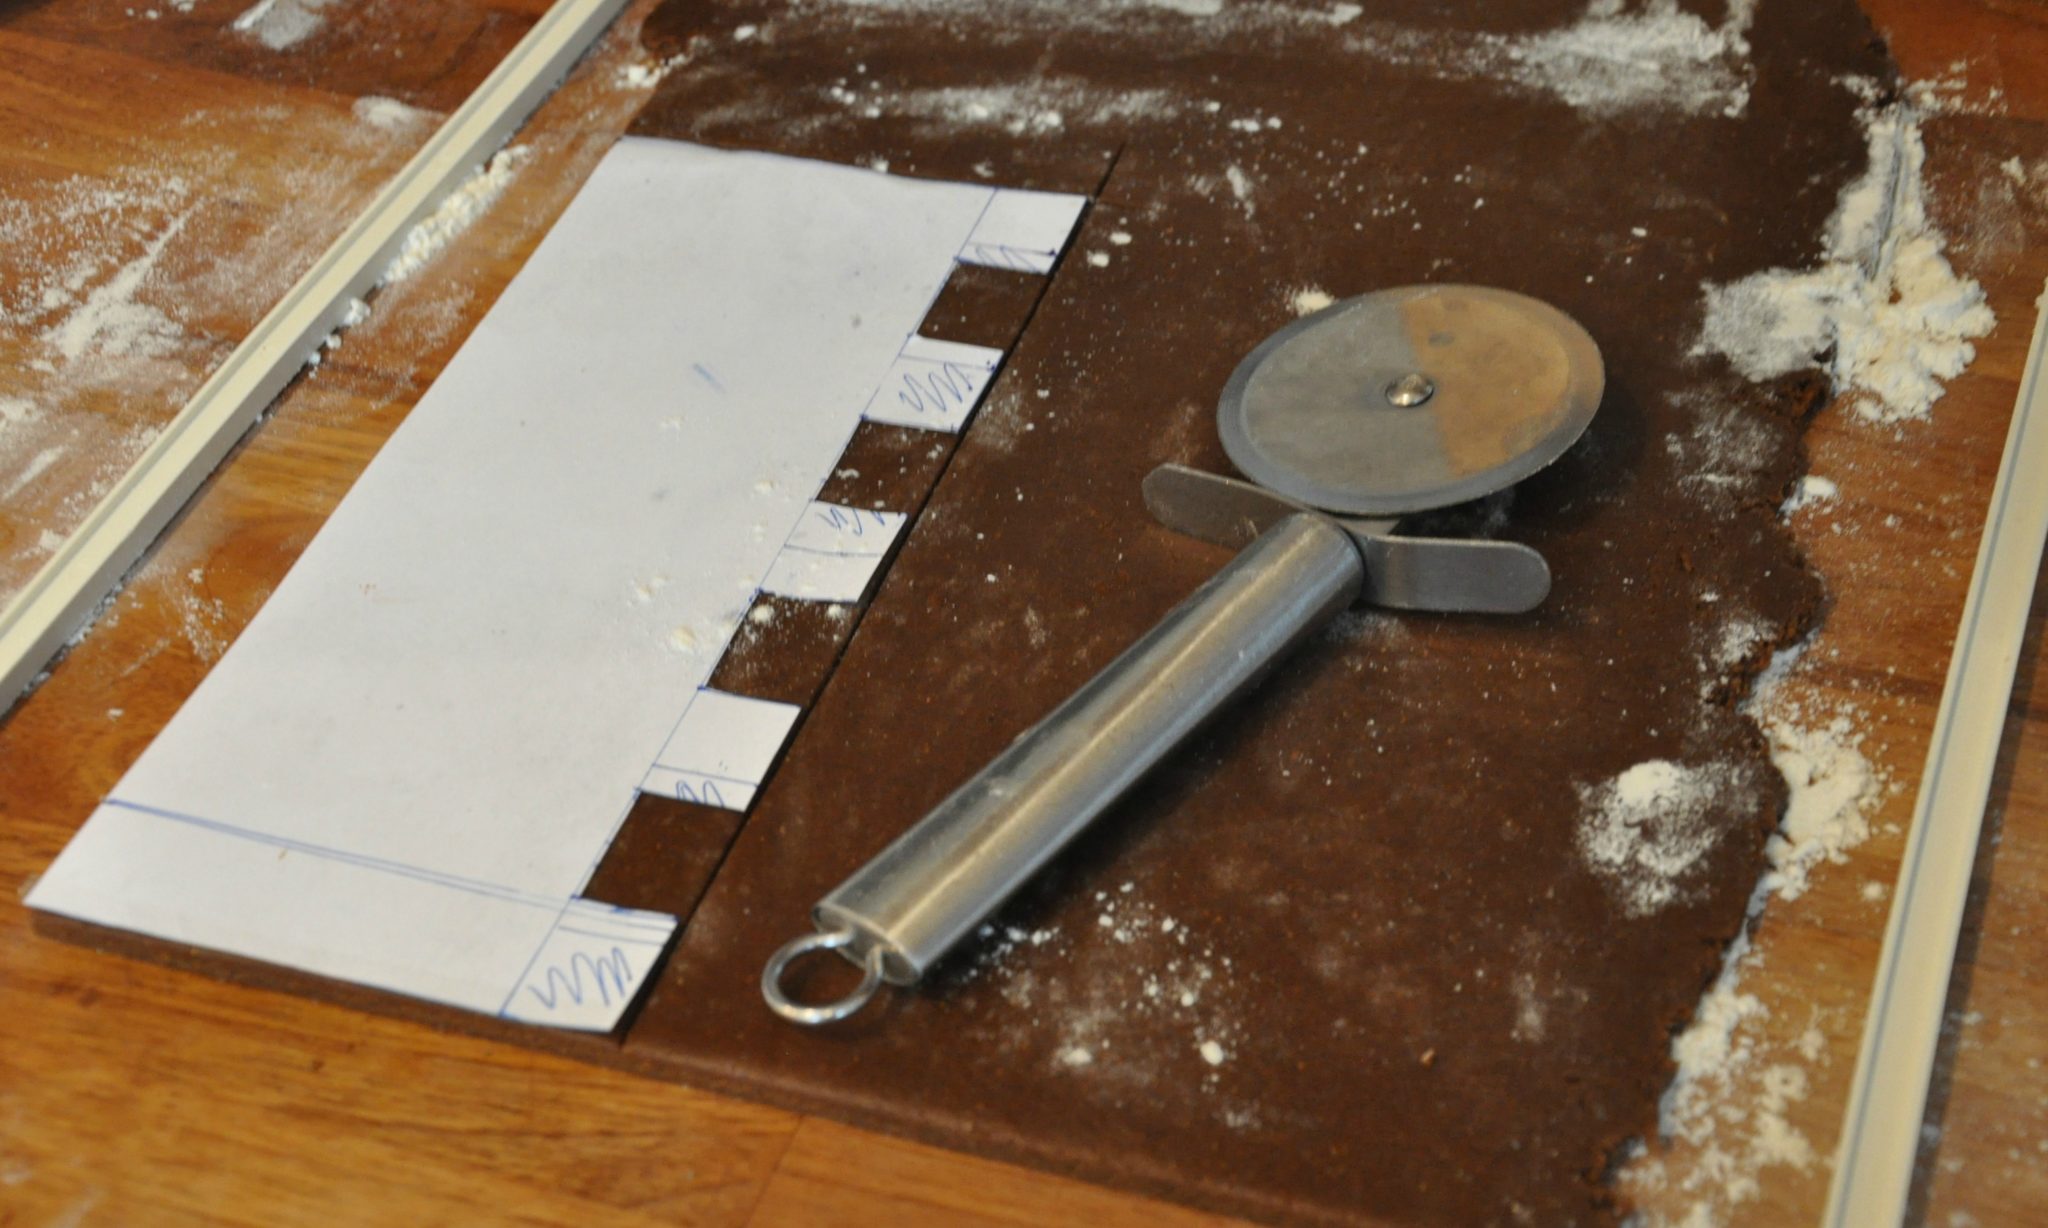
Once on the trays, lay the templates over the top to make sure the gingerbread pieces haven’t distorted too much and pat them back into shape if necessary. With the wall pieces you may find it easier to cut the basic shape out first, then cut the grooved parts out with a knife on the actual baking tray to stop them distorting.
If you want to cut out windows, this is the time to get out your circle and square cutters. If you want to cut doors as well then do so now while the gingerbread pieces are on the trays, prior to cooking.


If you don’t have enough trays you may have to rotate, baking a few pieces at a time, taking them out and allowing them to cool before baking the next lot. As a rough guide, the large pieces take around 15–17 minutes, medium pieces 12–14 minutes and small pieces 10–12 minutes. Keep checking them as they cook. The pieces should feel fairly firm, not sticky to the touch and slightly brown around the edges. If they are still a little soft but not sticky or shiny in the middle, that’s fine as they will harden as they cool
Once all the pieces are baked, transfer to a wire rack and allow to cool completely.
How to Make the Icing
Separate the egg white and yolk. Place the egg white in a bowl and discard the yolk.
Gradually add in the icing sugar and mix well until the icing reaches a soft peak consistency – when you touch the icing with the back of the spoon it should form a peak that flops over but holds its shape.
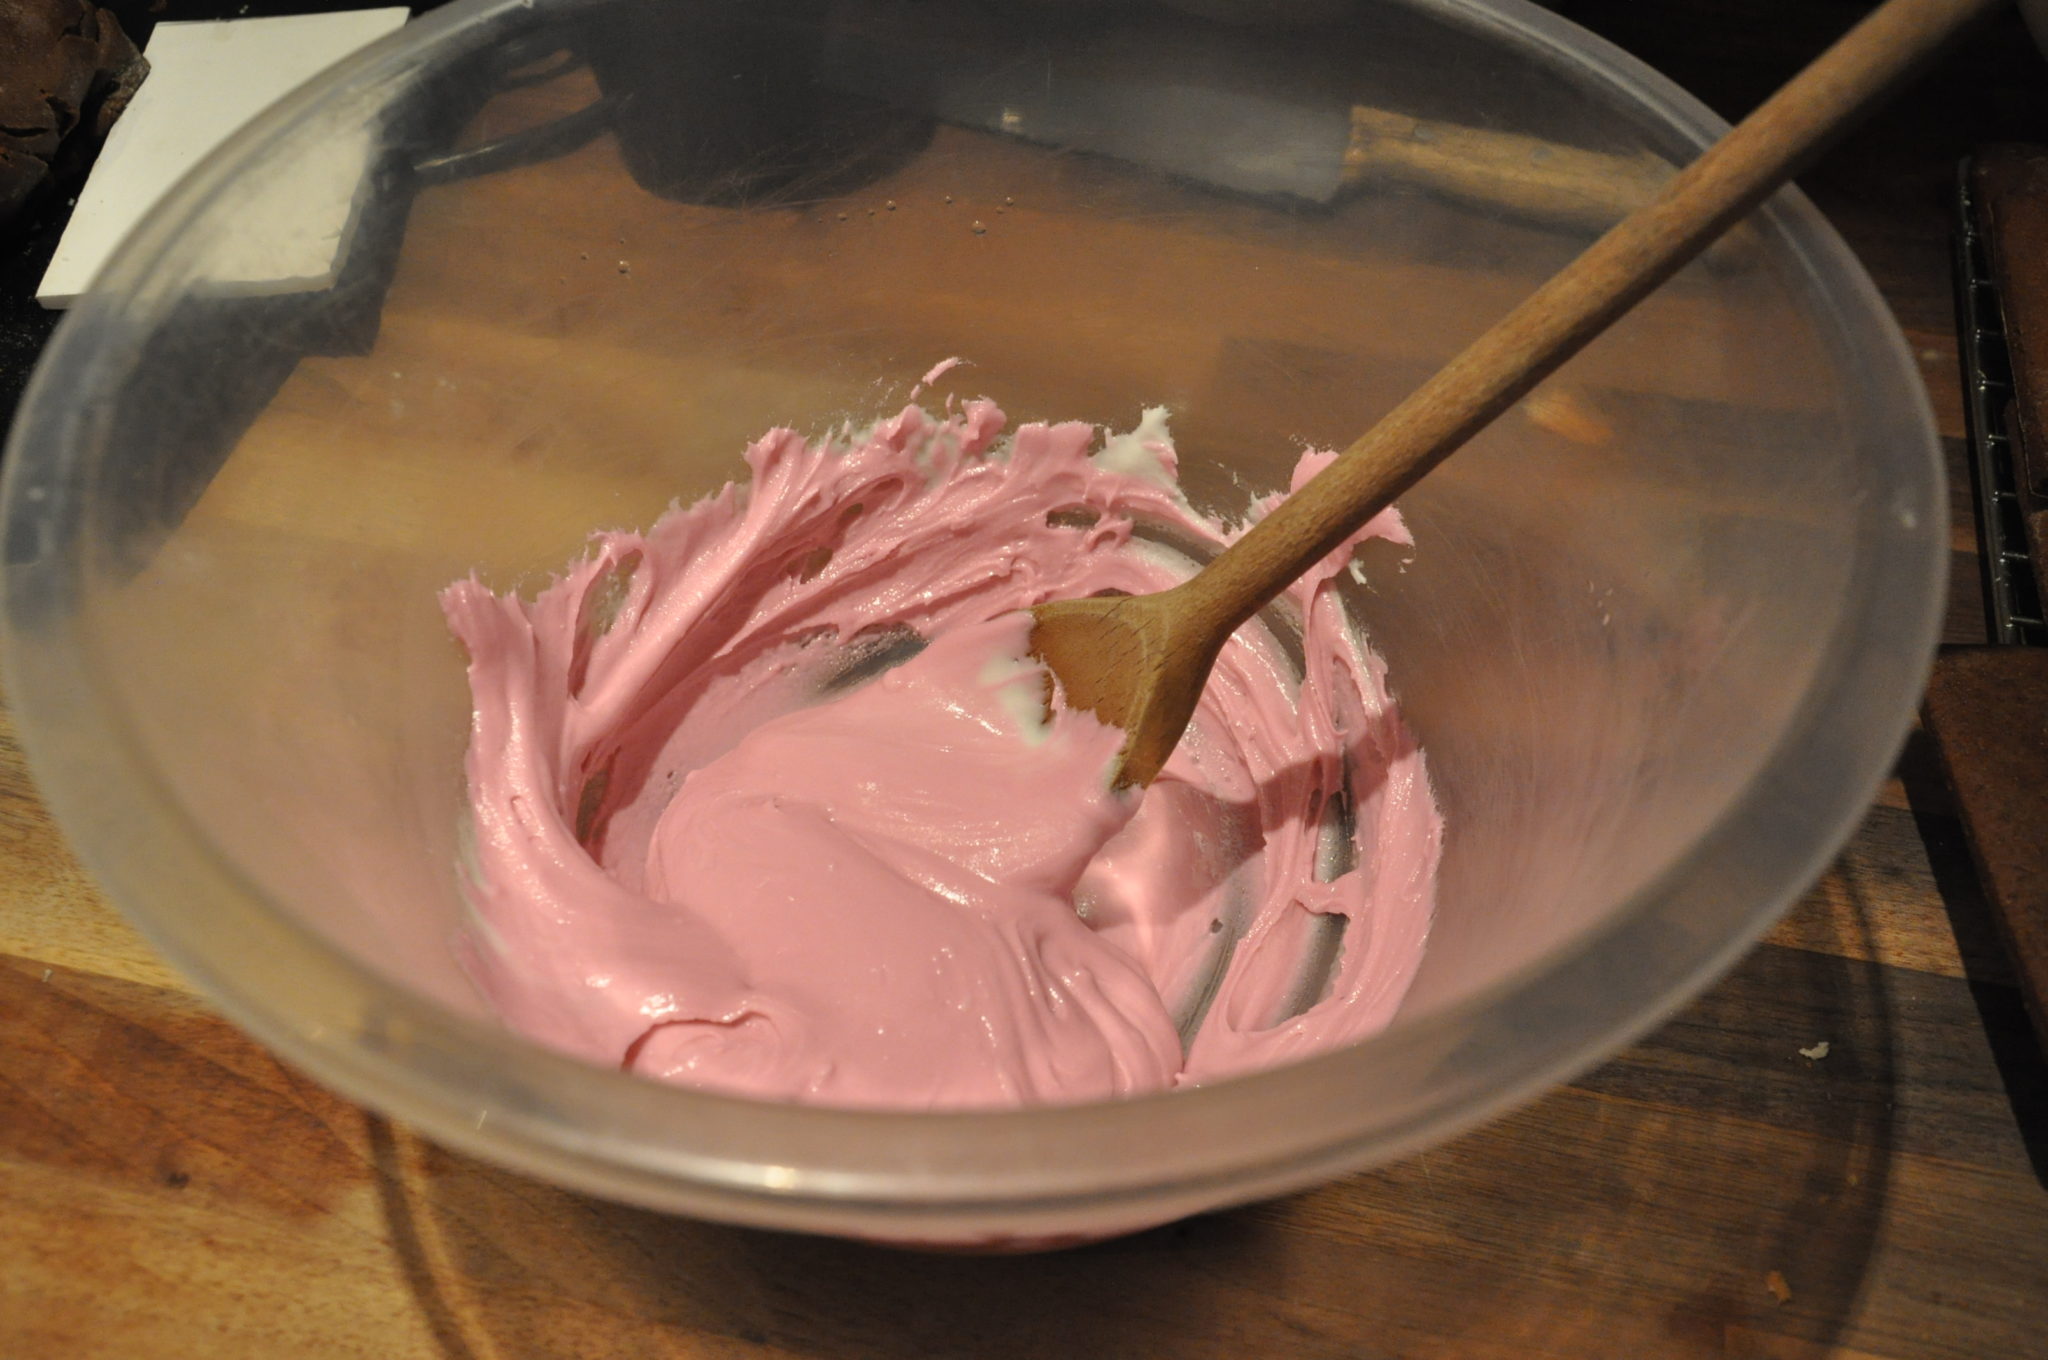
Cover with a damp cloth over the bowl to stop it drying out until you are ready to use it.
Constructing the Castle – Day One
Putting your castle together should ideally be done over several days to allow time for the royal icing to set. Royal icing sets extremely hard so it will hold your gingerbread together very well but if you rush it you could risk the whole lot collapsing.
Fill a disposable piping bag with a number 2 or number 3 tube halfway with icing and tie a knot in the end. If you don’t have piping tubes, snip off the end to create a 2–3mm hole.
It is far easier to pipe on the pieces when they are flat than it is when they are already put together so if you want to pipe in patterns, now is a good time to do it.
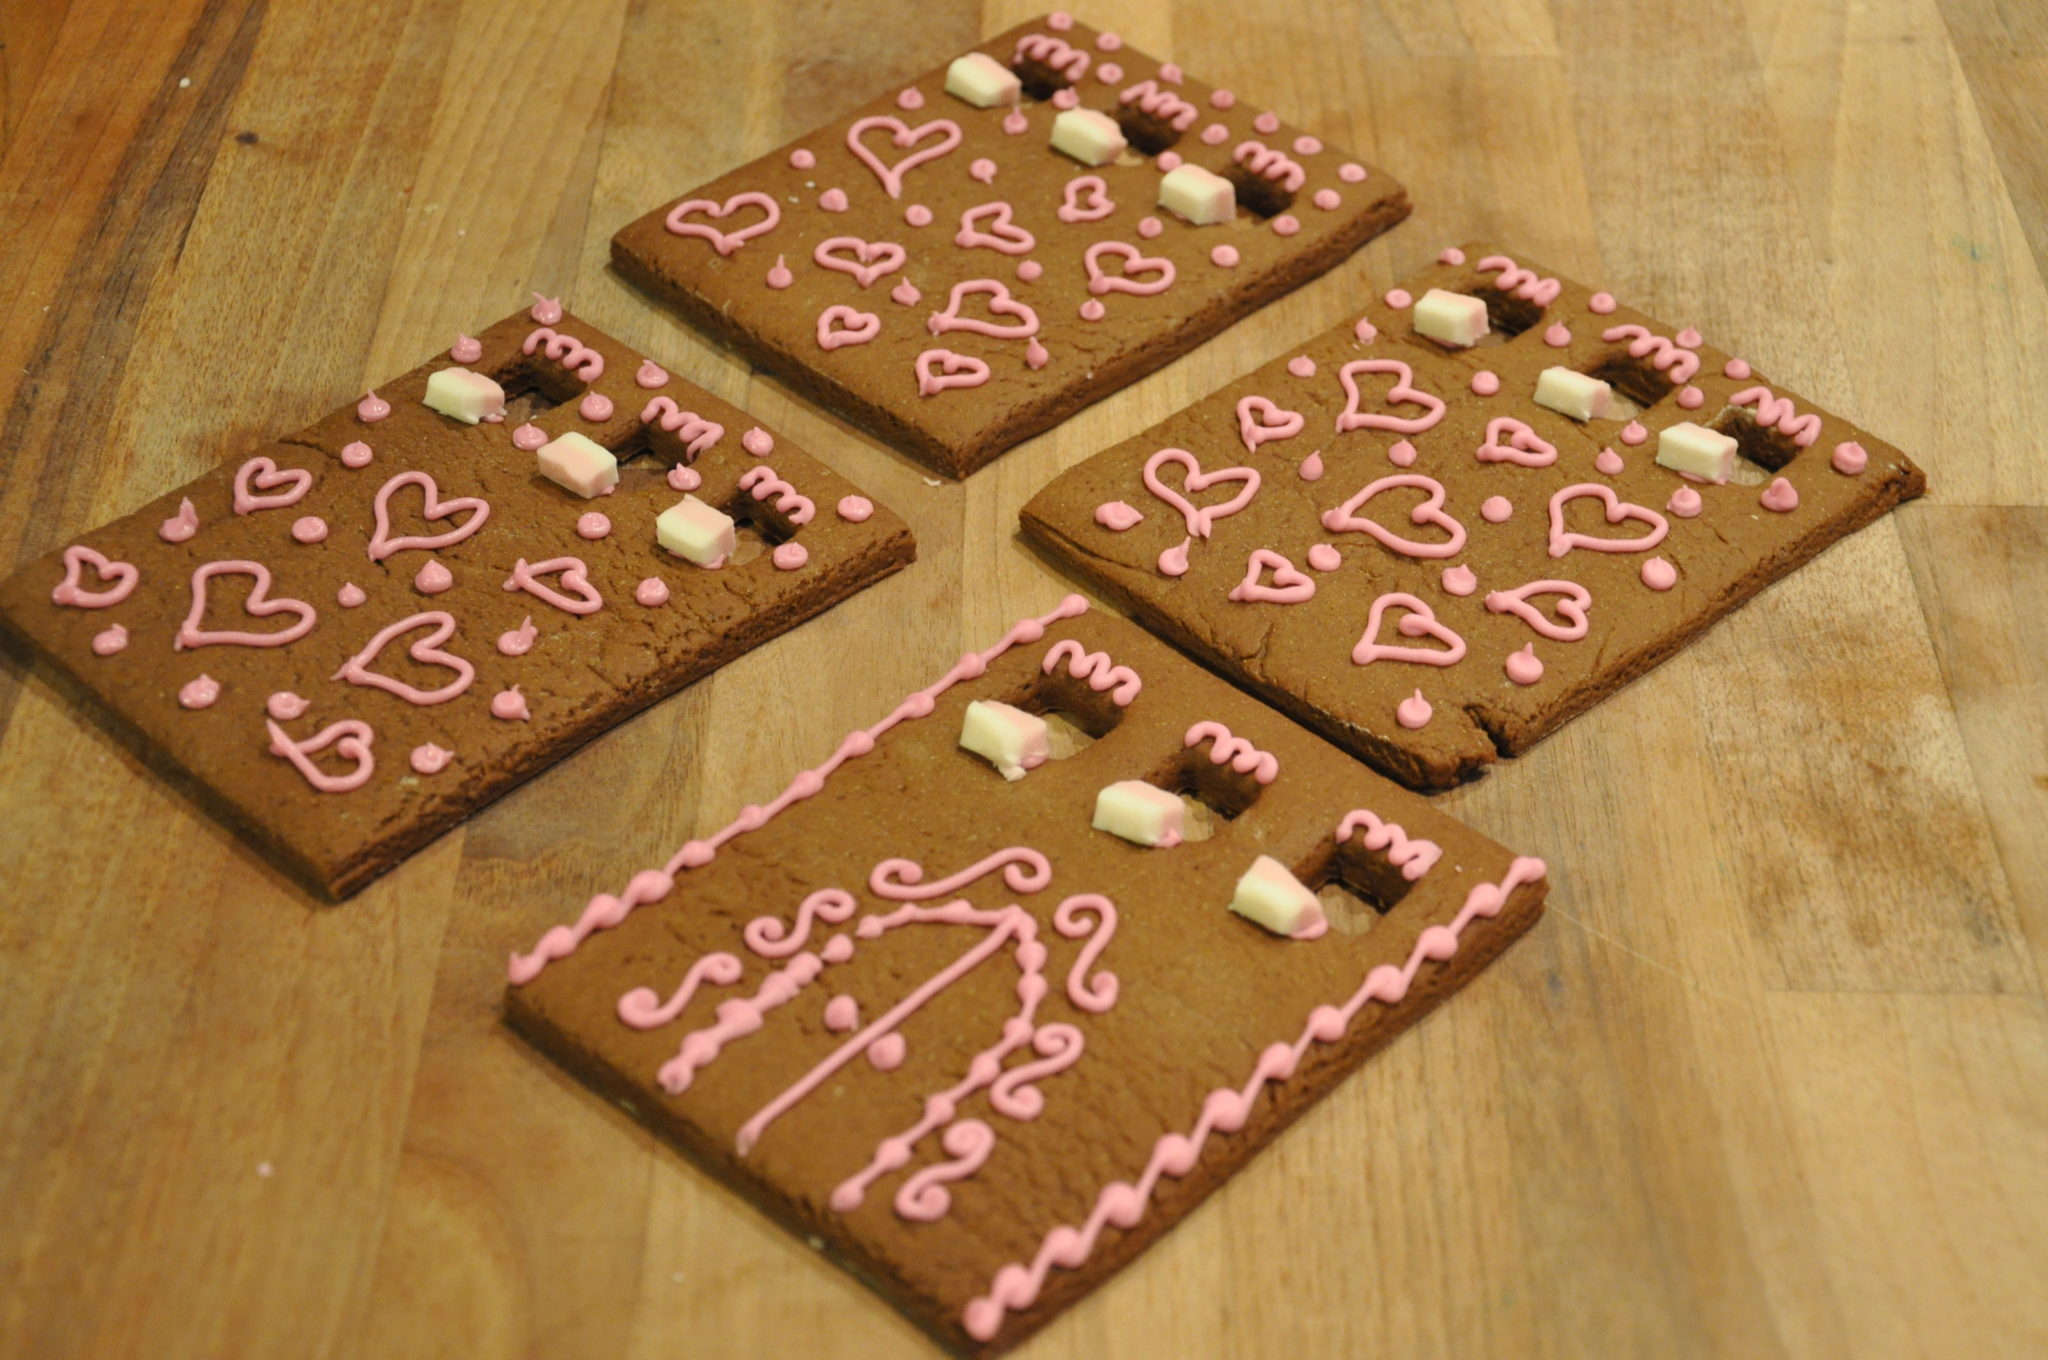
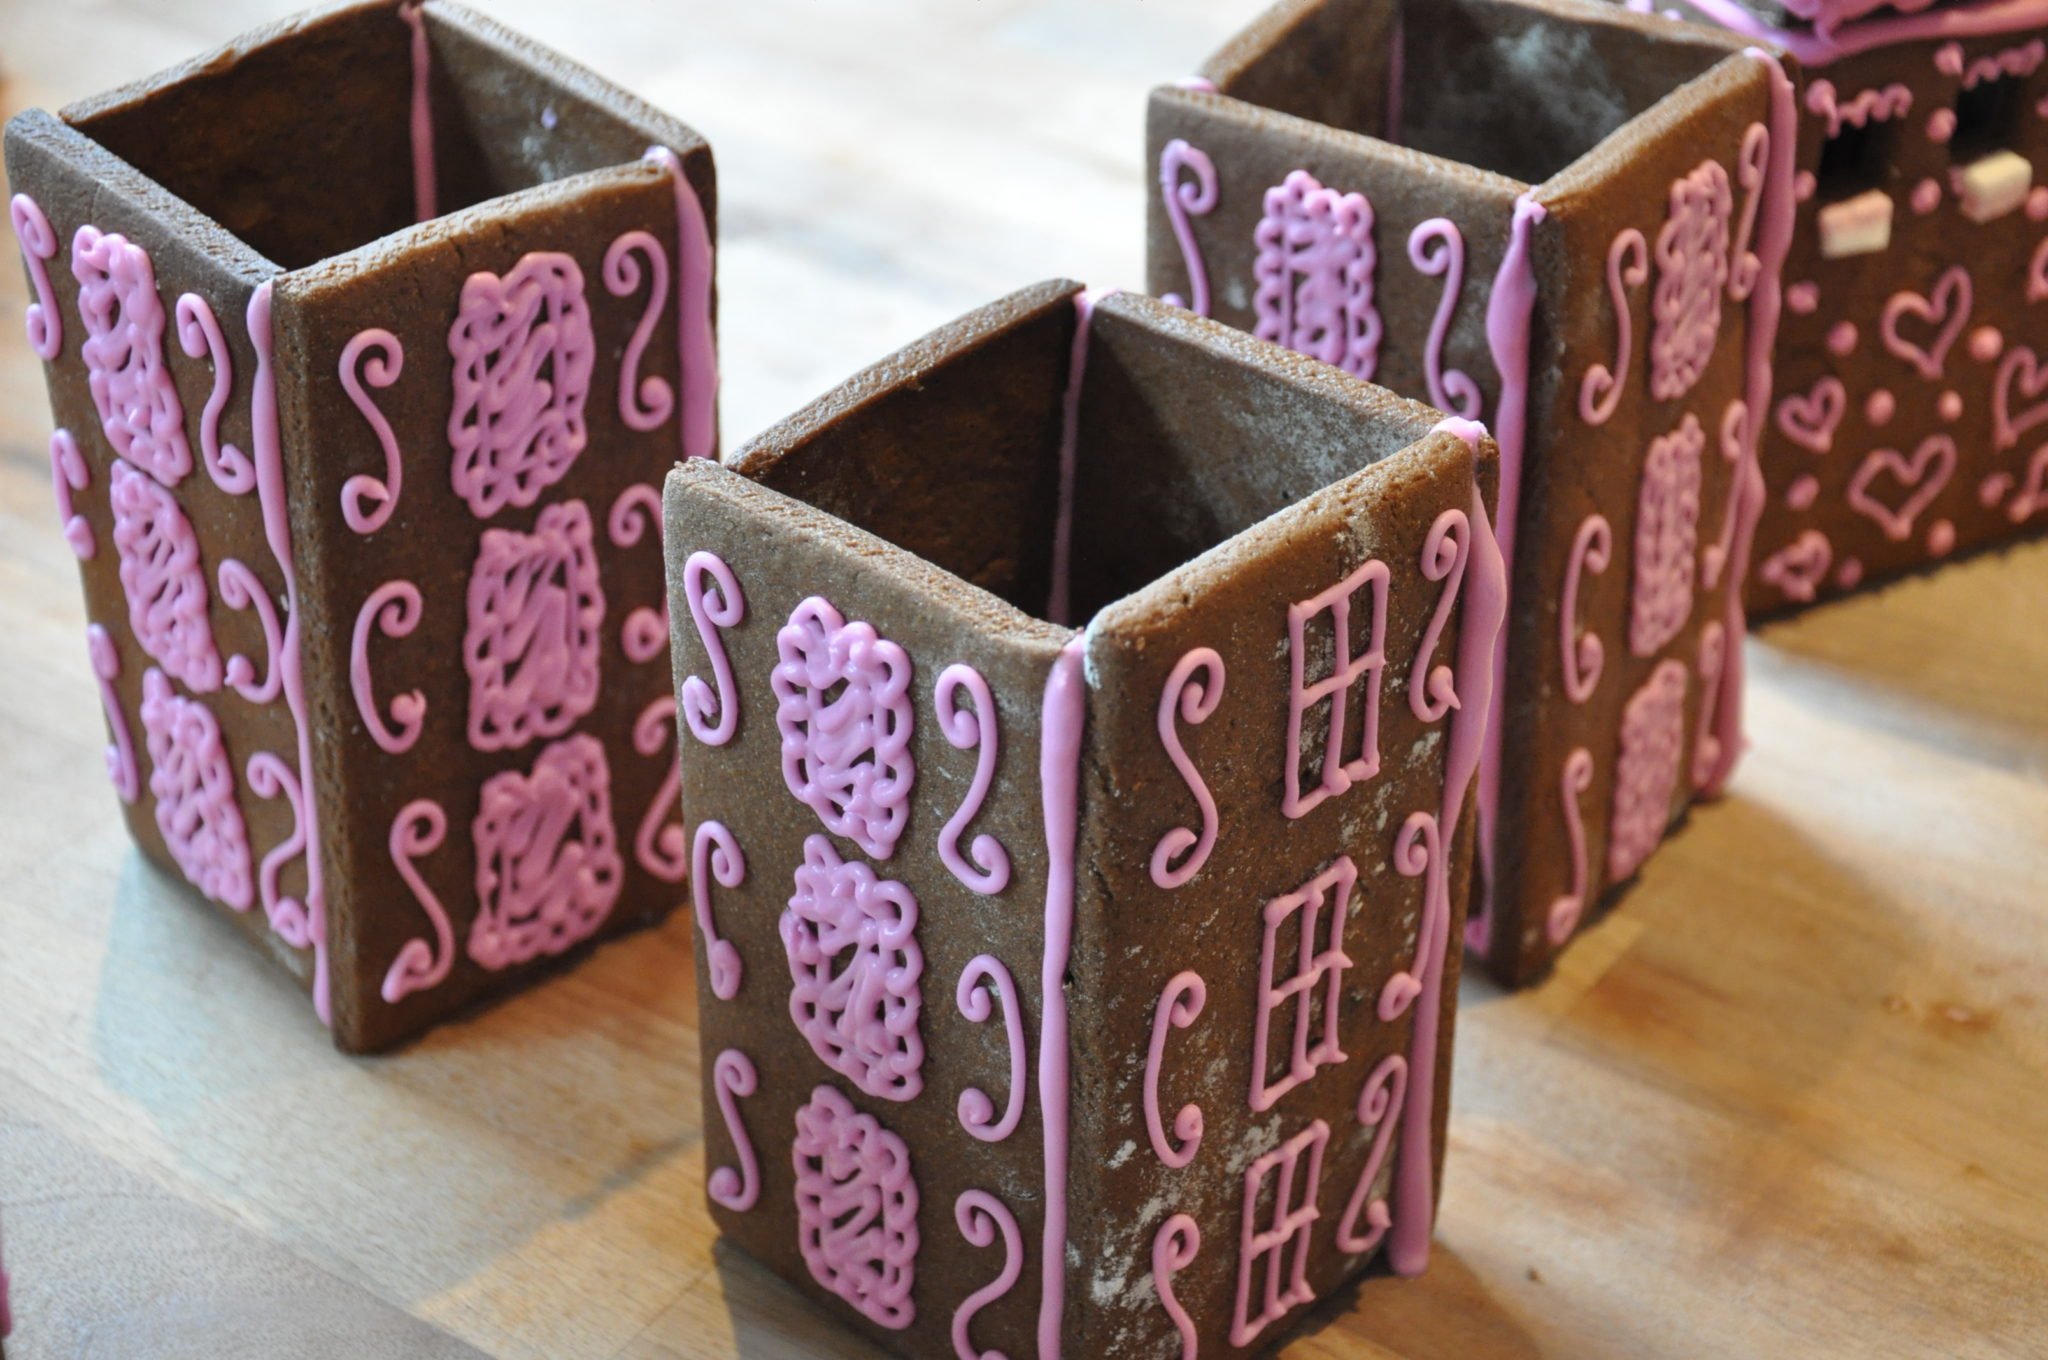
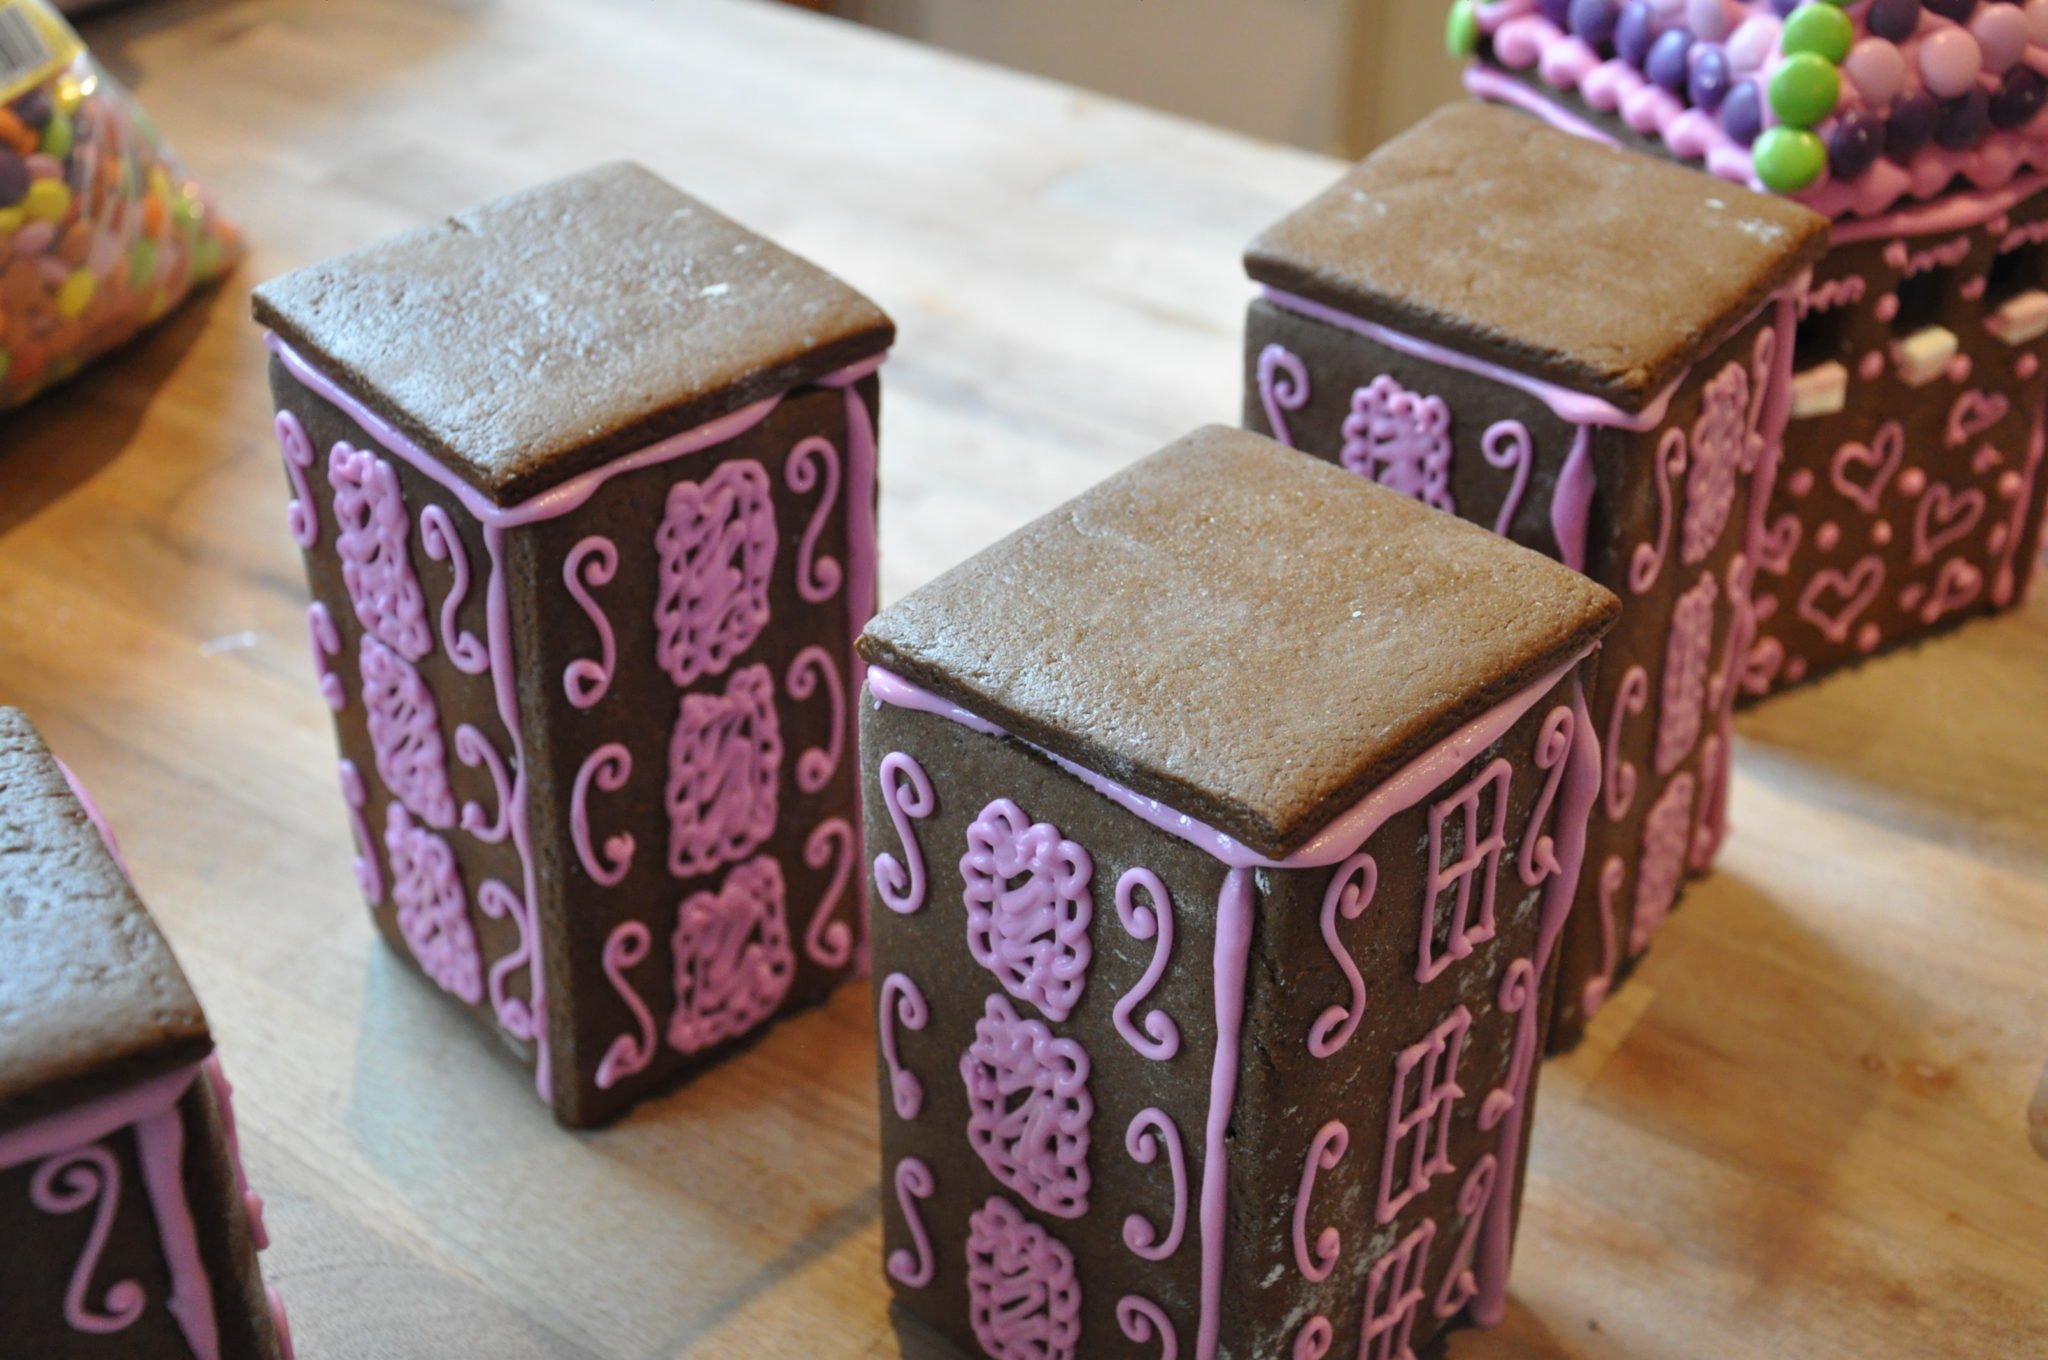
Lay your main tower and four corner tower wall pieces flat (there should be 20 pieces in total). Pipe any shapes and patterns and then set aside to dry for a couple of hours. If you want to pipe onto other pieces then do those at the same time.

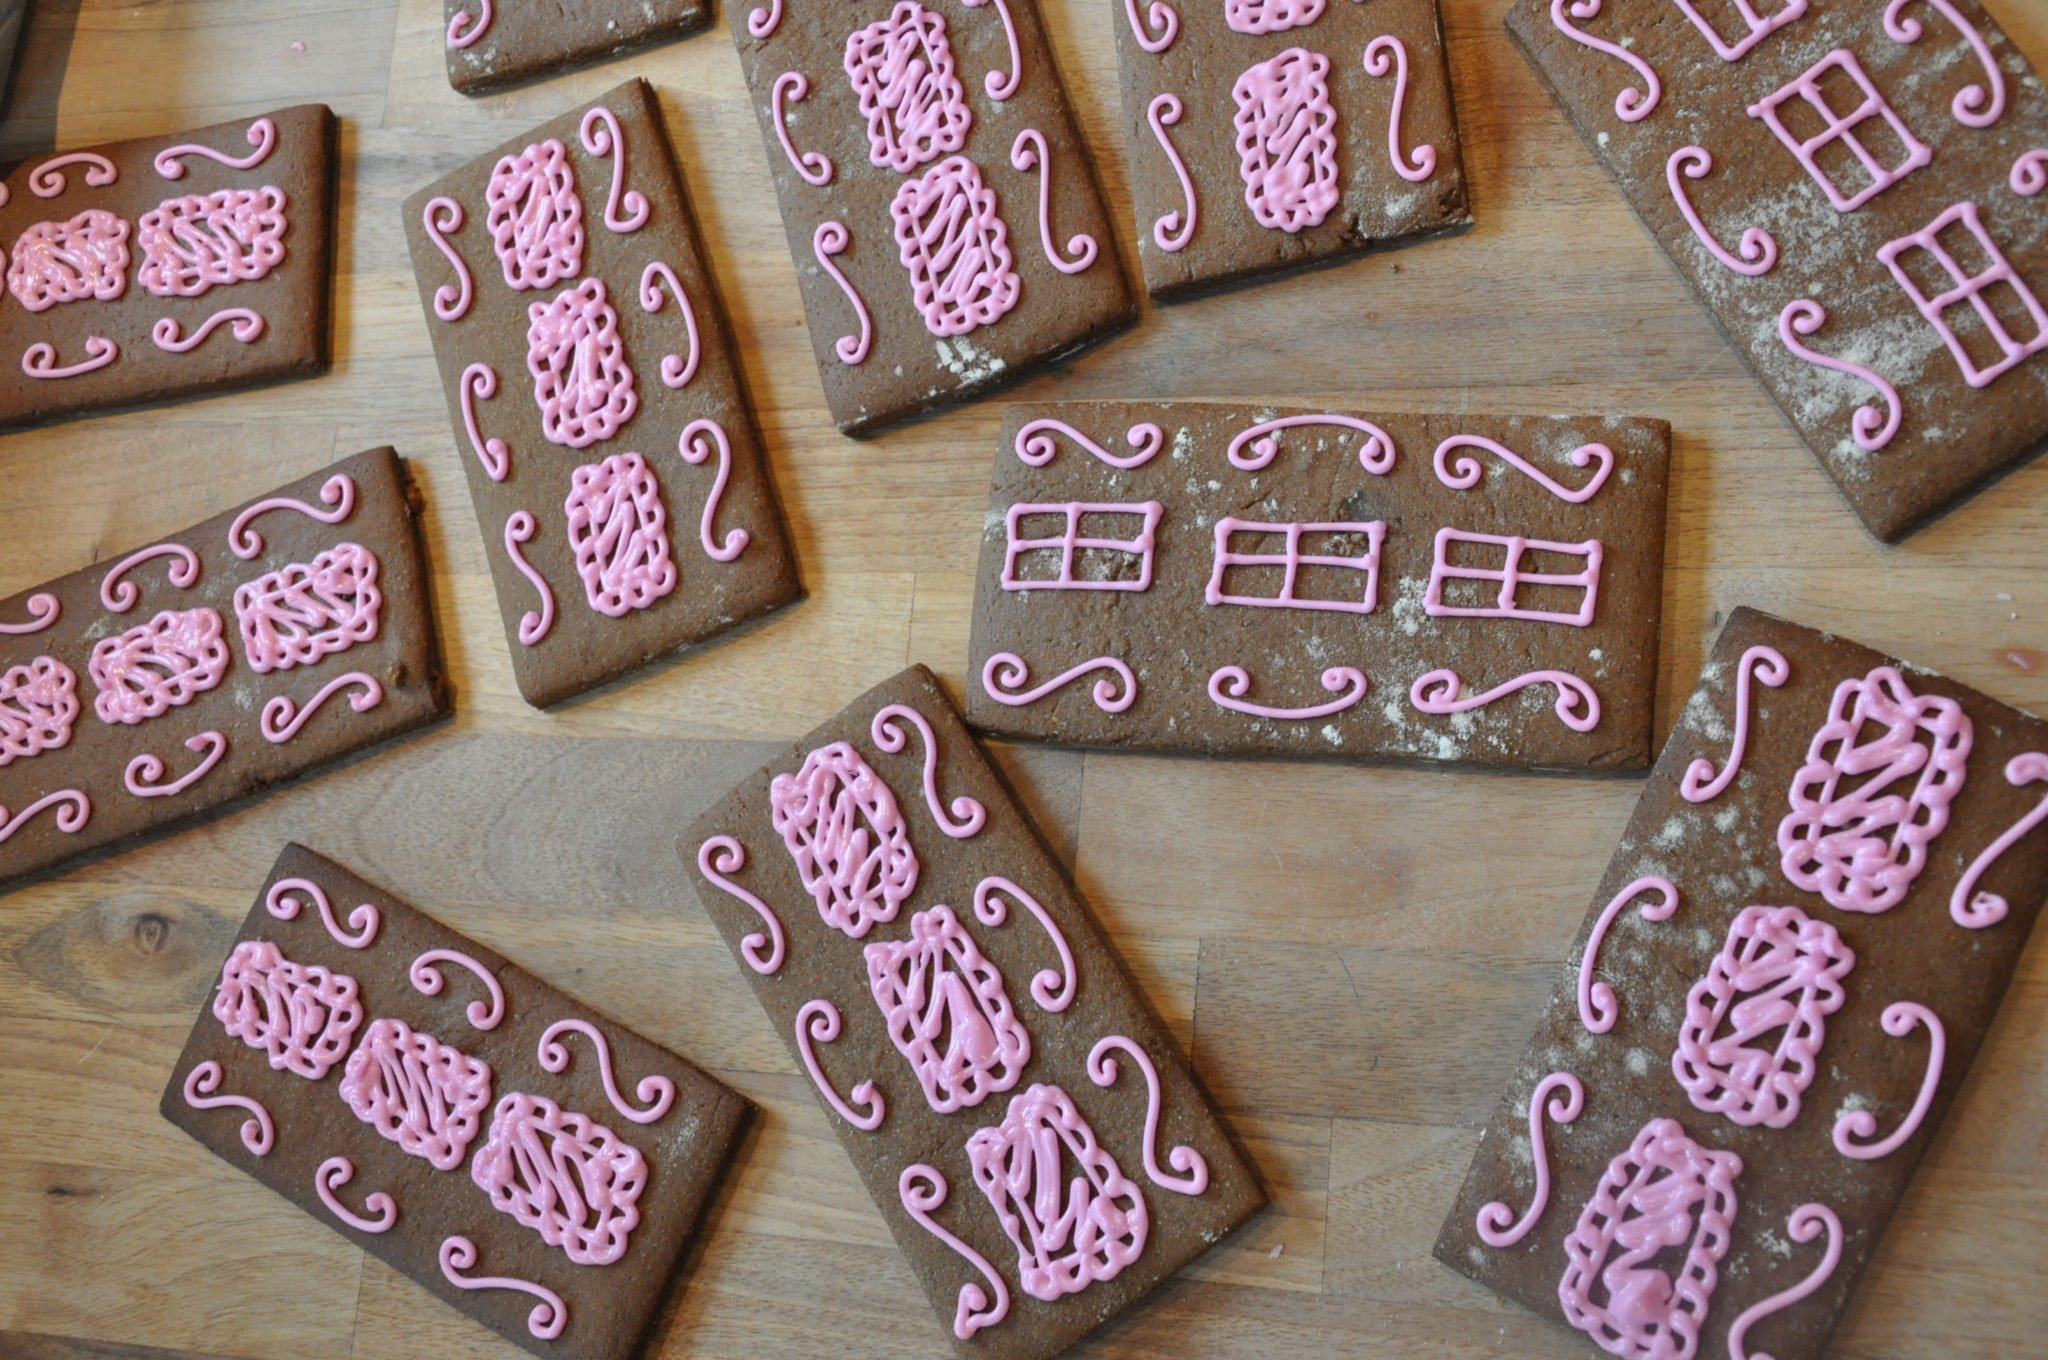
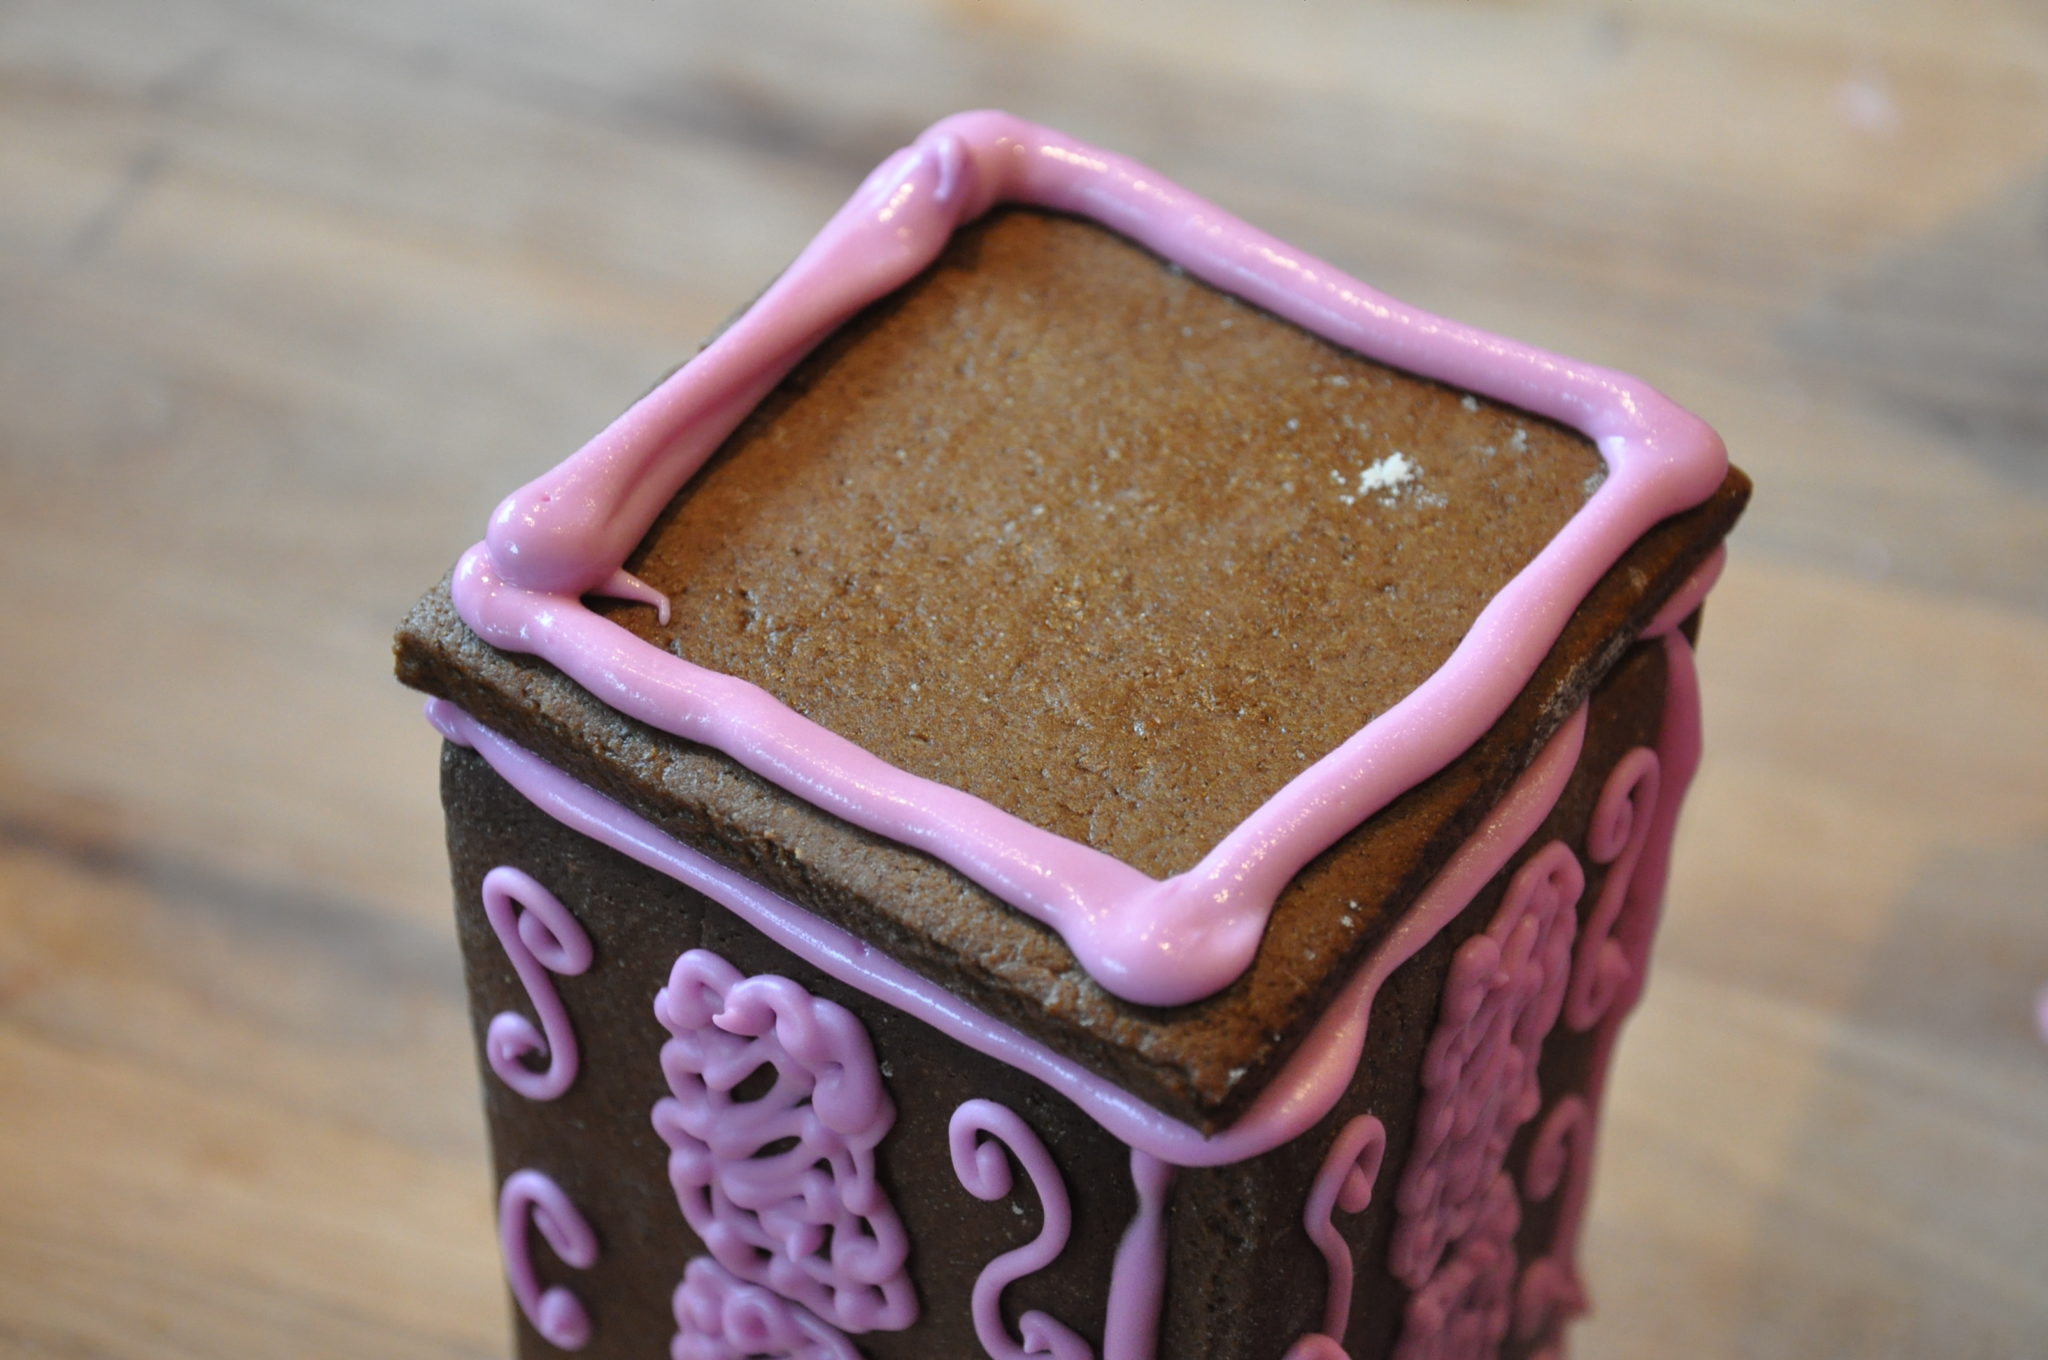
Once the piping is dry, fill another bag, this time without a nozzle, with icing and cut a hole about 4–5 mm wide. Pipe along the sides of the four main tower wall pieces and stick them together.
Pipe the top edge and place the top square on gently.
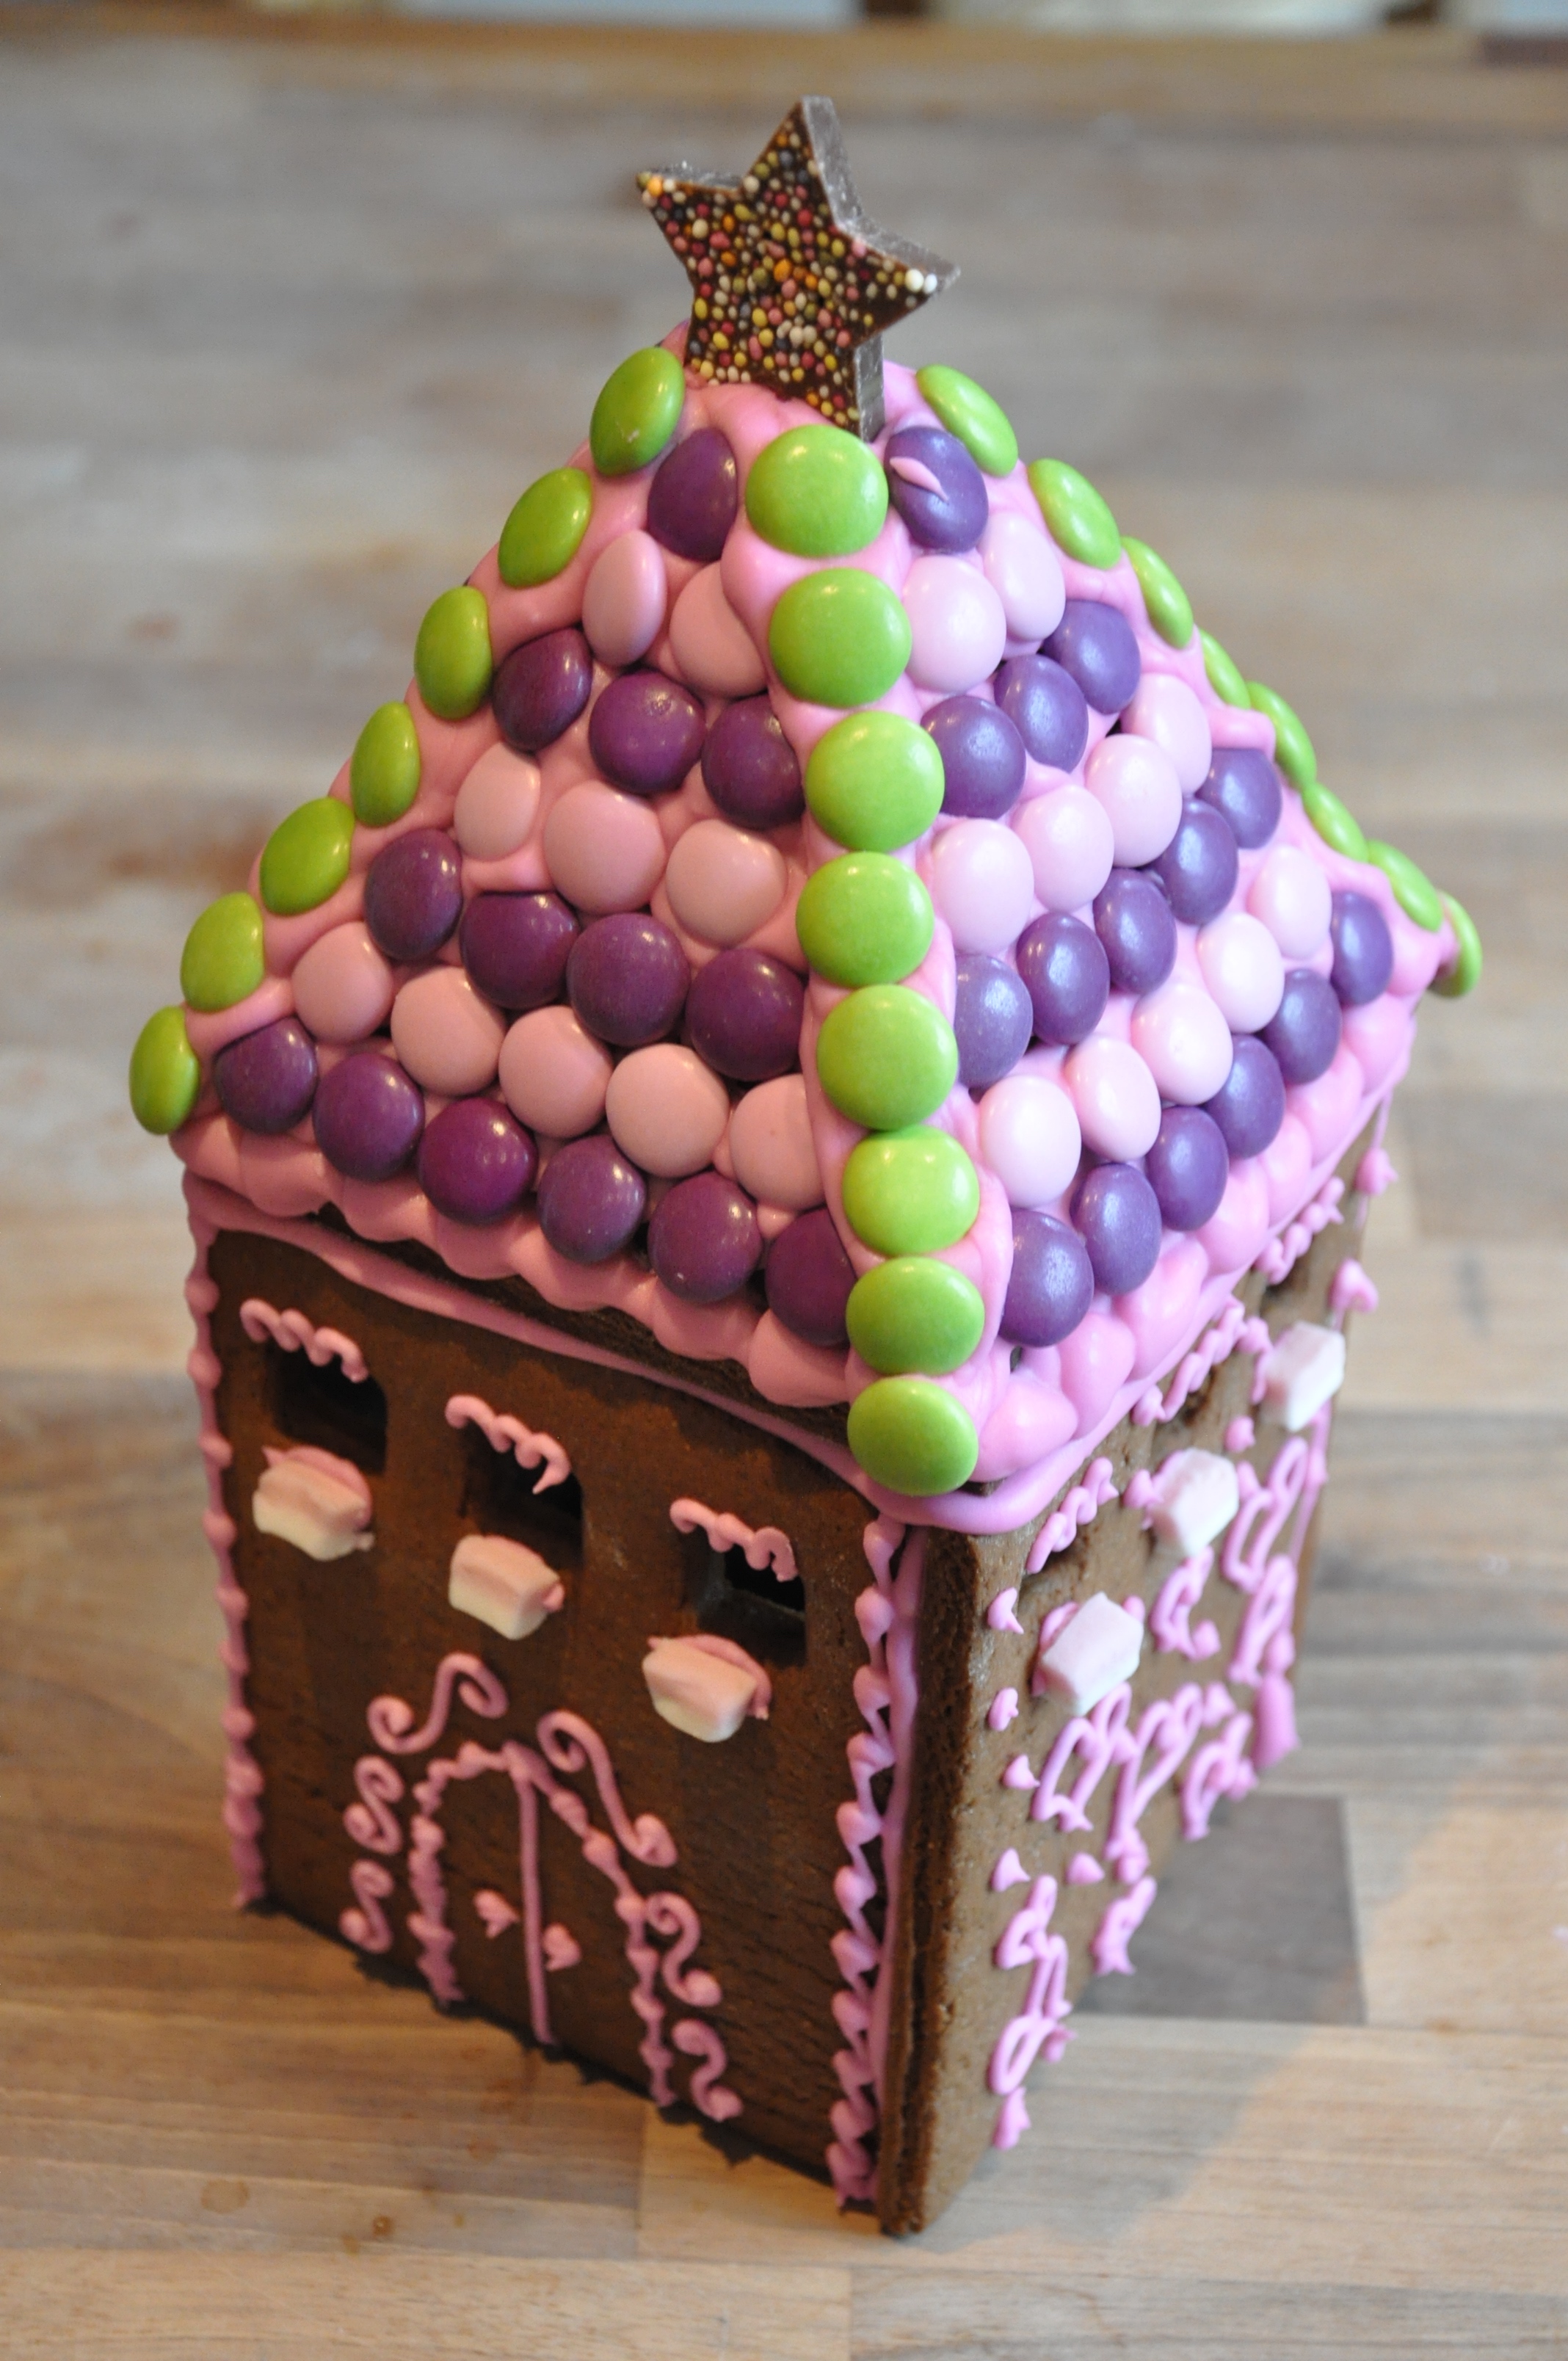
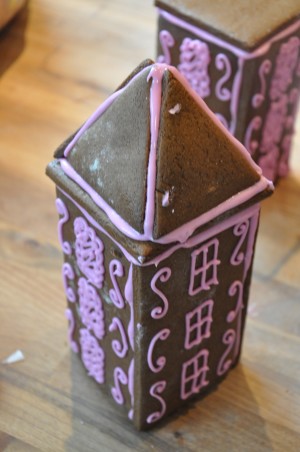
Pipe along the edges of the roof pieces and attach to the top of the tower. You may need to jiggle them a little to get them to line up.

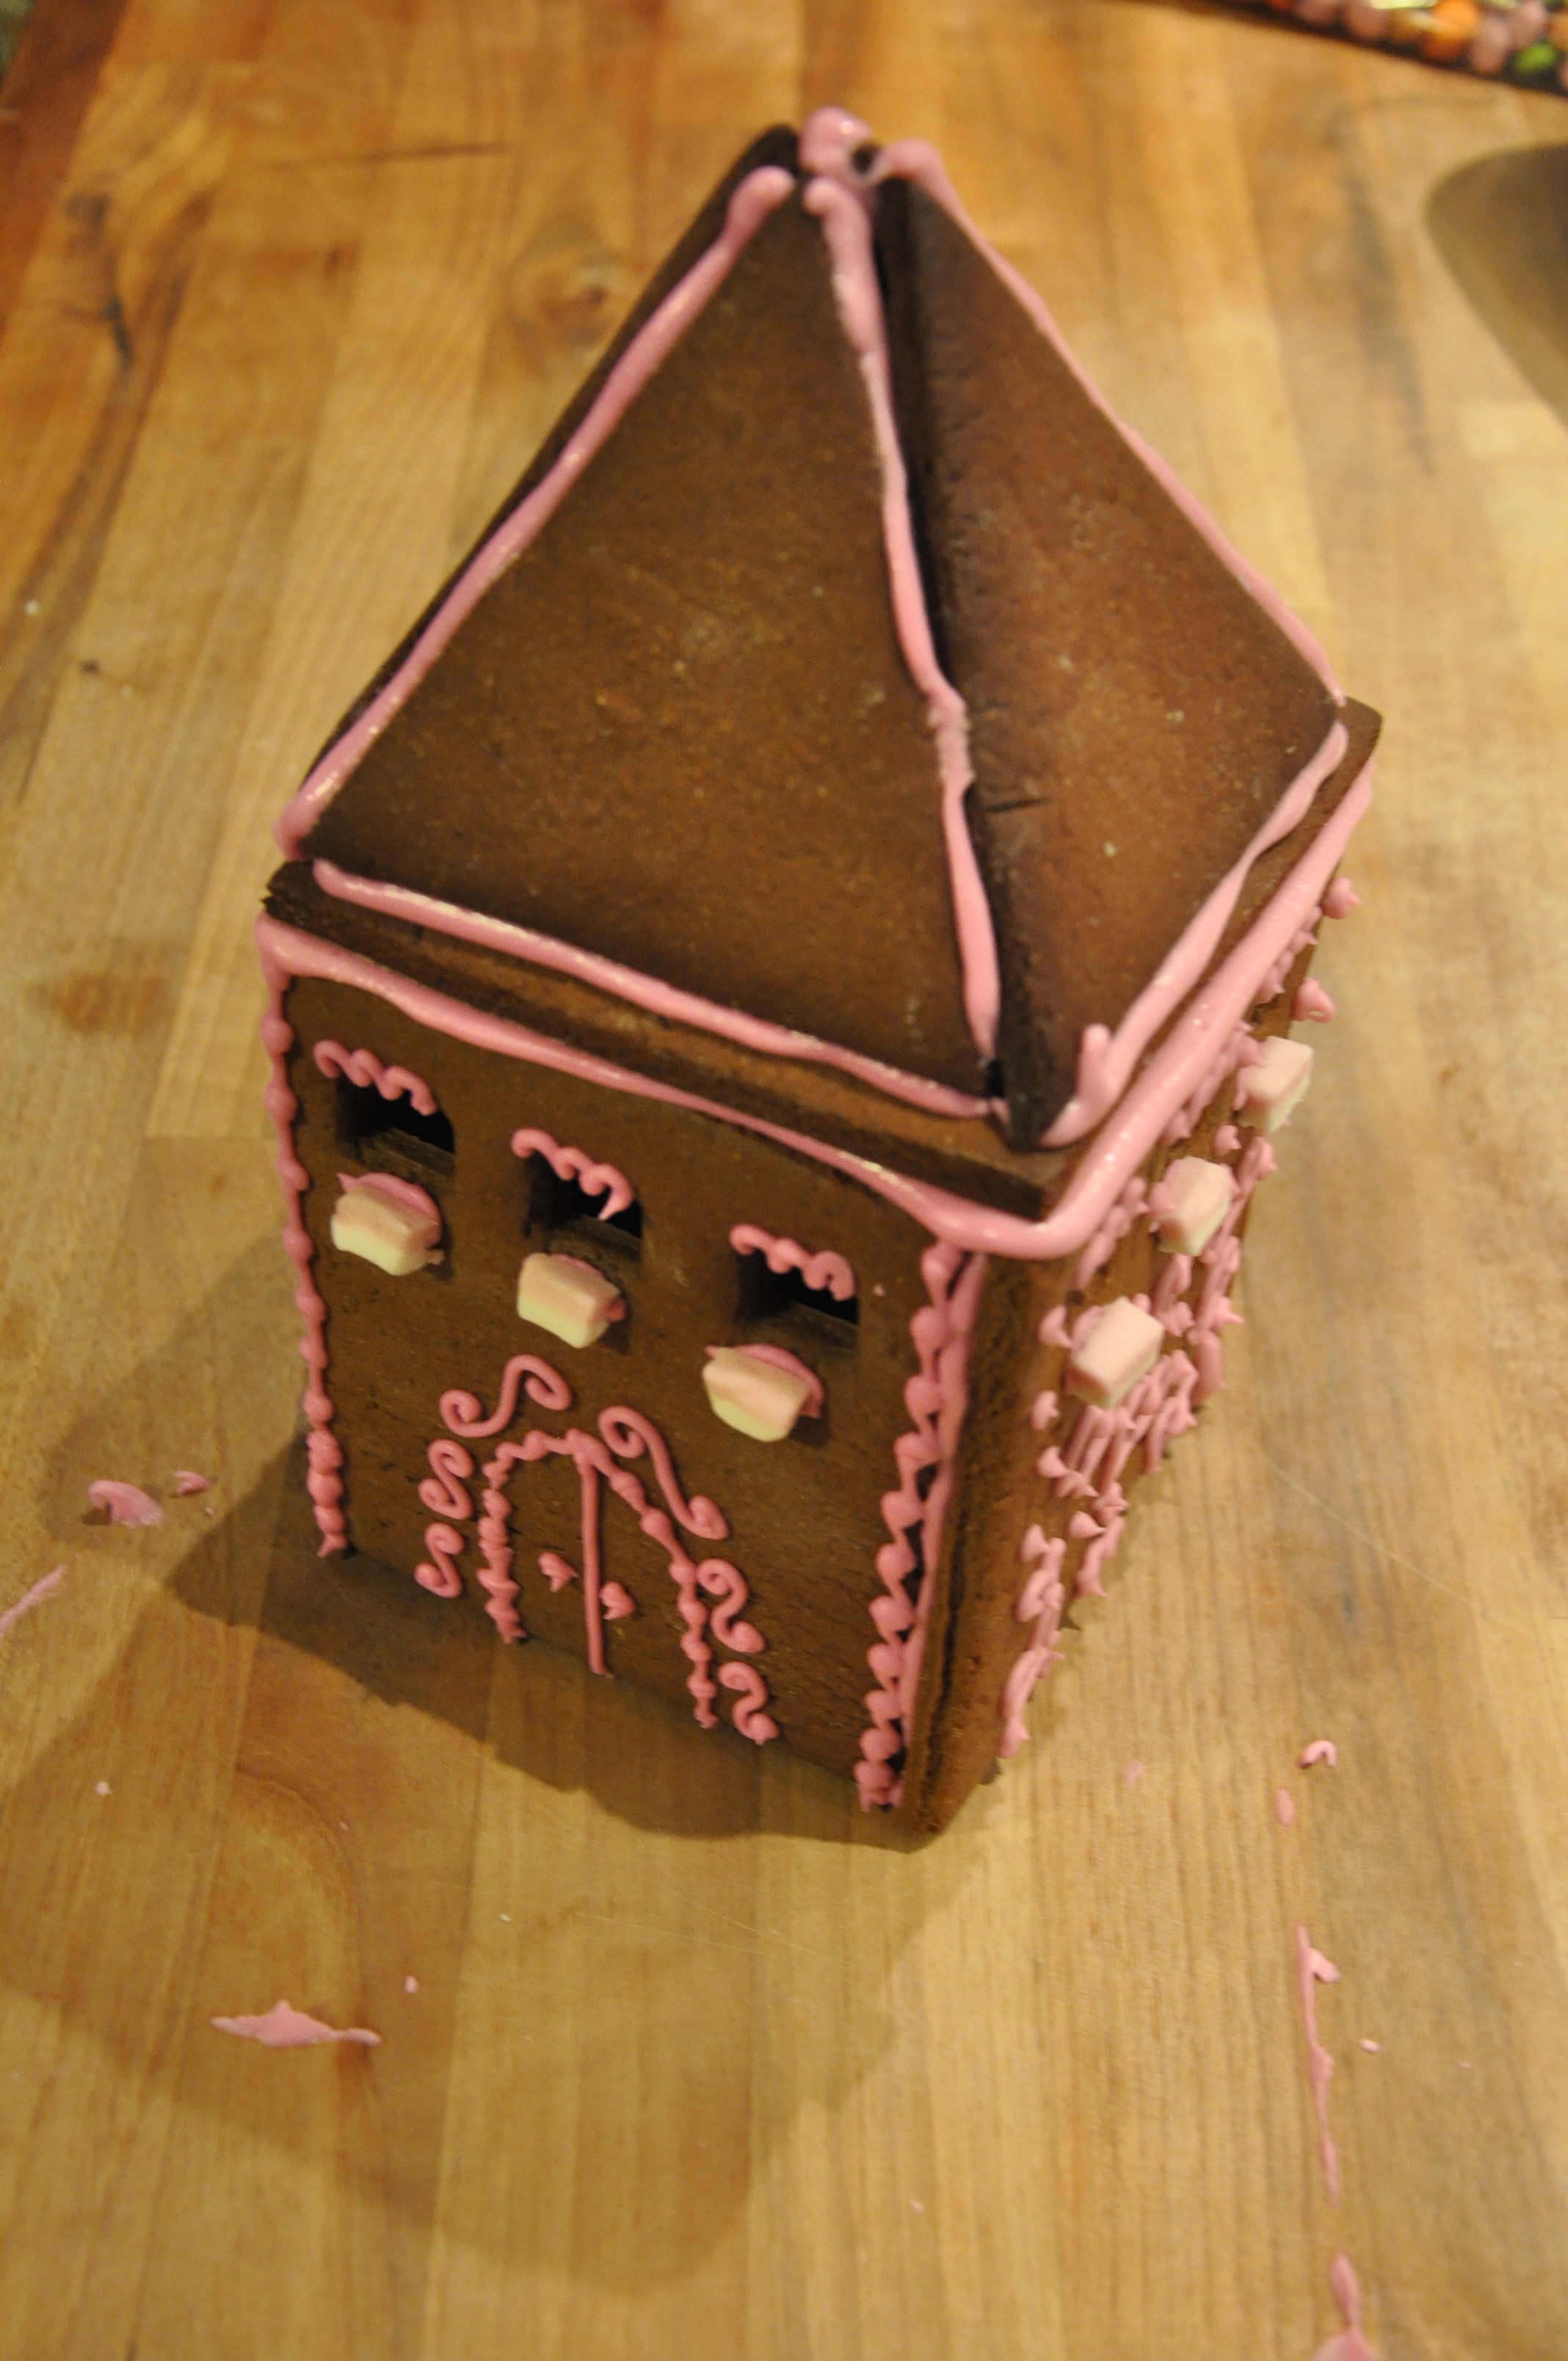
At this point, you can also decorate the roofs with your chosen sweets if you wish.
Set aside and leave to dry overnight.
Repeat the process with the four smaller towers and set aside to dry.

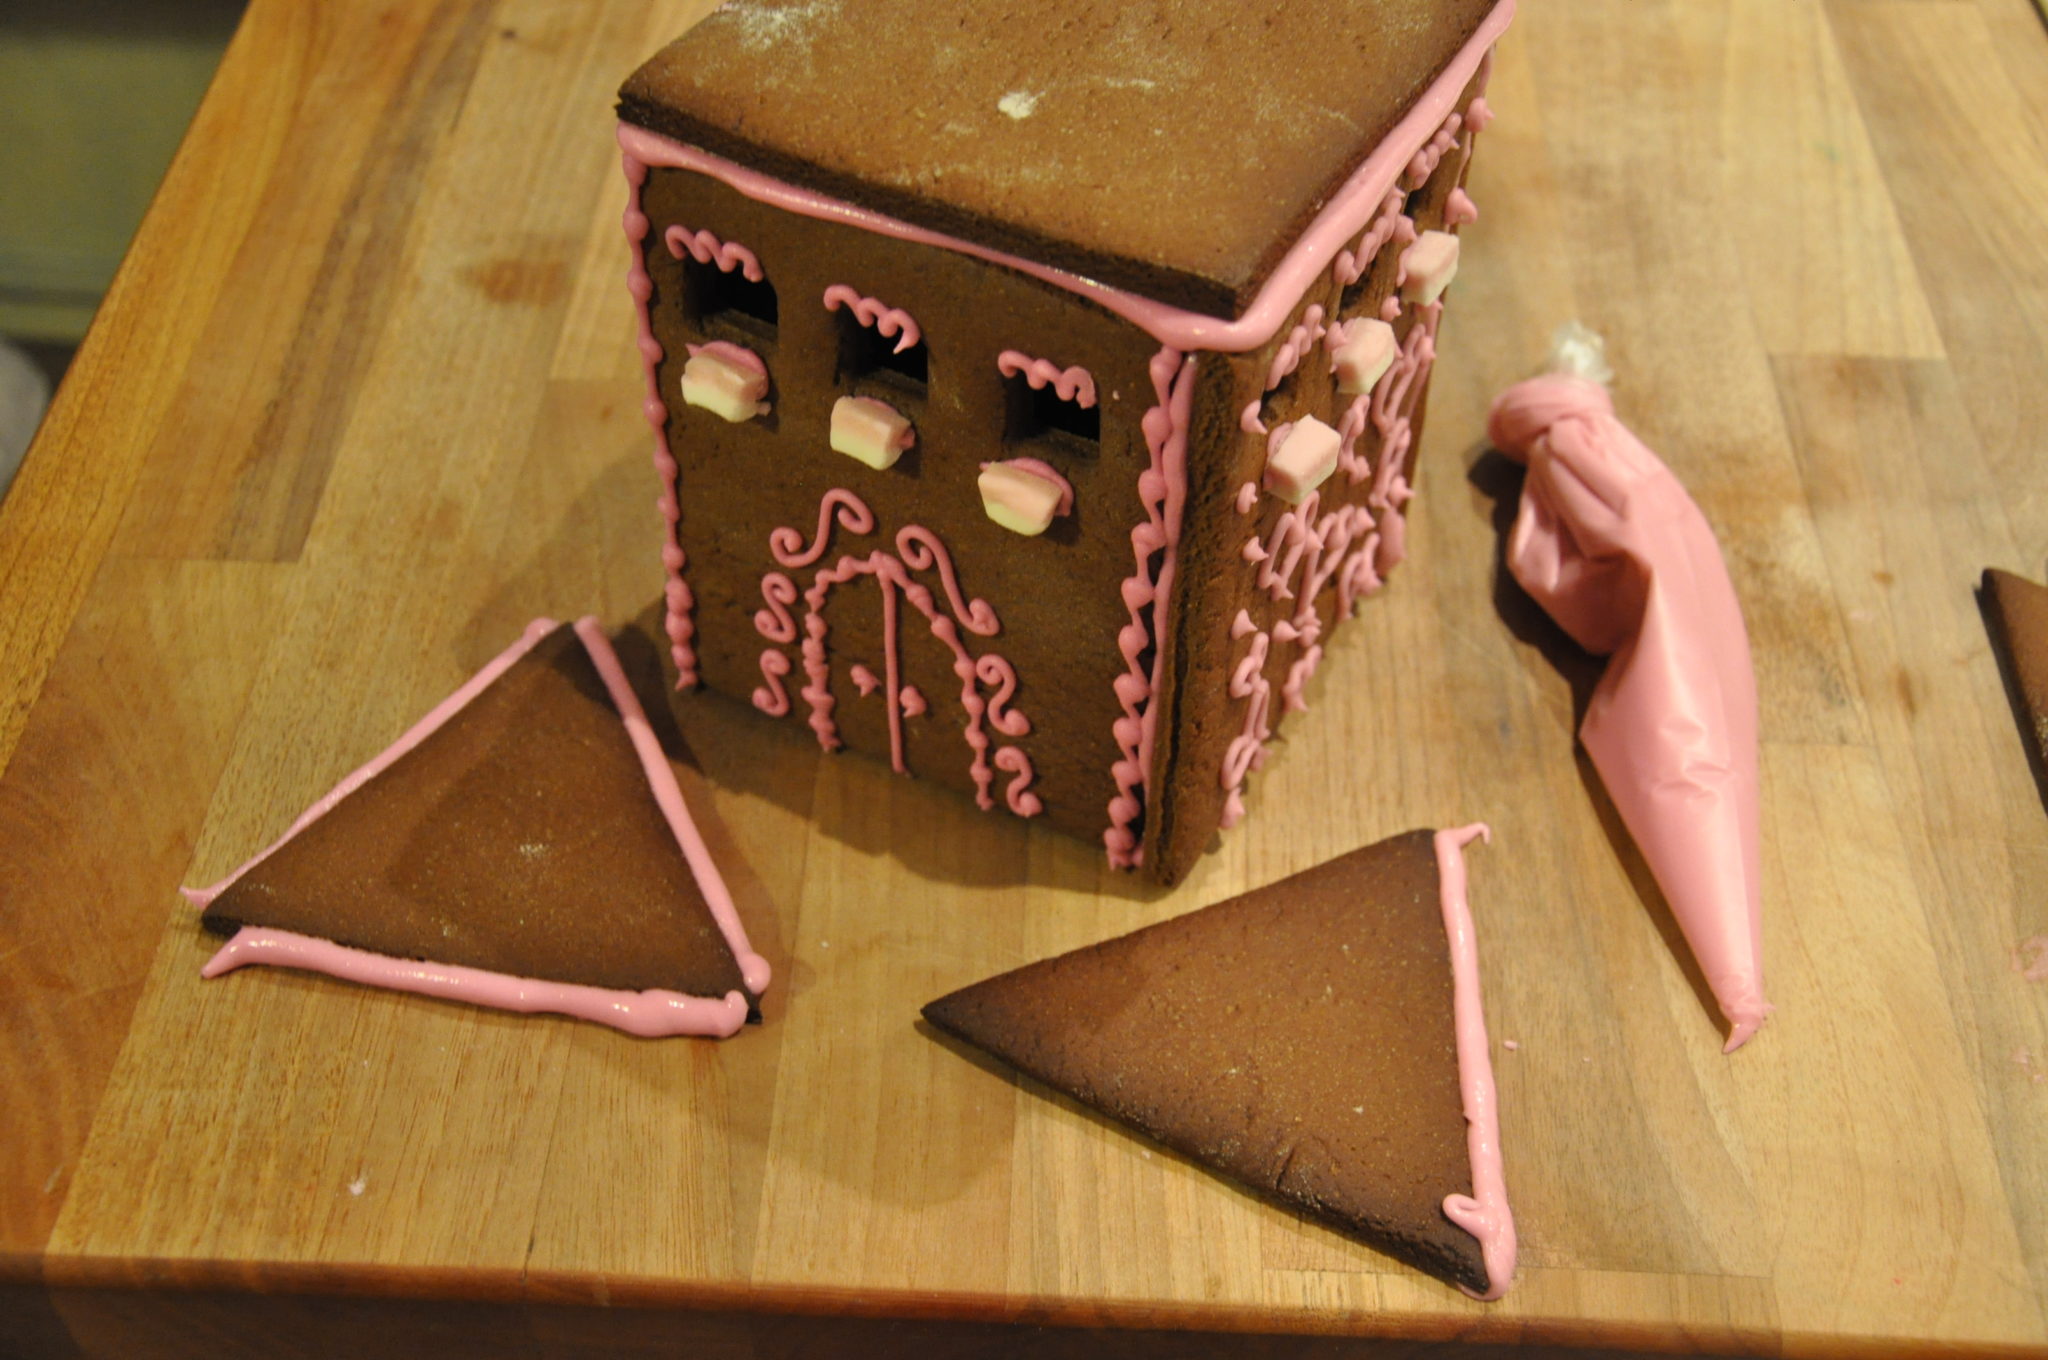
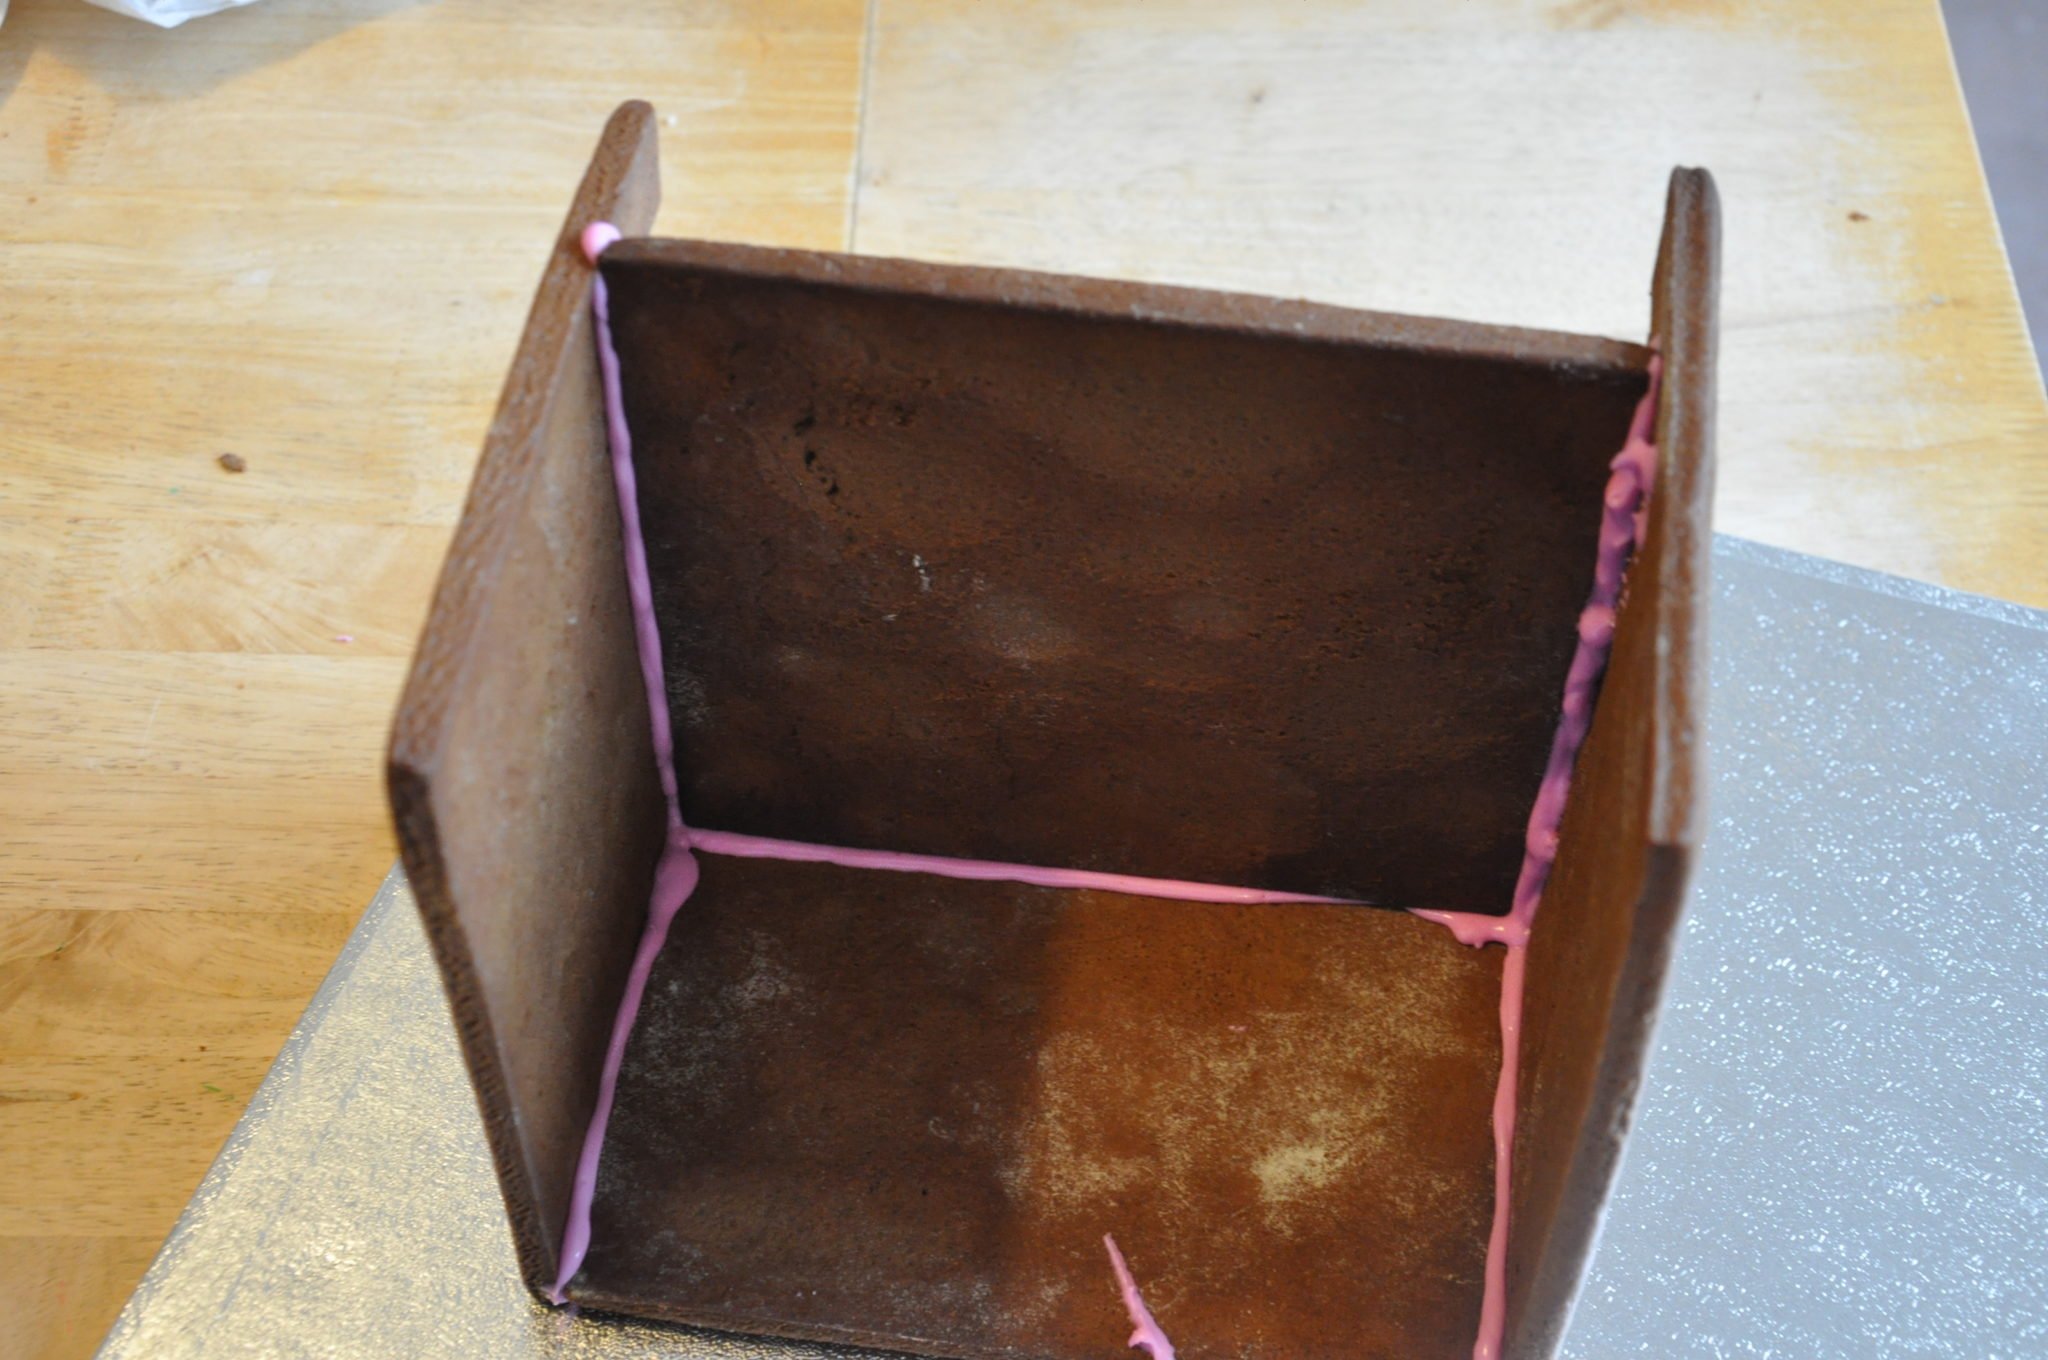
Take the four central castle pieces and roof piece. Lay one wall piece on its side and pipe a line where you want the flat roof to go and a line along one side. Take a second wall piece and pipe another line on it for the roof. Push this second piece up against the first, take the roof piece and stick in place.
Repeat with the third roof piece on the other side and then with the fourth roof piece on the top. Allow to dry overnight before turning upright. Please note two sides of the roof piece are slightly longer to the sticking together of the pieces without huge gaps.

Constructing the Castle – Day Two
Now your main pieces should all be dry you can start to put the castle together.
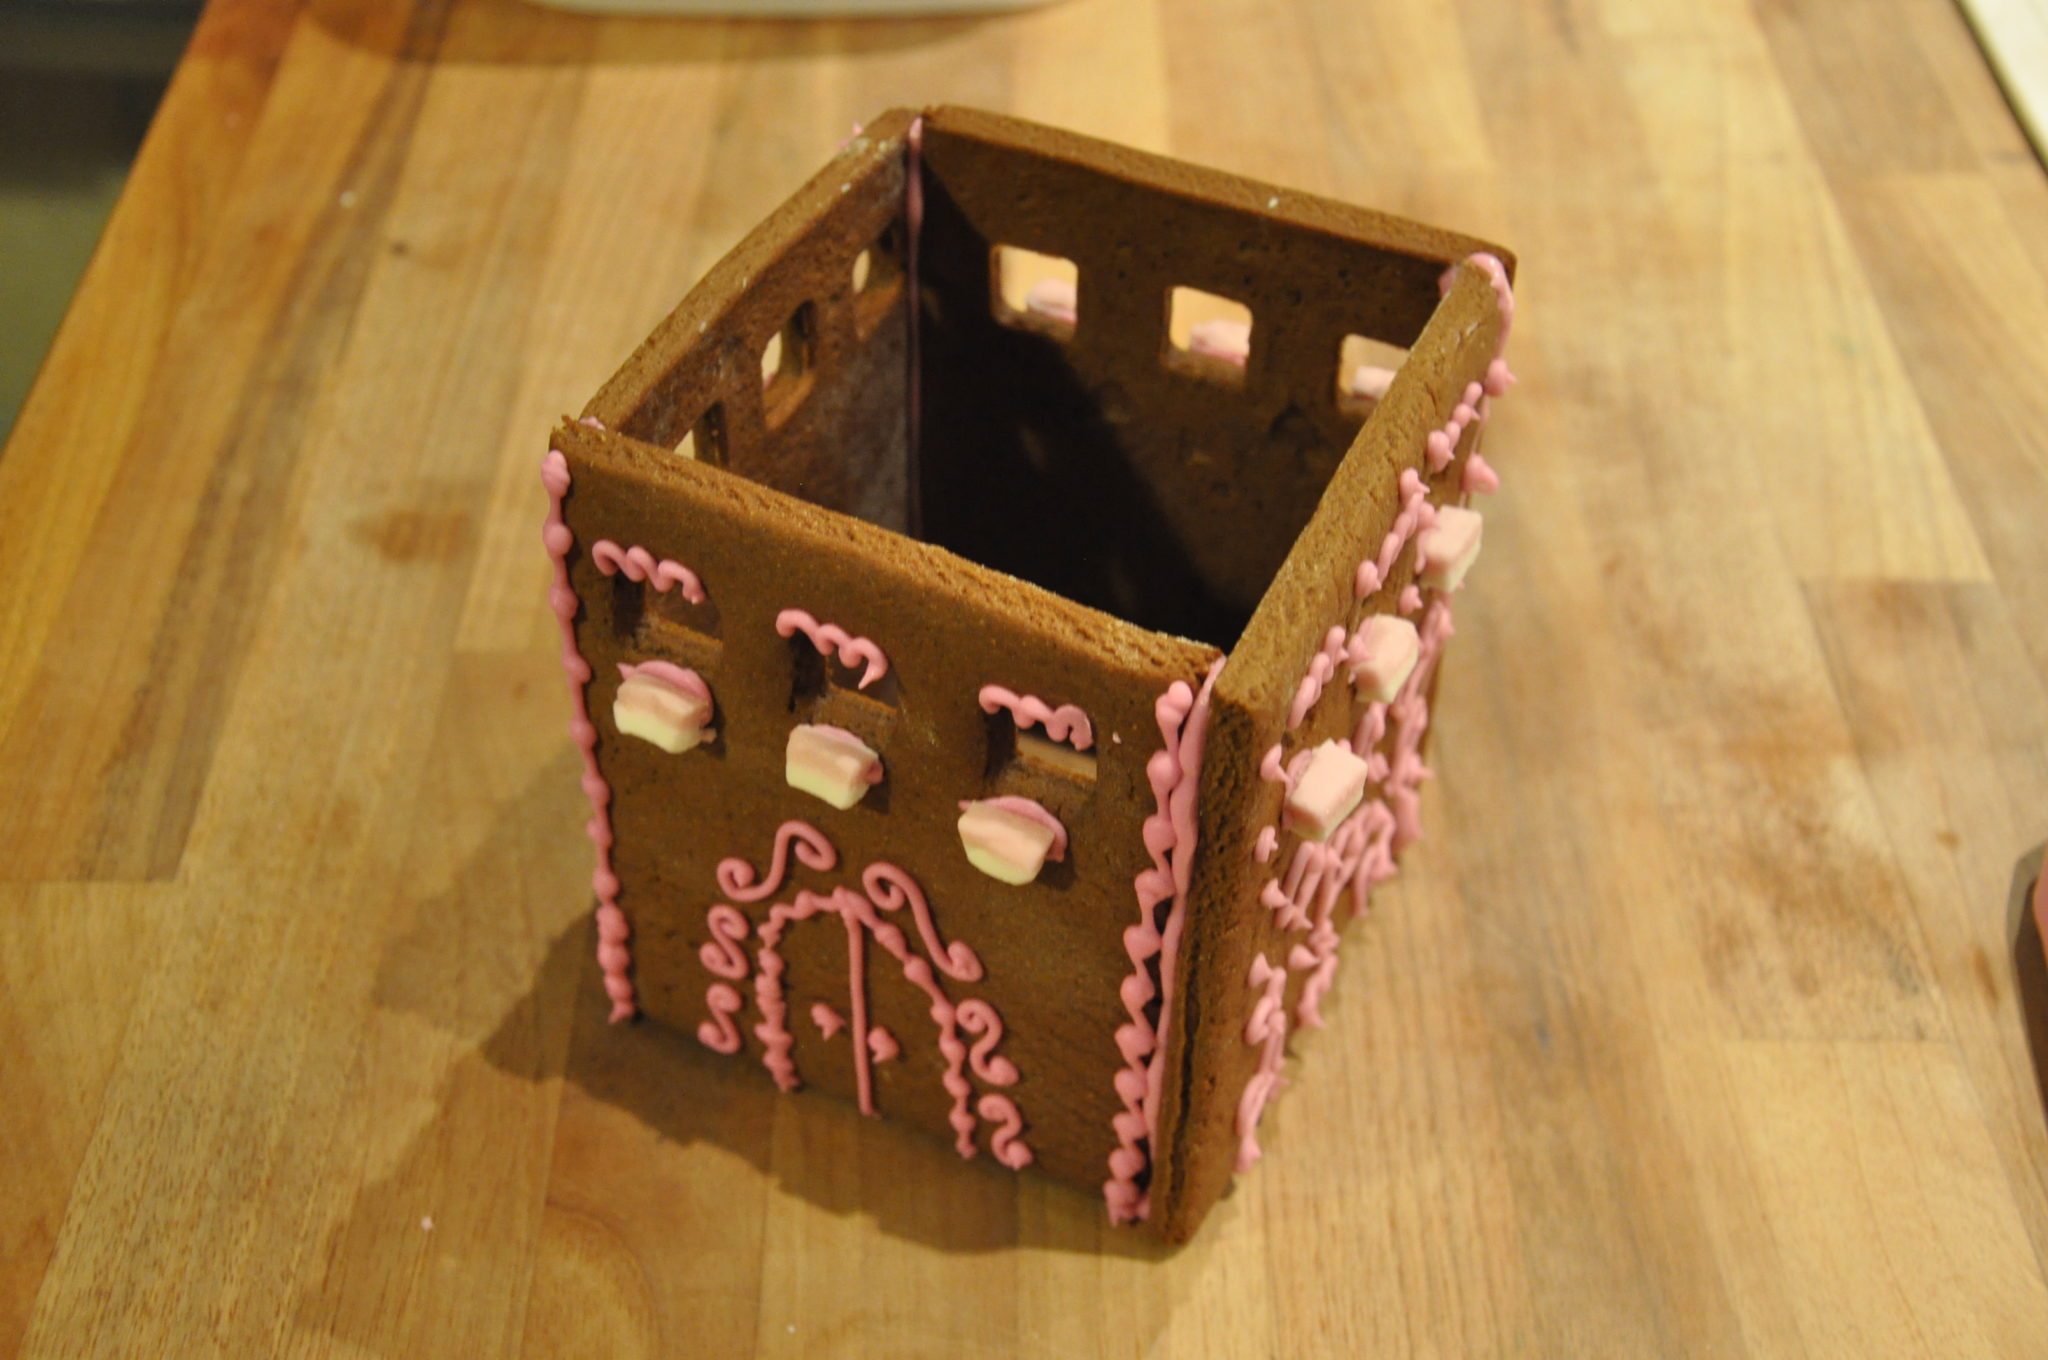
Fill a piping bag halfway with royal icing and snip a 4–5 mm hole in the end. Take your constructed central castle and pipe along all the bottom edges. Place the piece in the centre of your cake board.
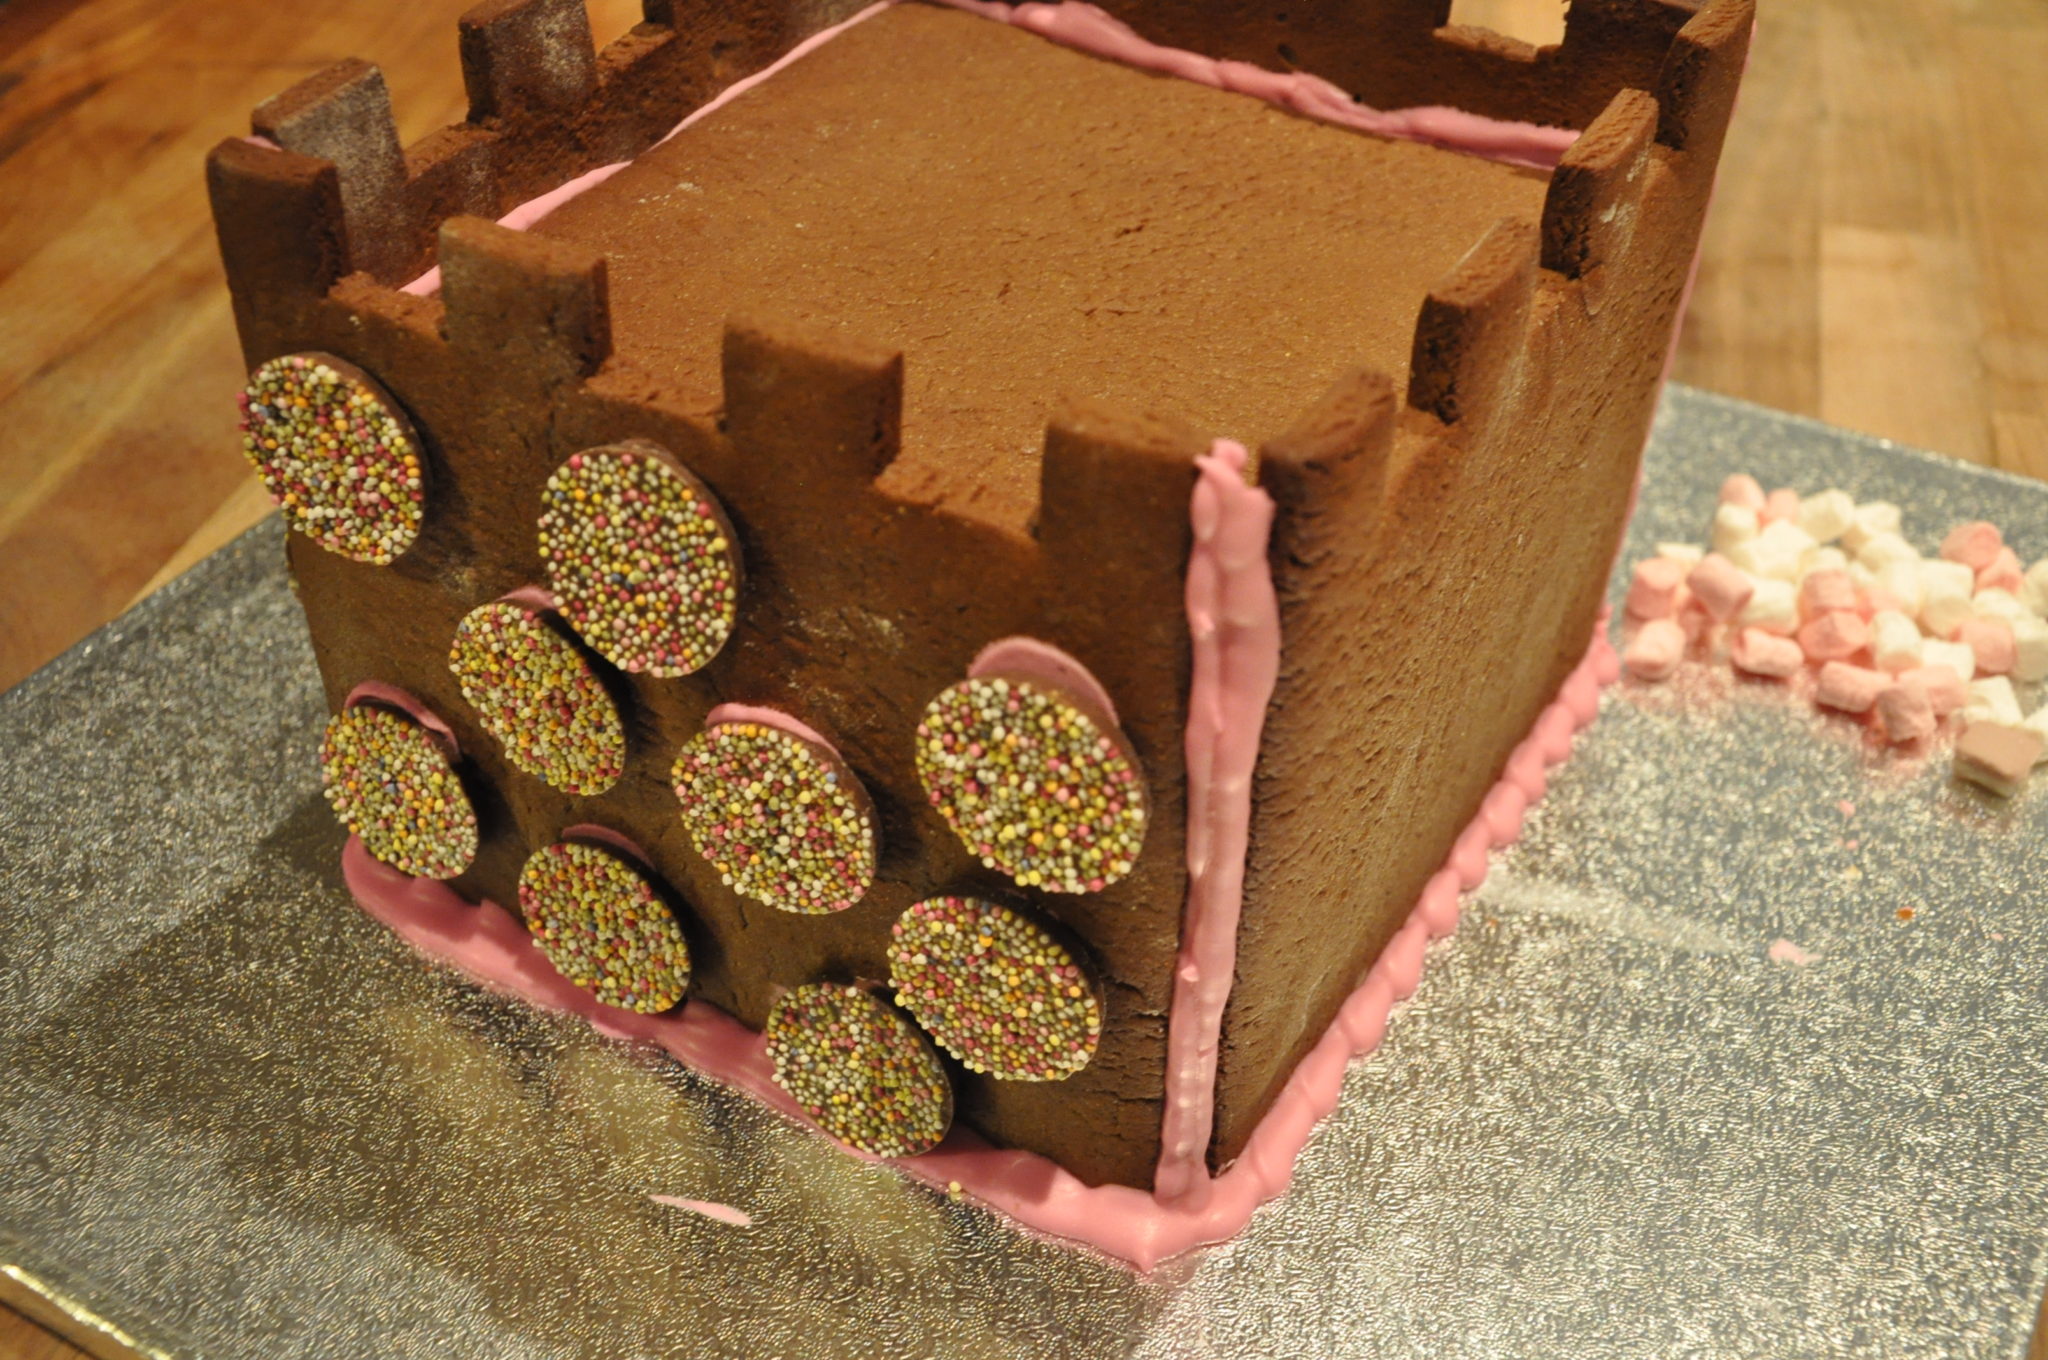
Decorate the outside walls of the main castle now – it is a lot harder to decorate with the outer wall pieces in place!
Pipe another square of icing (roughly the same size as the base of your main tower) on the top of the main castle piece and attach your tower.
Pipe a square on the base board where you want the first rear tower to go and fix it to the board.
Pipe the bottom and side edges of the first outer wall piece and slot into place, pushing it gently up against the first corner tower.
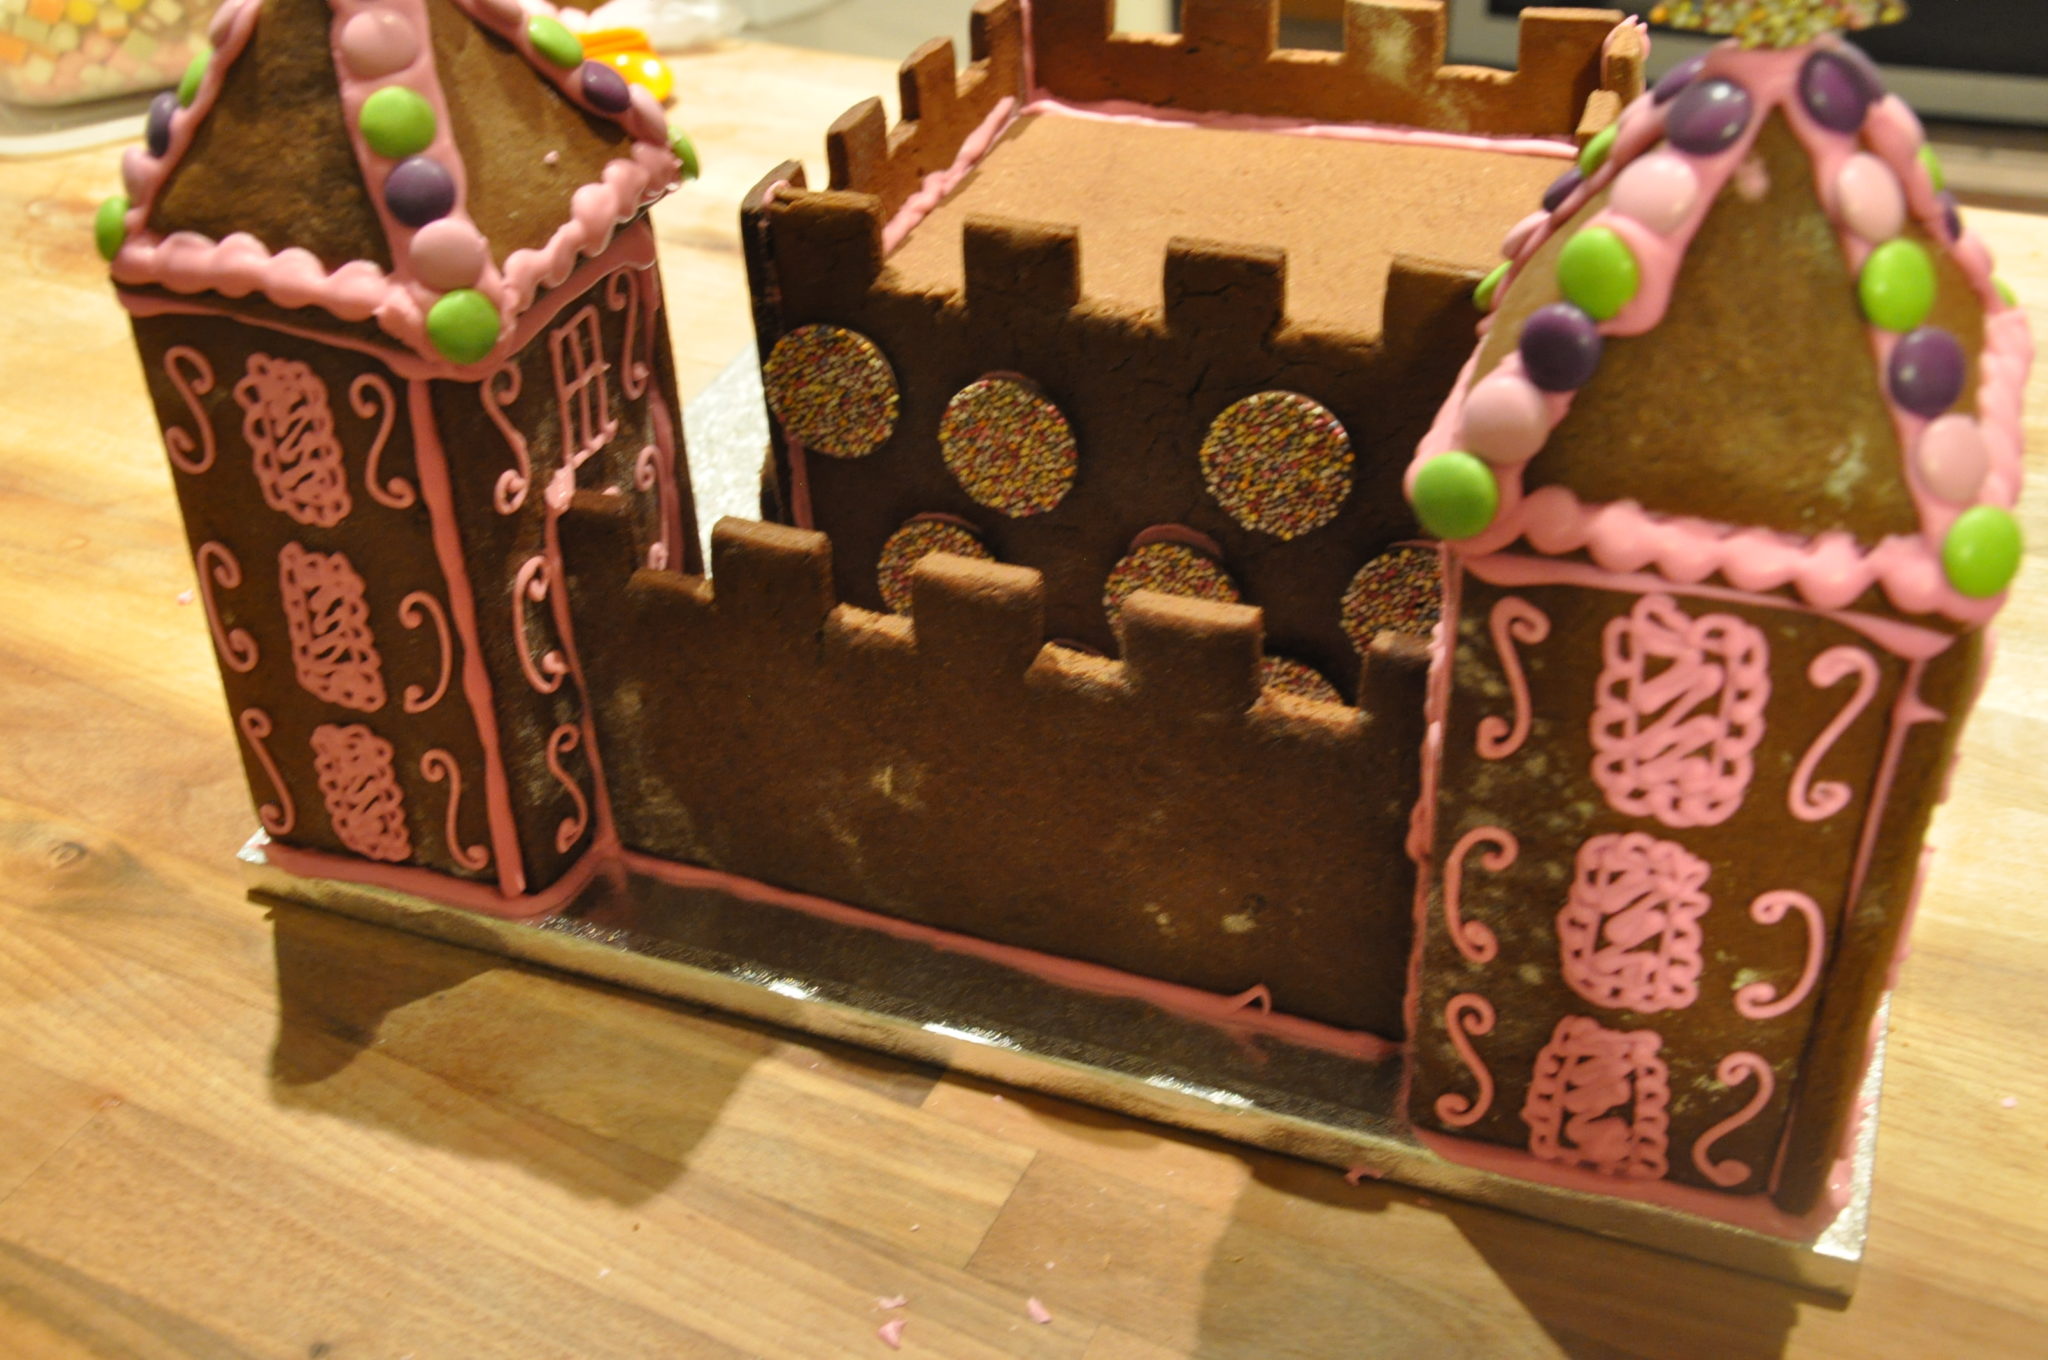
Repeat steps 3 and 4 with the next three towers.
Finally, you need to add in your front wall piece. Before you pipe any icing you might want to check its size against the gap. Trim the gingerbread by sawing gently with a bread knife if it is too large.
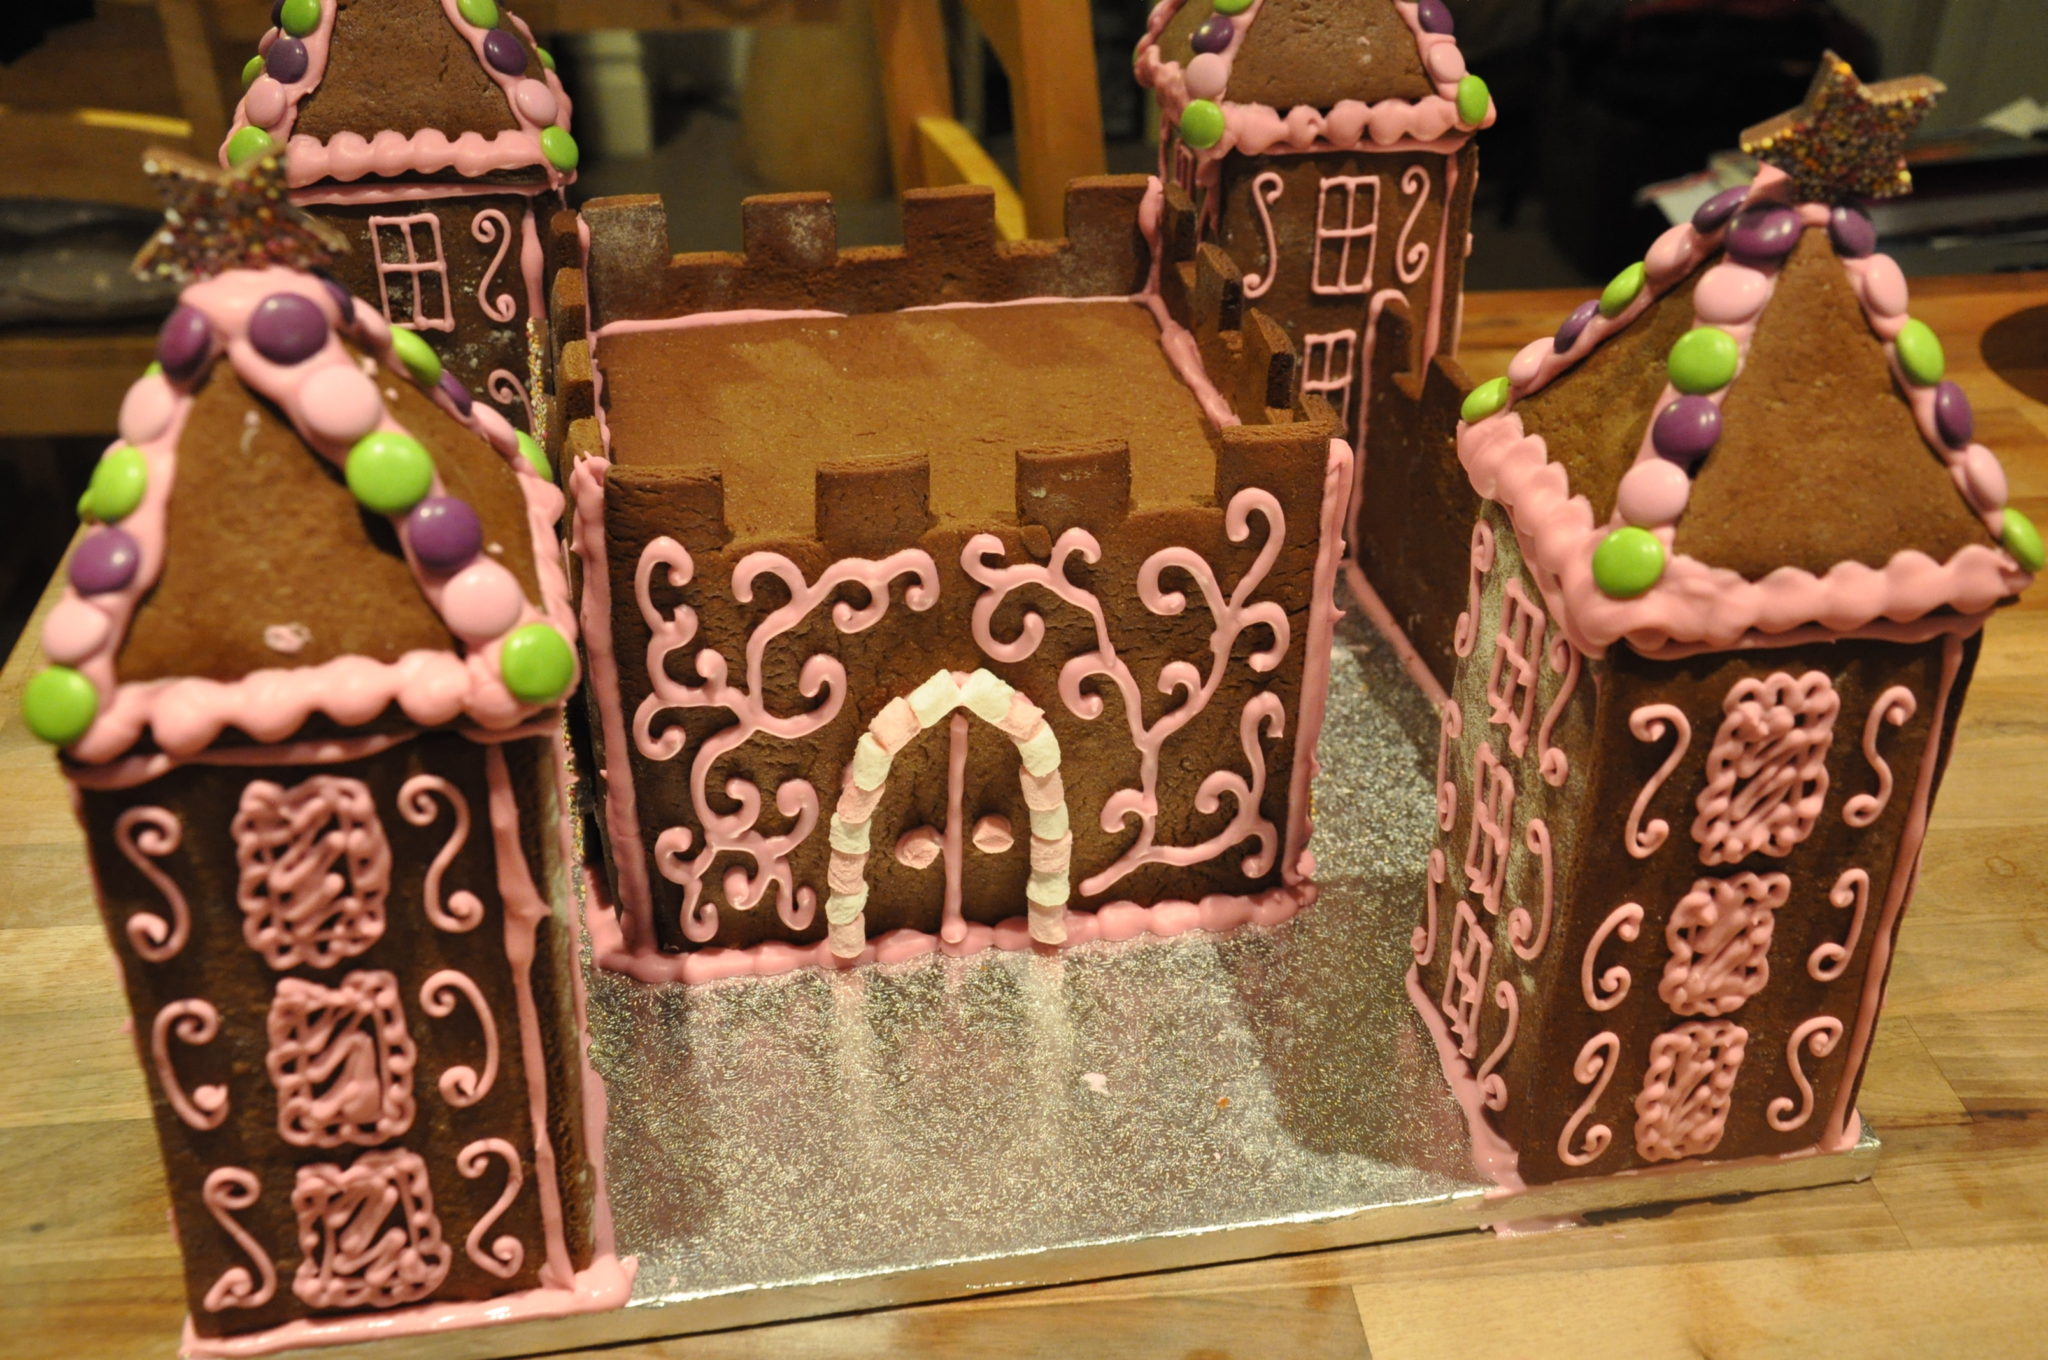

Pipe along the bottom and side edges with icing and gently slot into place.
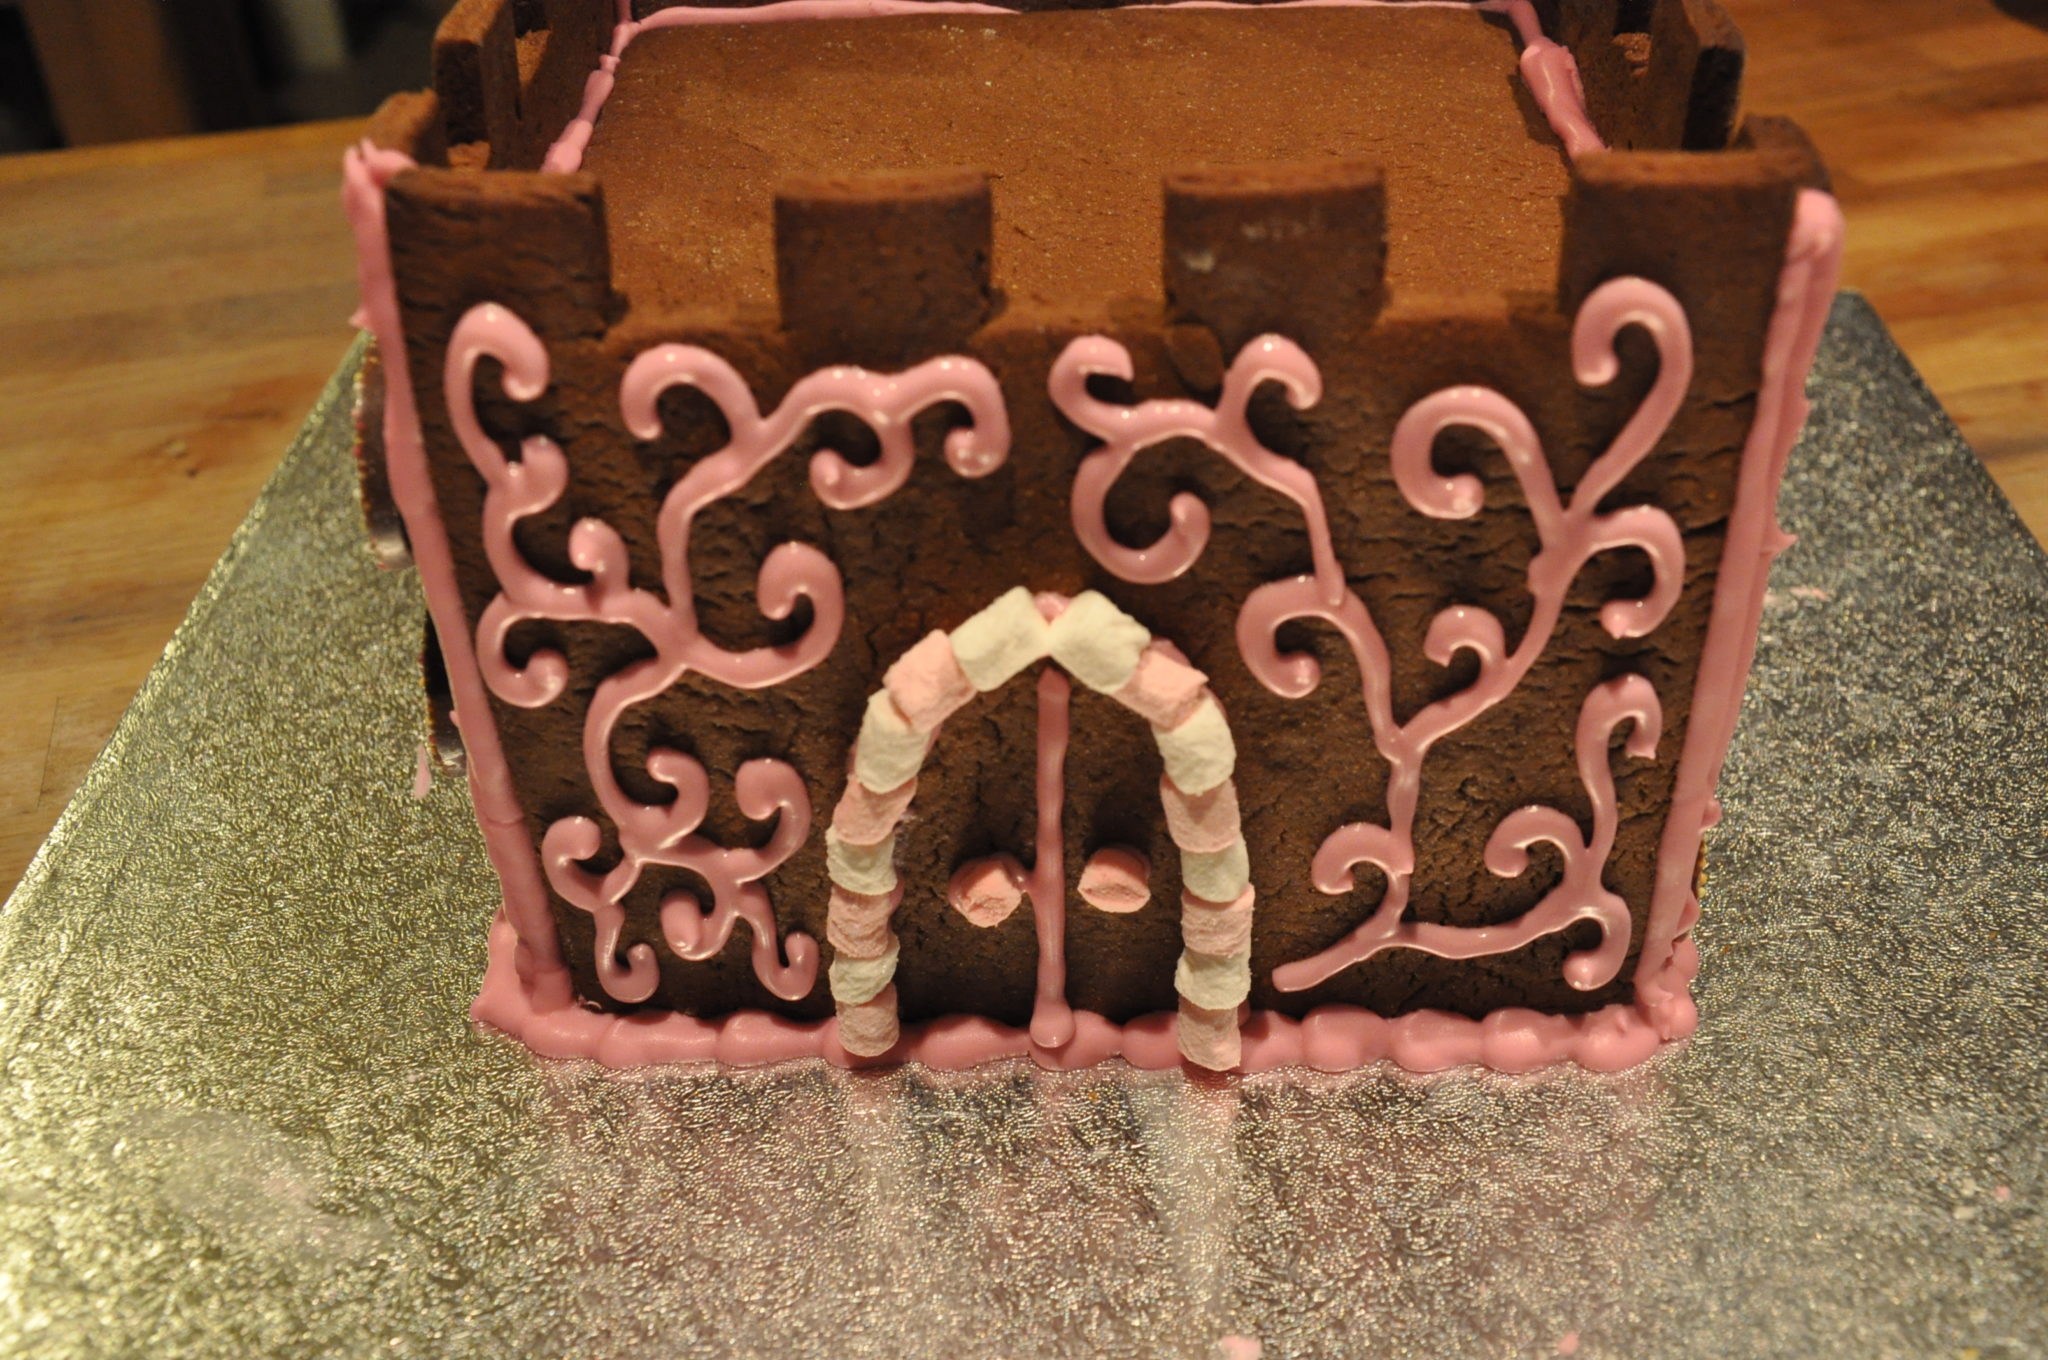
Add in any doors you may have created.
Set aside and leave to dry overnight if possible.
Decorating the Castle – Day Three
This is the part where you get to go a bit mad! There isn’t really a step-by-step for this because it is entirely up to you how you wish to decorate your castle.
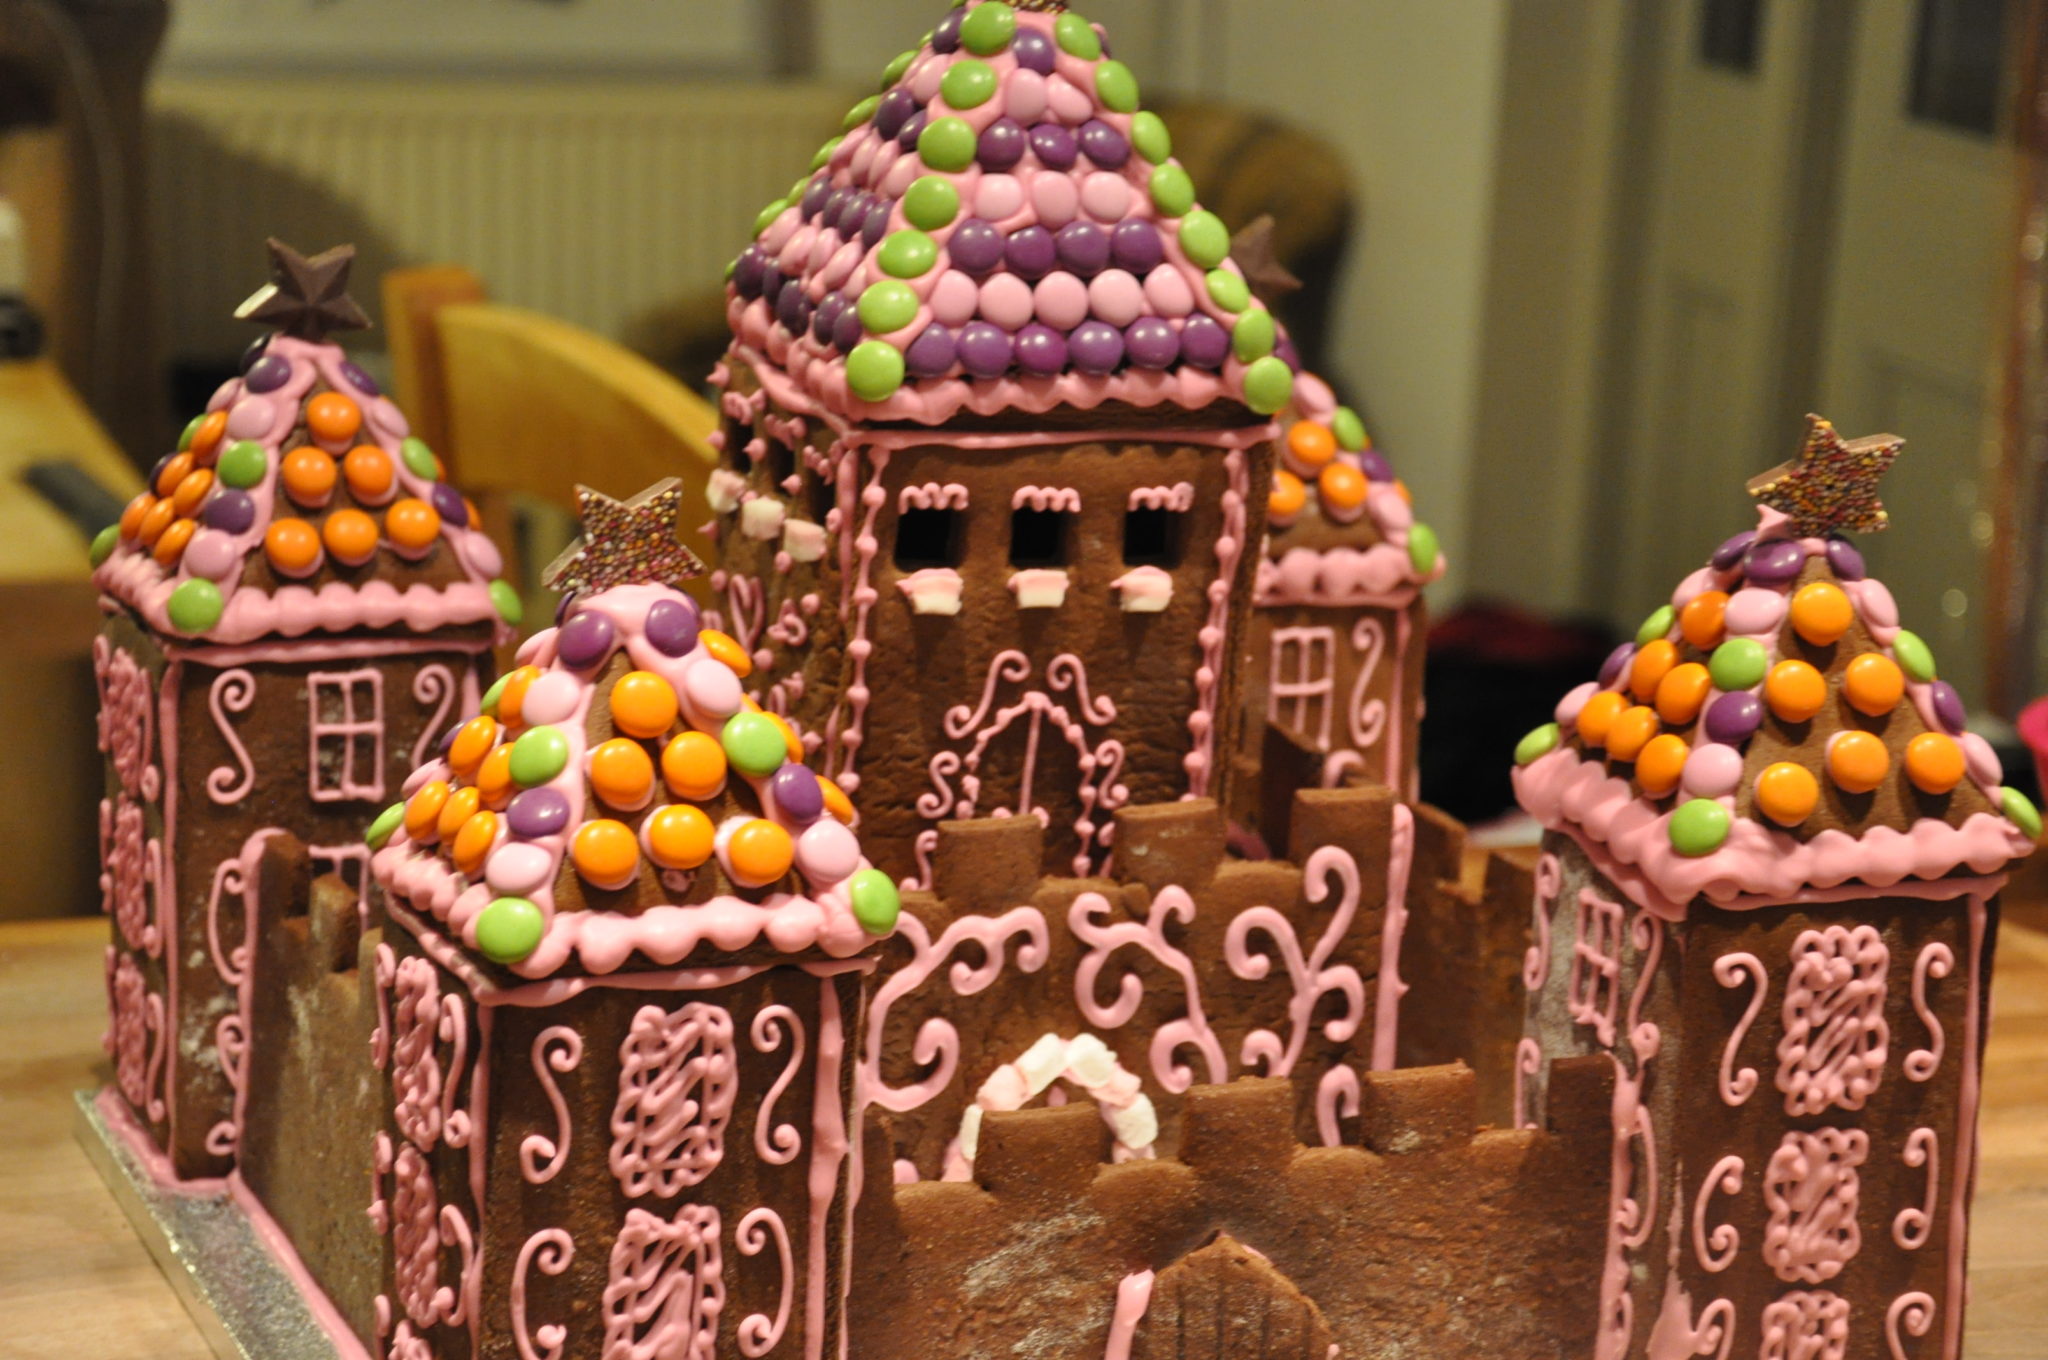
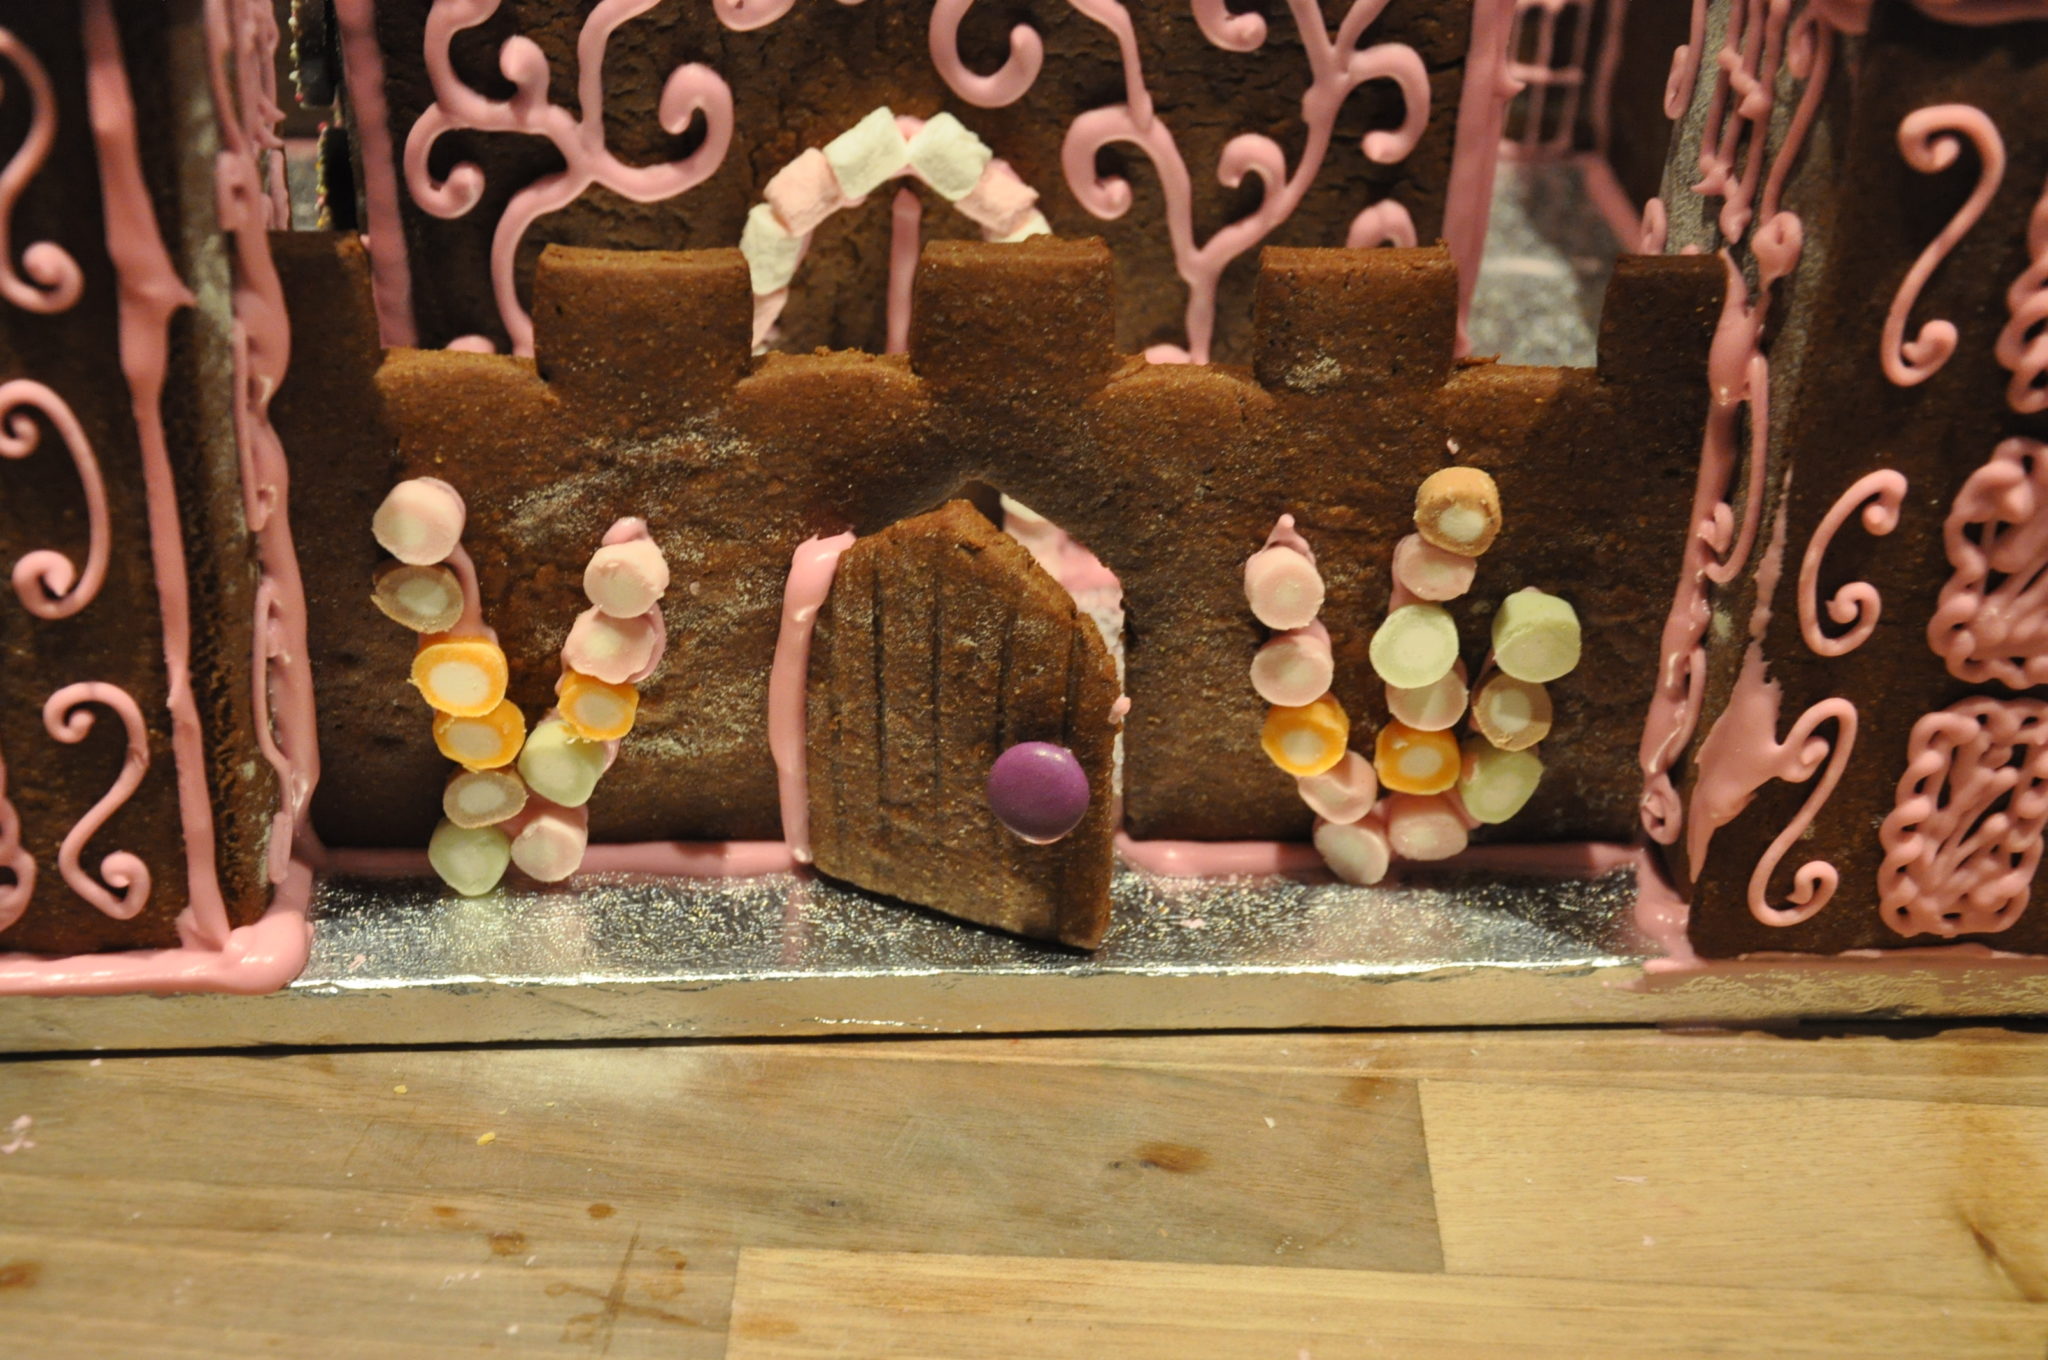
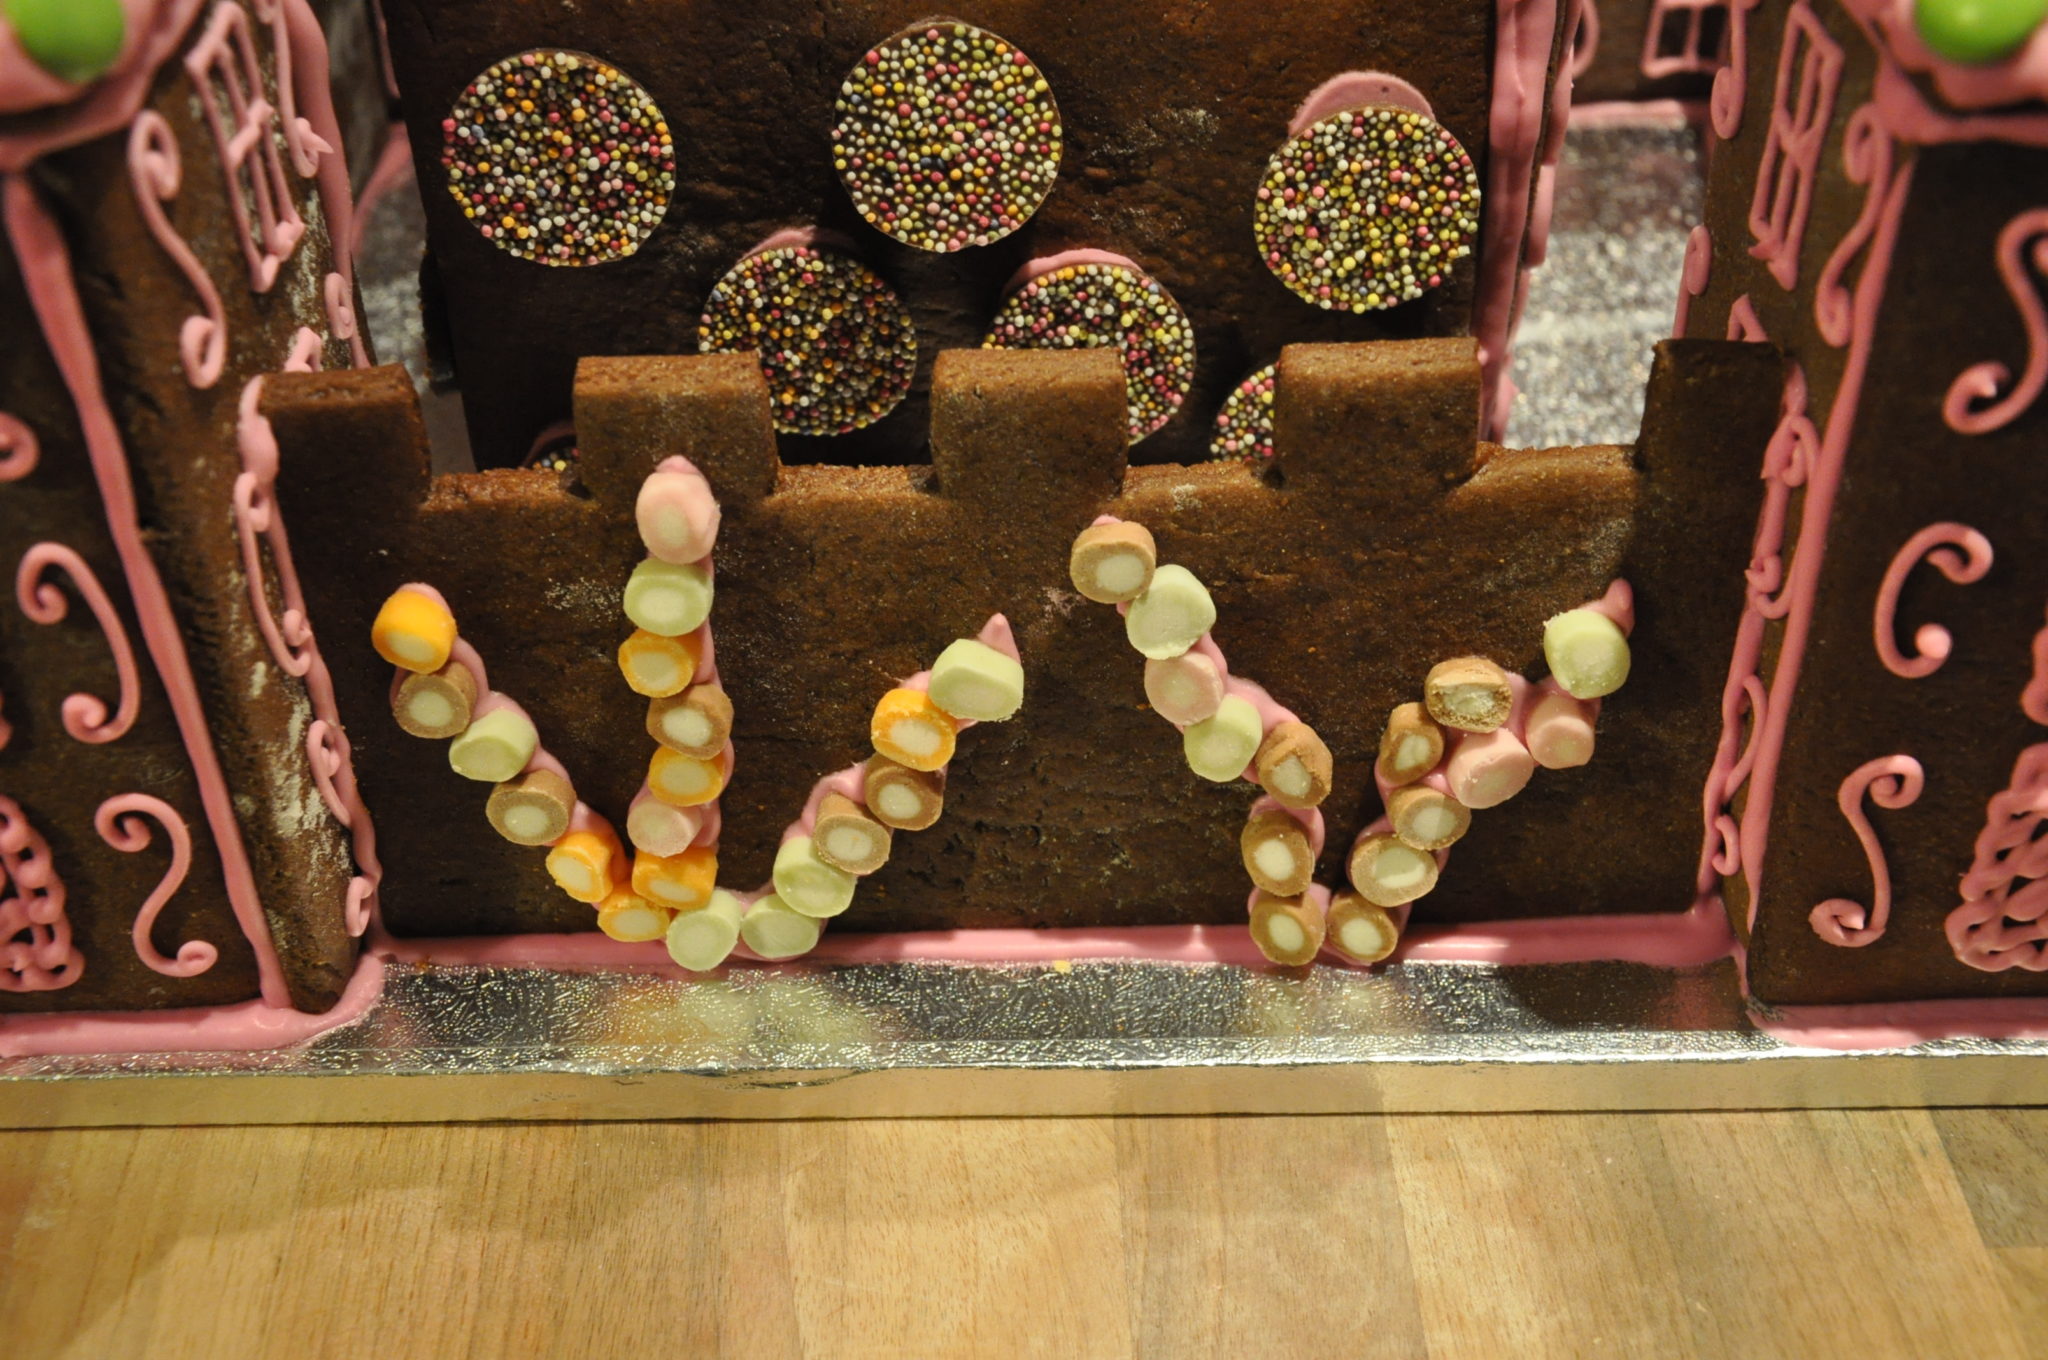
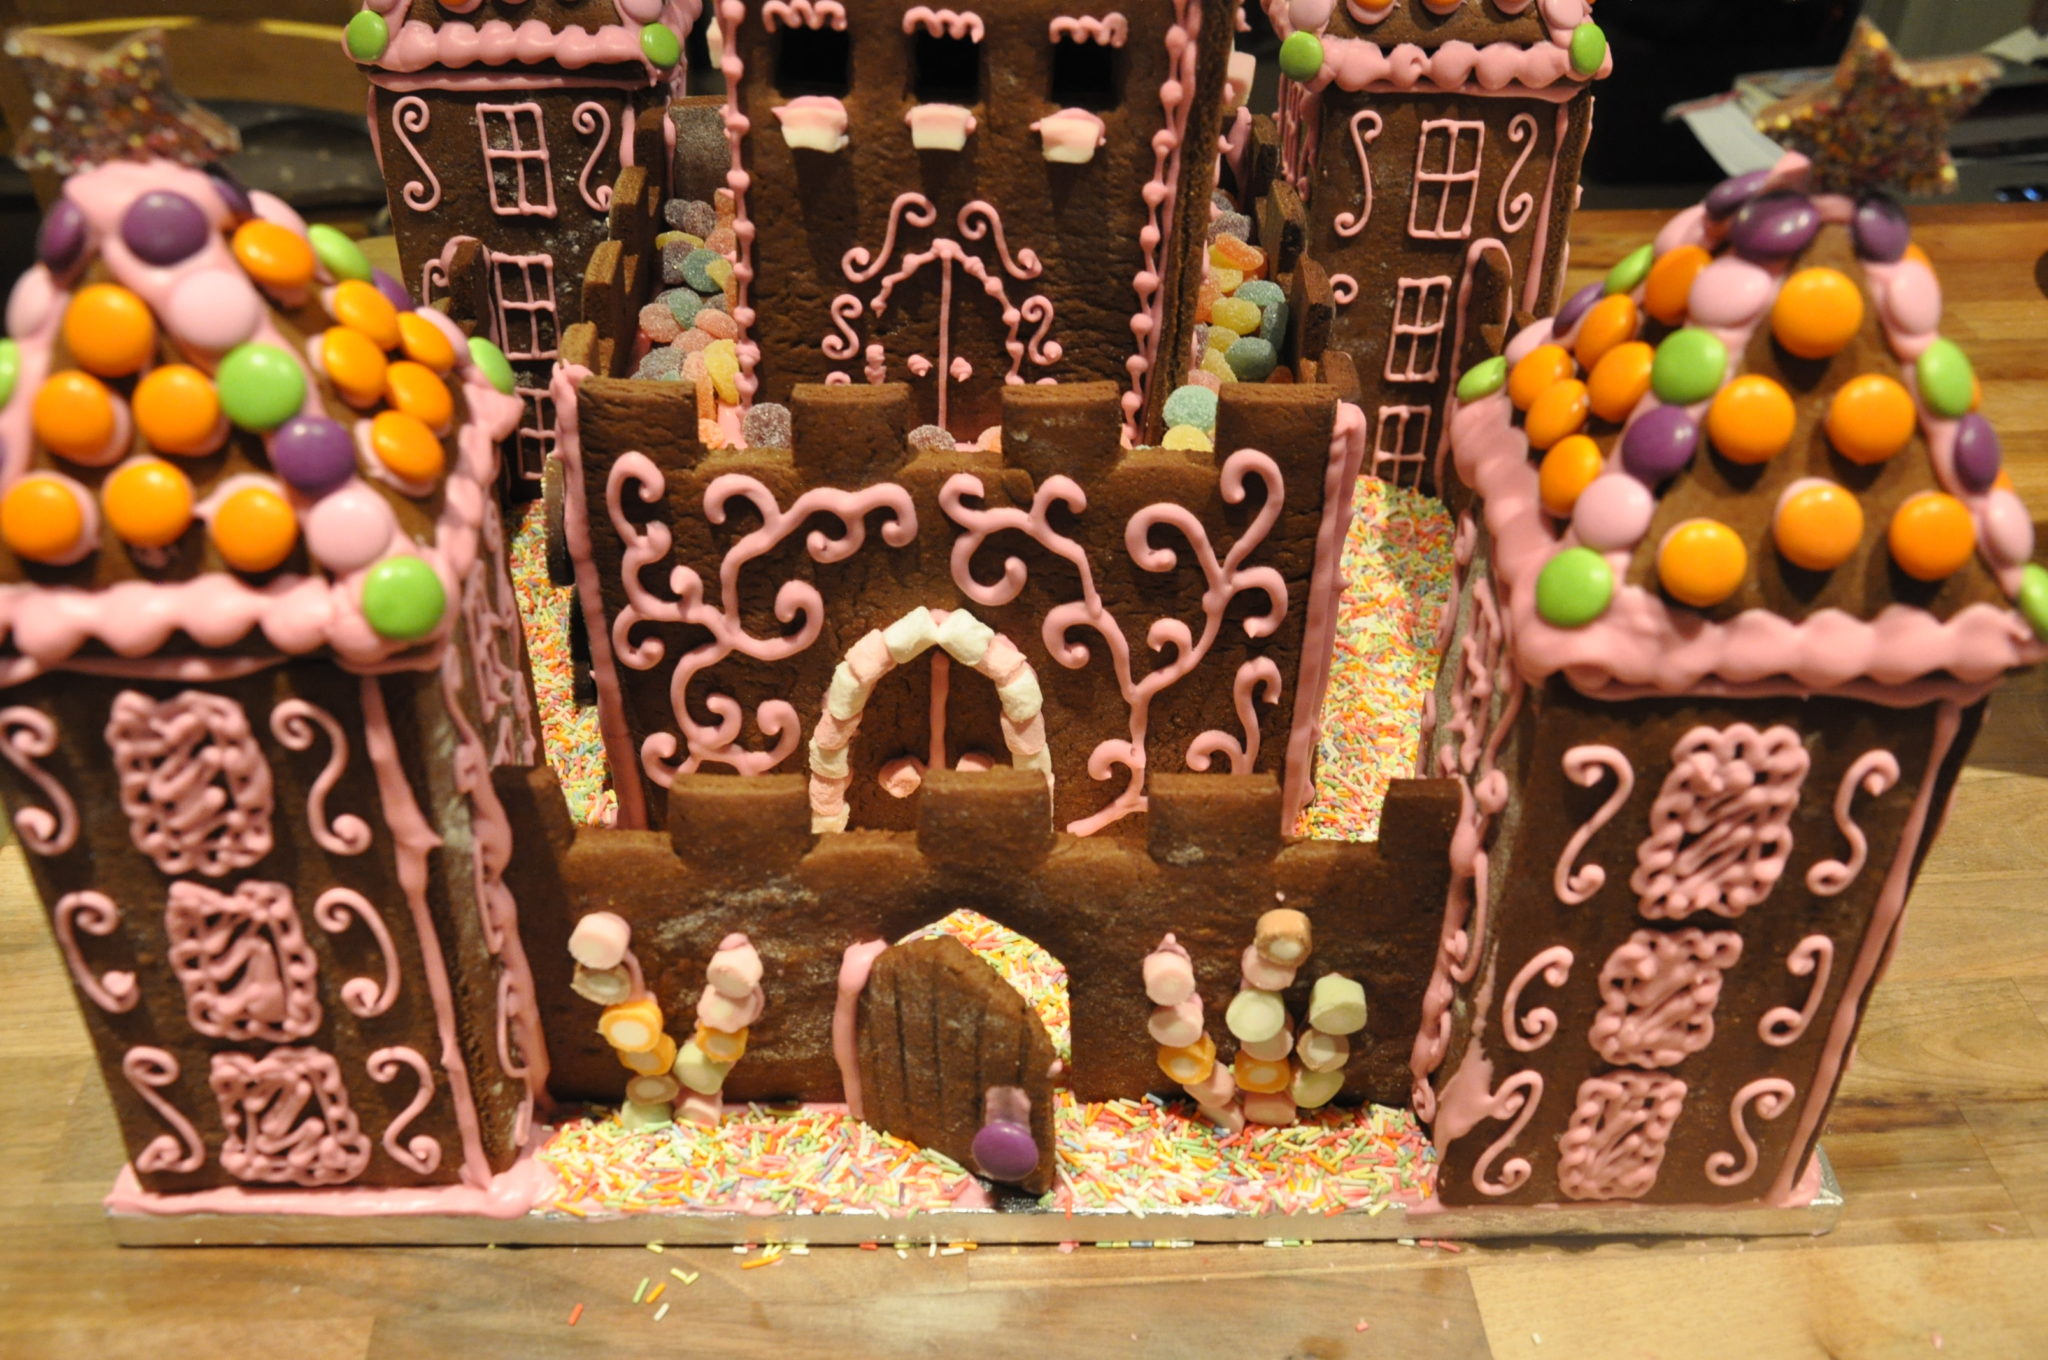

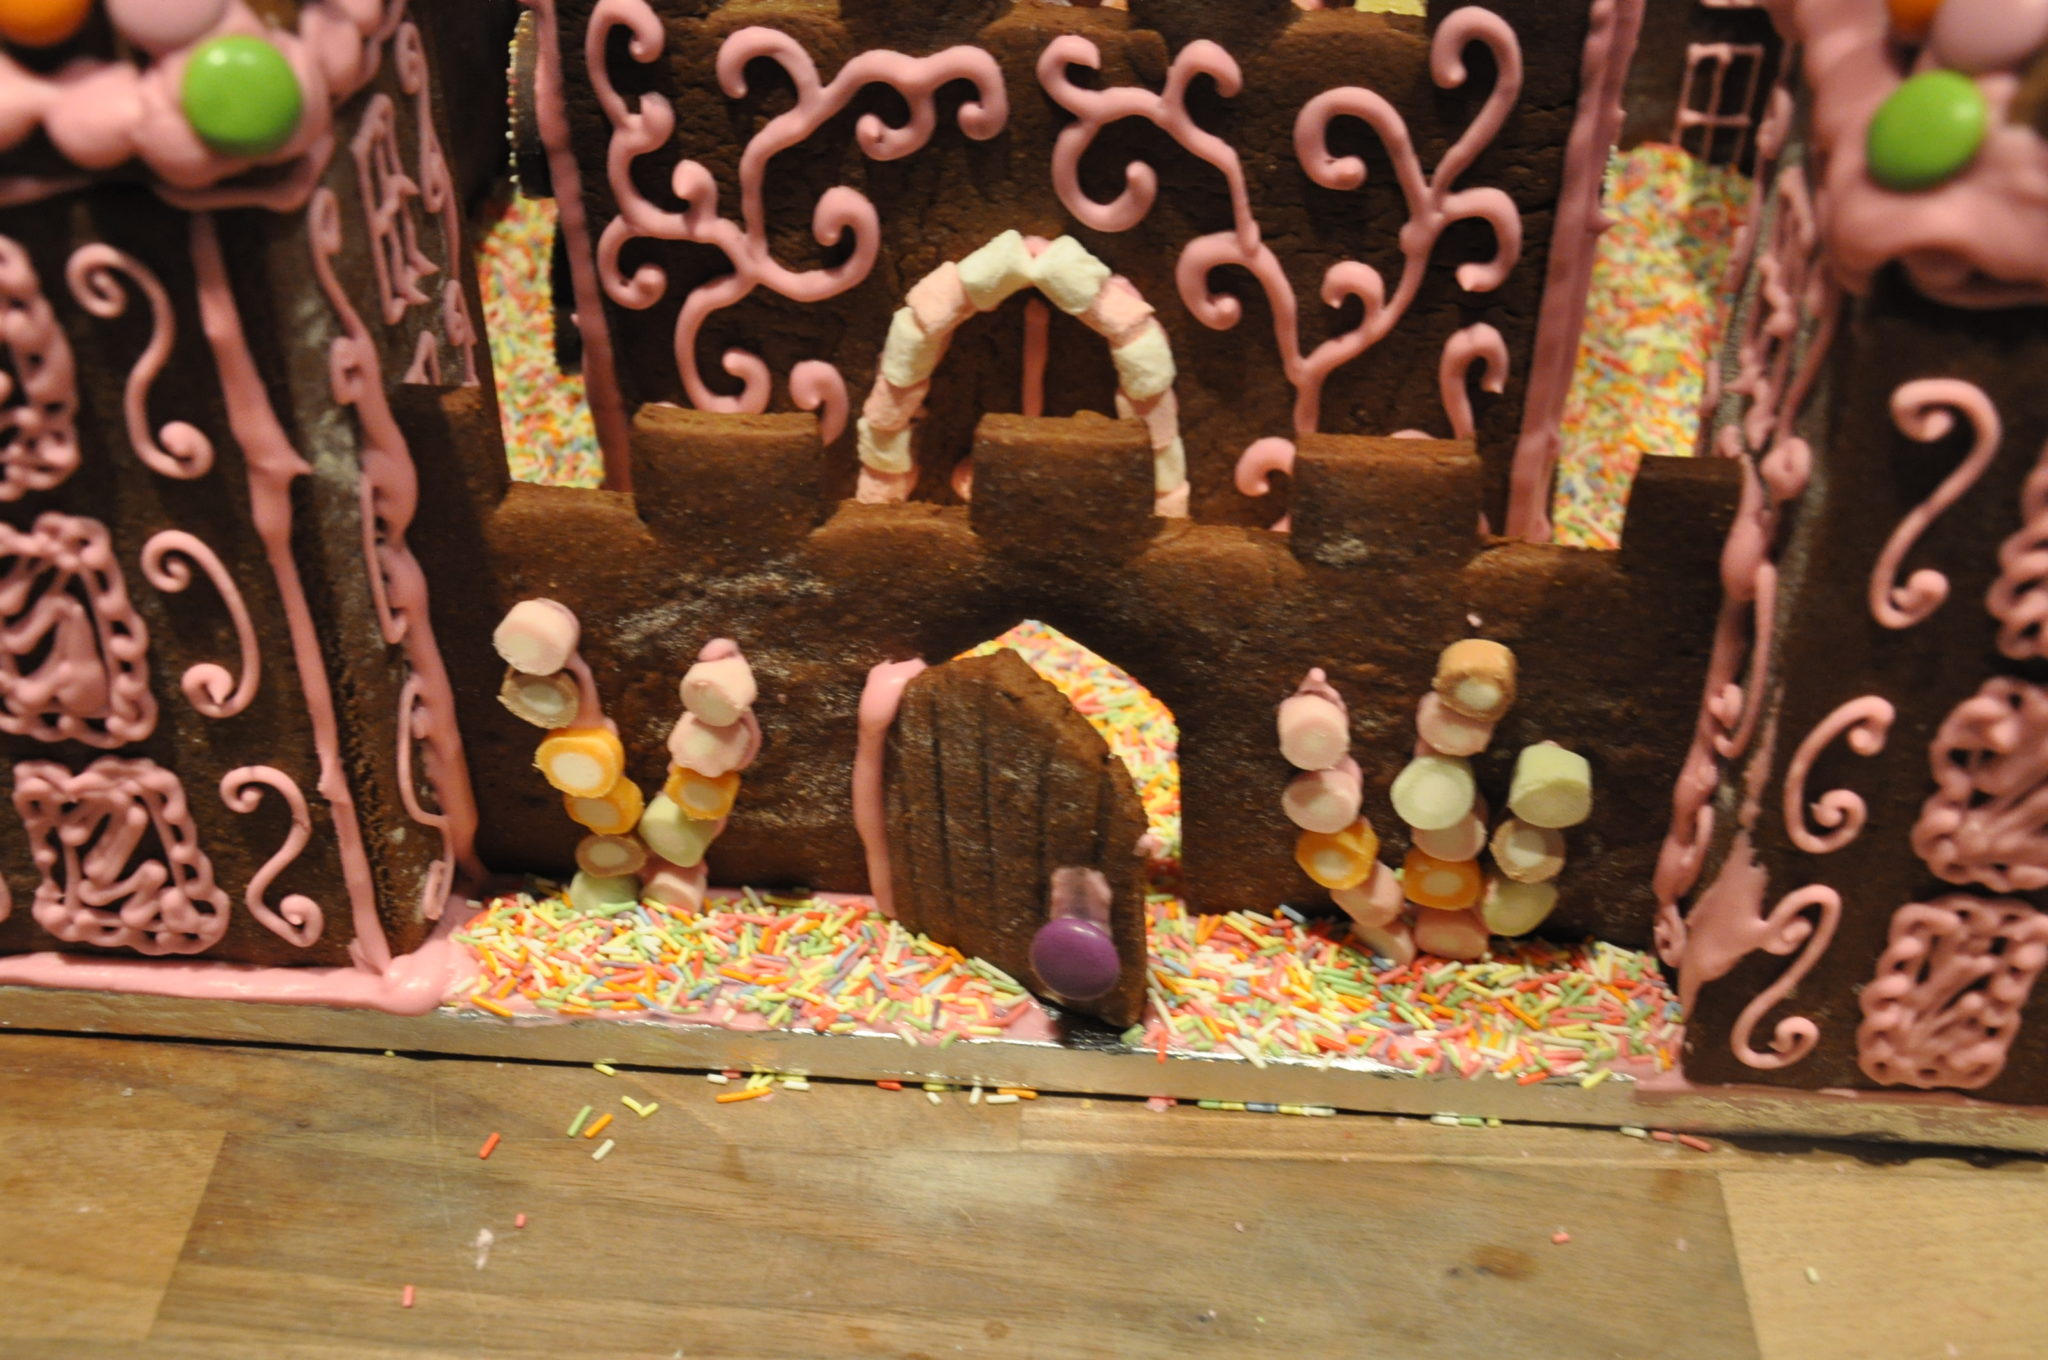


I tend to use things like Jelly Tots, iced gems, strawberry laces, dolly mixtures, Skittles, chocolate drops and so on but you can use anything you want.
- Sliced almonds make great roof tiles, as do chocolate buttons.
- Different glazed nuts and fruits give the gingerbread a more grown-up feel.
- Striped candy canes look great leaning against the walls and can also be used above doorways to create arches.
- Hundreds and thousands make nice pathways and hide the board underneath.
- Dessicated coconut can lend a snowy feel to it.
Take a visit to your local sweet store and see what you can find! You may start out with the same template as everyone else but the end result is always very different and individual.
Download our Gingerbread Castle Template
Hints and Tips
- Use a bread knife to cut your gingerbread pieces to the right shape and size if they get distorted during cooking.
- Make your royal icing up in advance and keep it covered to stop it drying out.
- Remember to pipe your pieces flat – it is far easier than trying to pipe them vertically.
- Give yourself enough time for the gingerbread house to dry. Don’t rush it, even if you might want to, or it might collapse!
- Leftover dough can be used to make cookies. You can stack up different-sized star cookies to make trees.
If you’re looking for other Princess themed ideas for a party don’t forgot to visit our princess party supplies page.
Related Posts