- Stats: 16428 0
- Author: Partyrama
- Posted: 20th October 2015
- Category: Food & Drink
How To Make A Party Pumpkin Piñata Cake
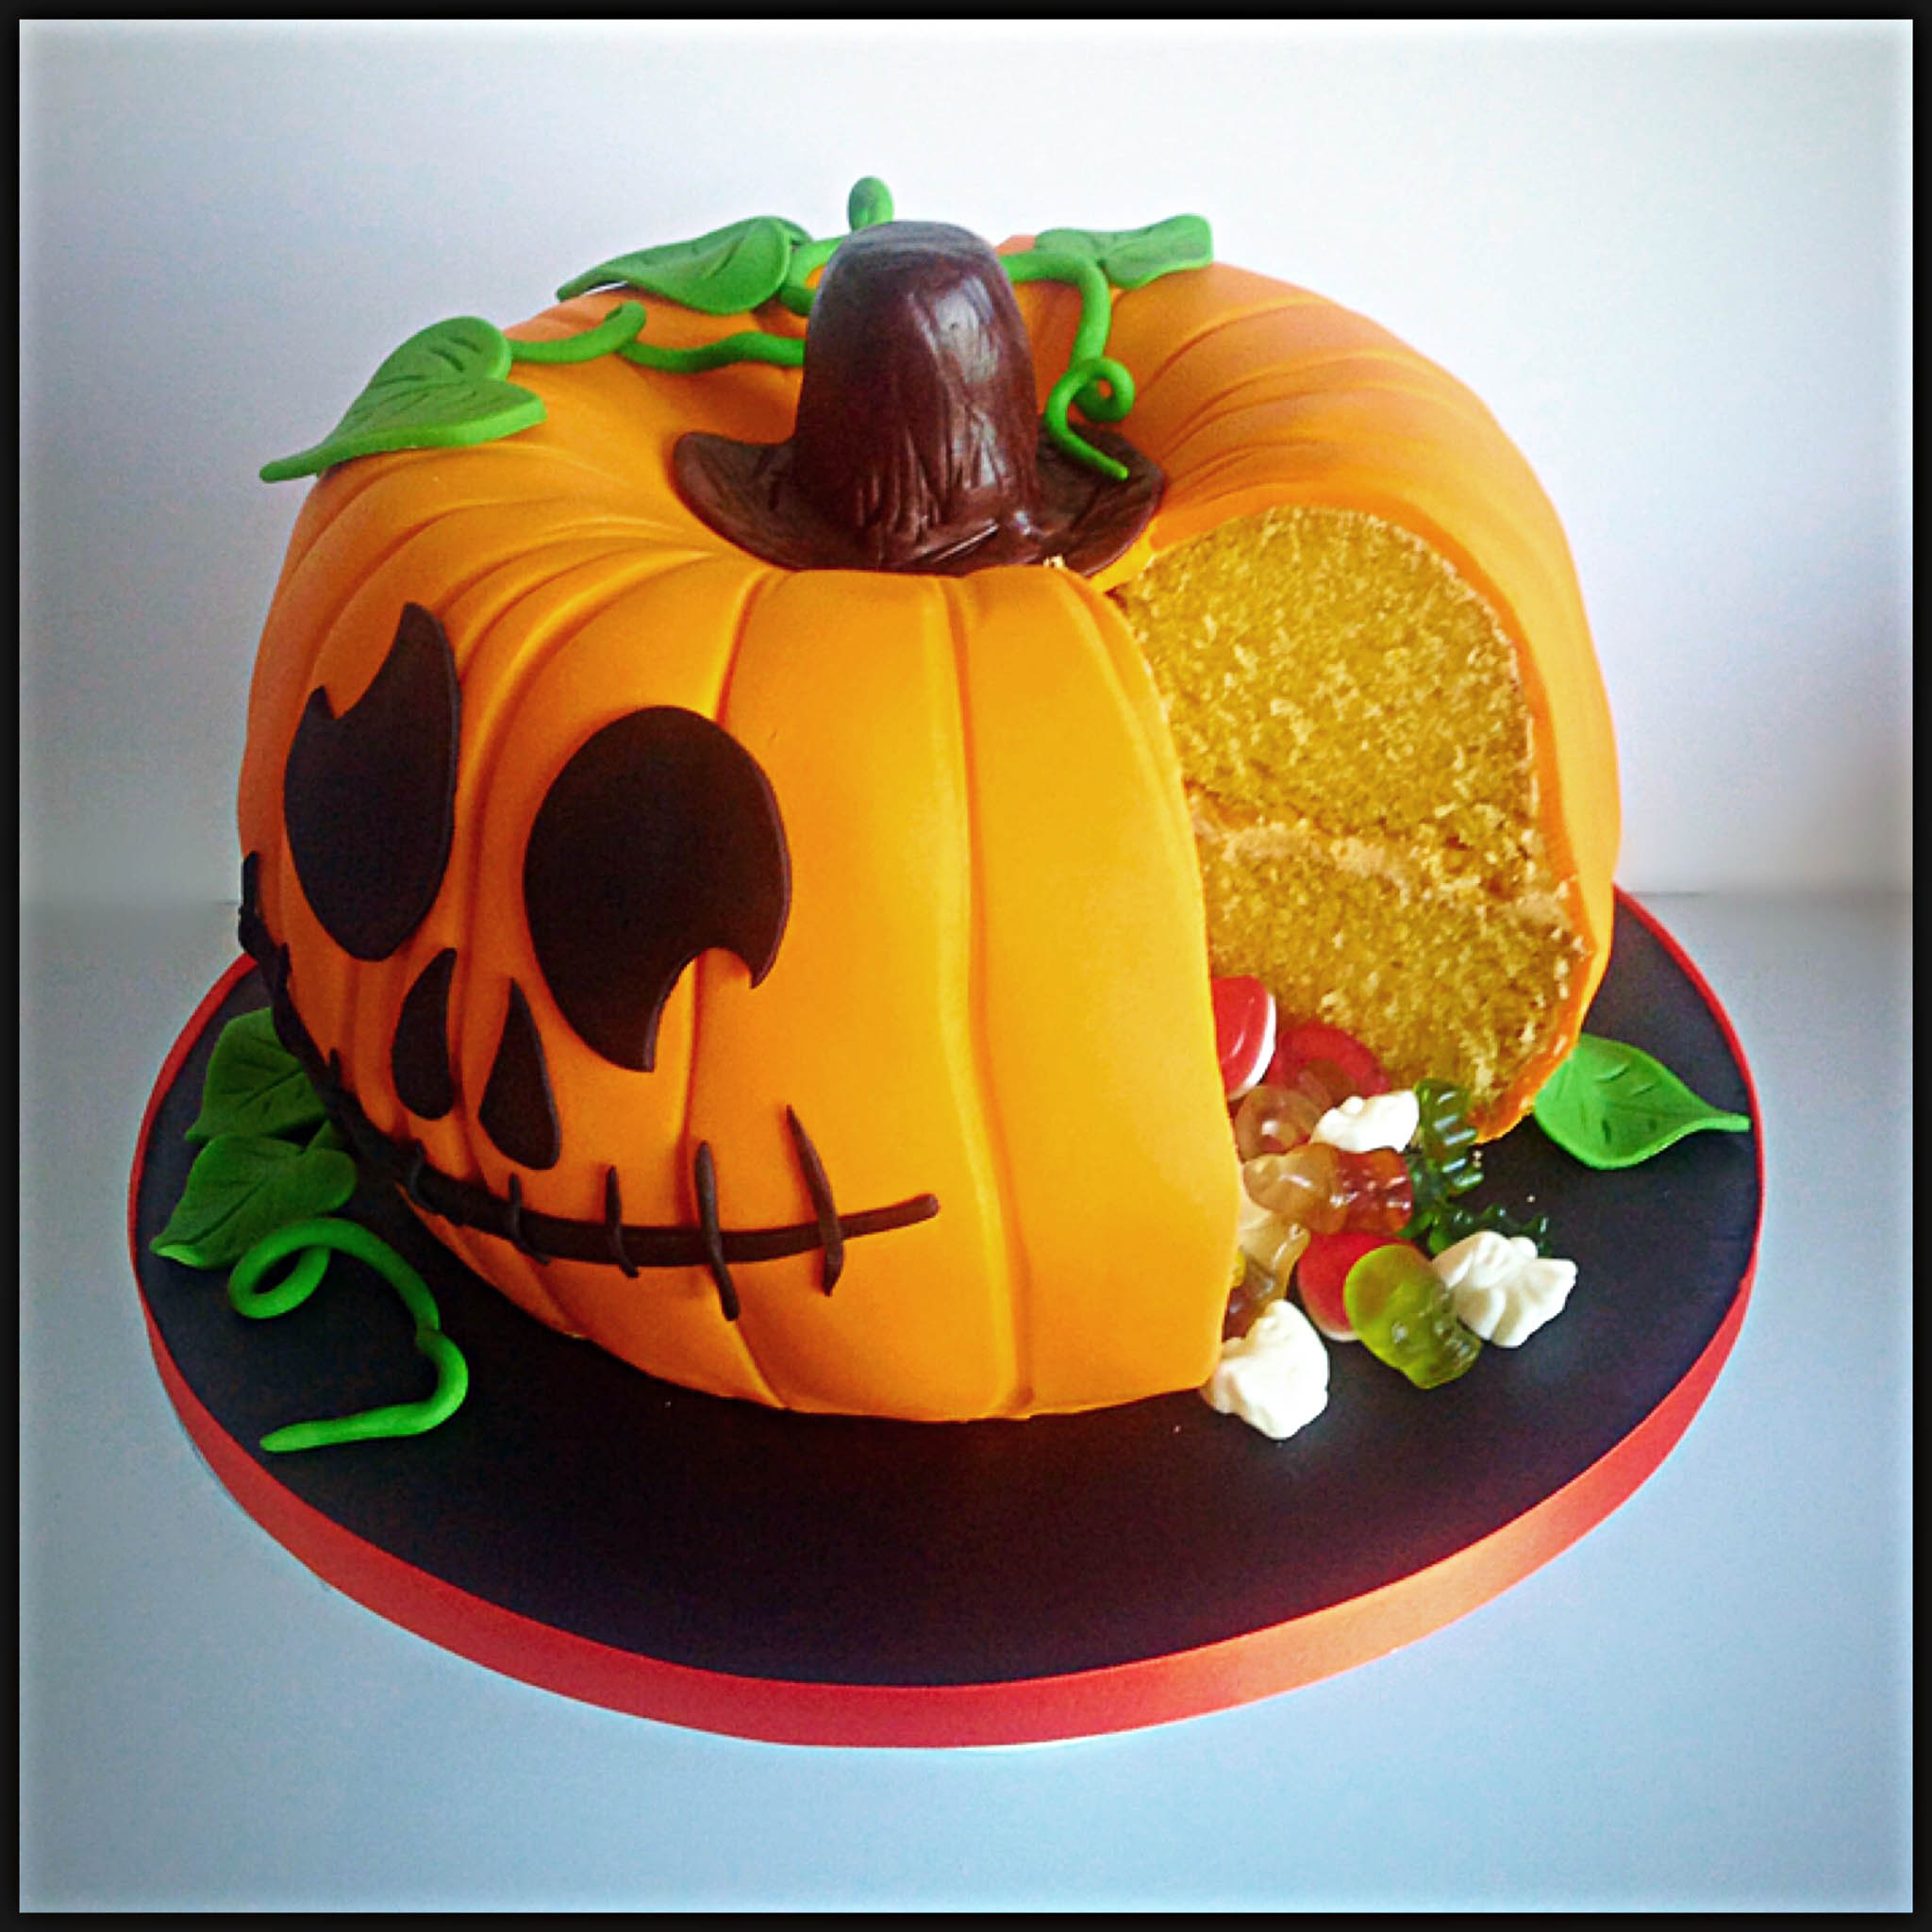
Follow this simple recipe for this spooky surprise Halloween cake that hides an extra treat! Follow the easy instructions from guest contributor Caroline Day of CakeLush.
Full of opportunities to make you jump, scream and scare yourself, Halloween is a great time to get creative with costumes, decorations and cakes! If you’re hosting a Halloween party and you want to wow your guests, this Pumpkin Piñata cake makes a fun centrepiece. In no time you’ll have your own spook-tacular jack-o-lantern cake!
N.B. This cake is party-sized – if you want to make a smaller version you will need to alter the measurements accordingly.
Preparing the cake drum
- 12” cake drum
- 8” cake board
- Orange ribbon
Prepare your cake drum in advance by rolling out a thin layer of black fondant. Trim around the edges and cover the side of the drum with the orange ribbon. Wrap up the leftover black fondant in clingfilm as you will need this to create your Halloween pumpkin face.
Let’s get baking!
For the pumpkin cake
- A 10” Bundt tin (this recipe gives you enough mixture for 2x 10” cakes)
- 600g self-raising flour
- 600g baking margarine or butter (plus extra for greasing)
- 600g caster sugar
- 9 eggs
- 1 orange’s zest
- 1 ½ tsp natural orange extract
- 2 tsp natural orange food colouring
- Halloween jelly sweets (I used 2 share bags)
I love Halloween because it’s the perfect time of year for baking with a Bundt tin!
The secret to baking a successful Bundt cake is having a really well-greased tin. You don’t want half your lovely cake stuck to the inside of the tin, so make sure you grease your tin thoroughly. When you bake the second Bundt, make sure the tin has cooled down completely before you grease it.
Preheat your oven to 160°C Fan/180°C/Gas Mark 4.
There is quite a lot of mixture for this cake so I’ve used an electric stand mixer. If you find it easier, you may want to make the mixture in 2 batches by halving the quantities.
Add the caster sugar, butter or margarine, orange zest and orange essence to the mixing bowl and cream it together until it reaches a light and fluffy consistency.
Crack the eggs into a separate bowl. Add them to the mixture one at a time with a spoonful of flour to prevent them curdling – the mixer should be on medium speed.
When the eggs are fully combined, add the rest of the flour on low speed and be careful not to overmix.
You can then add the food colouring. This gives the pumpkin cake a very subtle orange colour, but if you want a stronger colour you can use artificial food gel colours which are bake-stable. Make sure you only add a tiny bit at a time…a little goes a long way!
Spoon half the mixture into your well-greased tin, pushing the mixture out to the sides so it doesn’t peak too much in the middle during baking.
Bake in the middle of your oven for about 40 minutes until the sponge is cooked through and springs back when touched. Be careful when removing it from the oven as it will be hot!
Allow the cake to cool in the tin for about 15 minutes before turning out to cool on a wire rack. You now have the first half of your pumpkin!
Repeat the baking process for the second half, making sure you cool the tin completely before re-greasing it.
While the cakes are baking and cooling you can prepare the frosting.
For the frosting
- 200g unsalted butter
- 400g icing sugar
- 1 orange’s juice (sieved)
- 1 tsp natural orange food colouring
Whizz up the butter, icing sugar, sieved orange juice and a teaspoon of natural orange food colour in a mixer until light and fluffy.
When both cakes are completely cooled, you may have to trim the tops of them so they are level.
Using a small amount of the frosting, secure the bottom sponge to the 8” cake board and smooth a layer of frosting on the top of the first half ready to sandwich the two halves of your pumpkin cake together.
Now for the fun part!
Fill the hole in the middle of your Bundt cake with the Halloween jelly sweets, avoiding any frosting so they don’t get sticky!
Turn over your second Bundt cake and sandwich the two halves together, lining up the holes and the cake outline.
Fill the hole in the middle to the top with more of the sweets – try not to eat too many!
Cover the entire cake in a layer of frosting. With this cake you don’t have to be too neat, as pumpkins aren’t completely smooth!
Now for the orange covering!
Dust your clean surface with cornflour to prevent anything sticking and roll out your orange fondant so it’s large enough to cover your cake fully. Lift your fondant over the top of your cake using your rolling pin.
Smooth the fondant around the edges of your pumpkin cake using your hands and trim off any excess at the bottom.
When it comes to transferring the cake to the cake drum, you should add a small amount of frosting to the middle of your drum. Then lift the cake (still on the cake board) carefully from underneath and secure it to the drum.
Using a veining tool or a bamboo skewer create the grooves in the fondant to give your pumpkin its definition. Be careful not to press too hard or you might tear the fondant.
For the decoration
- 1 kg orange fondant
- 250g black fondant
- 100g brown fondant
- 100g green fondant
Tip: Wrap any unused fondant tightly in food wrap and put in a sealable food bag or plastic tub to prevent it drying out.
For the pumpkin stalk:
Shape a piece of brown fondant into a short sausage shape and fan out one end so it stands up. You can add some stalk detail using the bamboo stick or veining tool. Gently place it on the centre of your cake and secure in place with a little brush of water.
For the pumpkin face:
I’ve cut out two ovals for the eyes and used a small heart cutter for the nostrils and strips of fondant for the mouth but the possibilities are endless!
Attach your face to your Halloween pumpkin with a tiny brush of water.
For the pumpkin leaves and tendrils:
Roll out some green fondant and, using a large heart cutter, cut out several hearts and transform them into pumpkin leaves by adding some veining using a tool or bamboo skewer. Roll some green fondant into thin sausages and curl them around to make tendrils.
Attach the leaves and the tendrils to the cake using a little brush of water and your Halloween Pumpkin Piñata cake is complete!
Now that wasn’t too scary, was it?!
You can serve with a few extra sweets… if you haven’t eaten them all! With co-ordinating tableware and devilish decorations, your party is sure to be spook-tacular!
Happy Halloween!


