- Stats: 3412 0
- Author: Partyrama
- Posted: 14th October 2018
- Category: Food & Drink
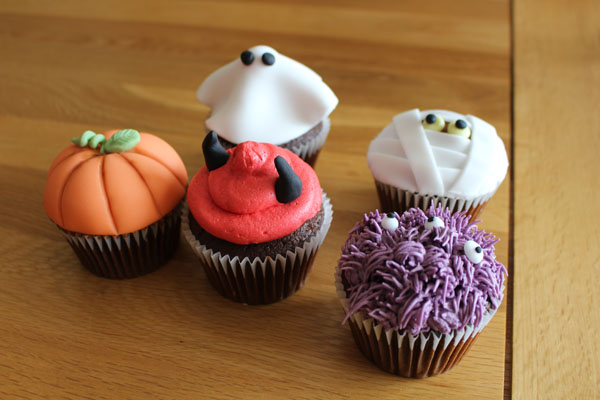
5 Amazing Halloween Cupcakes & Cupcake Toppers
Halloween is one of the most fun times of the year for getting creative in the kitchen, and with that in mind we have created this fun guide to making 5 stunning Halloween cupcakes and cupcake toppers!
Halloween pumpkin cakes, devils, ghosts, mummies and monsters… these haunting bakes are easy to make and are a beautiful addition to any Halloween party! Don’t forget, if you need some additional decorations, fancy dress, tableware and more, check out the Halloween section over at Partyrama.
Ingredients List
For The Cupcakes:
- 150g Finely Chopped Dark Chocolate (70%)
- 350g Plain Flour
- 60g Cocoa Powder
- 370g Caster Sugar
- 1tsp Bicarbonate Of Soda
- 1/2tsp Fine Sea Salt
- 3 Large Free Range Eggs
- 240ml Coffee, Cooled
- 240ml Buttermilk
- 210ml Vegetable Oil
For The Buttercream Icing (3 Varieties – Chocolate, Red & Purple):
- 300g Unsalted Butter, Softened
- 540g Icing Sugar
- 4tbsp Whole Milk
- 180g Dark Chocolate (for the Mummy/Pumpkin Toppers)
- Red Food Colouring (for the Devil Toppers)
- Purple Food Colouring (for the Monster Toppers)
For The Toppers:
- Edible Glue
- Small Lollypops (for the Ghost Toppers)
- Black Fondant Icing (for the Ghost/Mummy/Devil/Monster Toppers)
- White Fondant Icing (for the Ghost/Mummy/Monster Toppers)
- Yellow Fondant Icing (for the Mummy Toppers)
- Orange Fondant Icing (for the Pumpkin Toppers)
- Green Fondant Icing (for the Pumpkin Toppers)
- Chocolate Dusting Powder (for the Pumpkin Toppers)
Got your ingredients ready? Let’s get started!
Making The Cupcakes
Preheat your oven to 160C fan/350F/Gas Mark 4, and line a cupcake tin with cupcake cases.

Combine the flour, cocoa powder, caster sugar, bicarbonate of soda, sea salt and finely chopped dark chocolate in a bowl (tip – use a food processor to chop the chocolate for best results!).


Mix these ingredients together thoroughly, then set this dry mix to one side.

In a jug, mix the eggs, vegetable oil and buttermilk together until fully combined.


Stir in the cooled coffee, then gradually pour and mix in the liquid over your dry mix whist whisking thoroughly until you have a silky-smooth mixture. For best results, use a food mixer on a slow speed setting.


Once complete, transfer the mixture to a small jug (you will need to do this in batches), and carefully fill your paper cases just over two thirds full. Once complete, pop the tray in the oven and bake for around 20 minutes until the mixture has risen and springs back when touched.


Once ready, remove from the oven and leave to cool for 5 minutes, then transfer to a wire rack to finish cooling.

Making The Buttercream Icing
Beat the butter in an electric mixer for 4-5 minutes until creamy and smooth.


Sift the icing sugar onto the mixture, add the milk, then continue to beat the mixture for a further 5 minutes. To save your kitchen getting covered in icing sugar, pop a towel over the mixer!


Once combined, you will end up with a mixture like this! Separate the buttercream into 3 separate portions, one to make chocolatey, one to make purple and one to make red.

Making The Chocolate Buttercream Icing (For The Mummy/Pumpkin Toppers)
Break your chocolate into chunks, and melt the chocolate in the microwave on full power. As all microwaves are slightly different, we recommend starting with a 30 second blast and then continue with careful 10 second blasts until fully melted.

Pour the chocolate into the buttercream, then mix together with a spatula until fully combined.


Making The Red Buttercream Icing (For The Devil Topper)
Using a cocktail stick, take a small amount of the colouring and gradually mix it into the buttercream icing with a spatula until it gets to a smooth and deep red colour.


Making The Purple Buttercream Icing (For the Monster Topper)
Add the purple colouring little by little, mixing it into the icing with a spatula until thoroughly mixed and the buttercream icing is a nice rich colour.


Devil Topper Instructions
Spoon the red buttercream icing into a piping bag fitted with a round nozzle. Take 1 cupcake, and starting from the outside, slowly squeeze out the icing onto the cupcake and cover the top in a spiral motion, moving into the centre in one motion.


Roll and shape two small balls of black fondant icing into horn shapes between your fingers, then carefully place them on the top of each cupcake!


Tada!

Mummy Topper Instructions
Start by rolling out a few small balls from the yellow fondant icing for the eyes, and some smaller balls again using black fondant icing for the pupils. Carefully stick the pupils onto the eyeballs.


Using a spatula, smooth out a dollop of chocolate buttercream on the top of your cupcake, and then pop the eyes centrally in the middle.


Roll out a large ball on white fondant icing, then using a knife or a pizza cutter, cut this into strips.


Start laying these strips horizontally across the face of the cupcake, making sure not to cover the eyes. You can make a couple slightly angled to give a more natural look to your mummy!


Keep layering them up horizontally and a couple more diagonally until all of the cupcake is covered, apart from the eyes in the middle.

Once complete, take some scissors and neatly trim the overhanging edges of the icing all the way around.


Tada!

Monster Topper Instructions
Start by making the eyes, rolling some white fondant icing into little balls.


Roll some smaller balls of black fondant icing for the pupils, then using some edible glue, stick these on the top to finish the eyes. Set them to one side.


Prepare a piping bag fixed with a grass tip nozzle with purple coloured buttercream icing, then apply an even coating to each cupcake as seen below.


Pop the eyes on the top and your monsters are complete!

Ghost Topper Instructions
Unwrap a small lollypop and push it into the centre of your cupcake. This will act as a stand for the ghost icing.

Roll out some white fondant icing, then using a cutter with a diameter around 1 1/2″ larger than the cupcake, cut out a circle of icing.

Position the centre of the icing over the top of the lollypop, then carefully fold the icing around the lollypop to create your ghost shape.


Roll some small balls of black fondant icing in your fingers, apply a little edible glue, then fix these to the ghost to give it its eyes.

Tada! Your spooky ghost cupcakes are done!

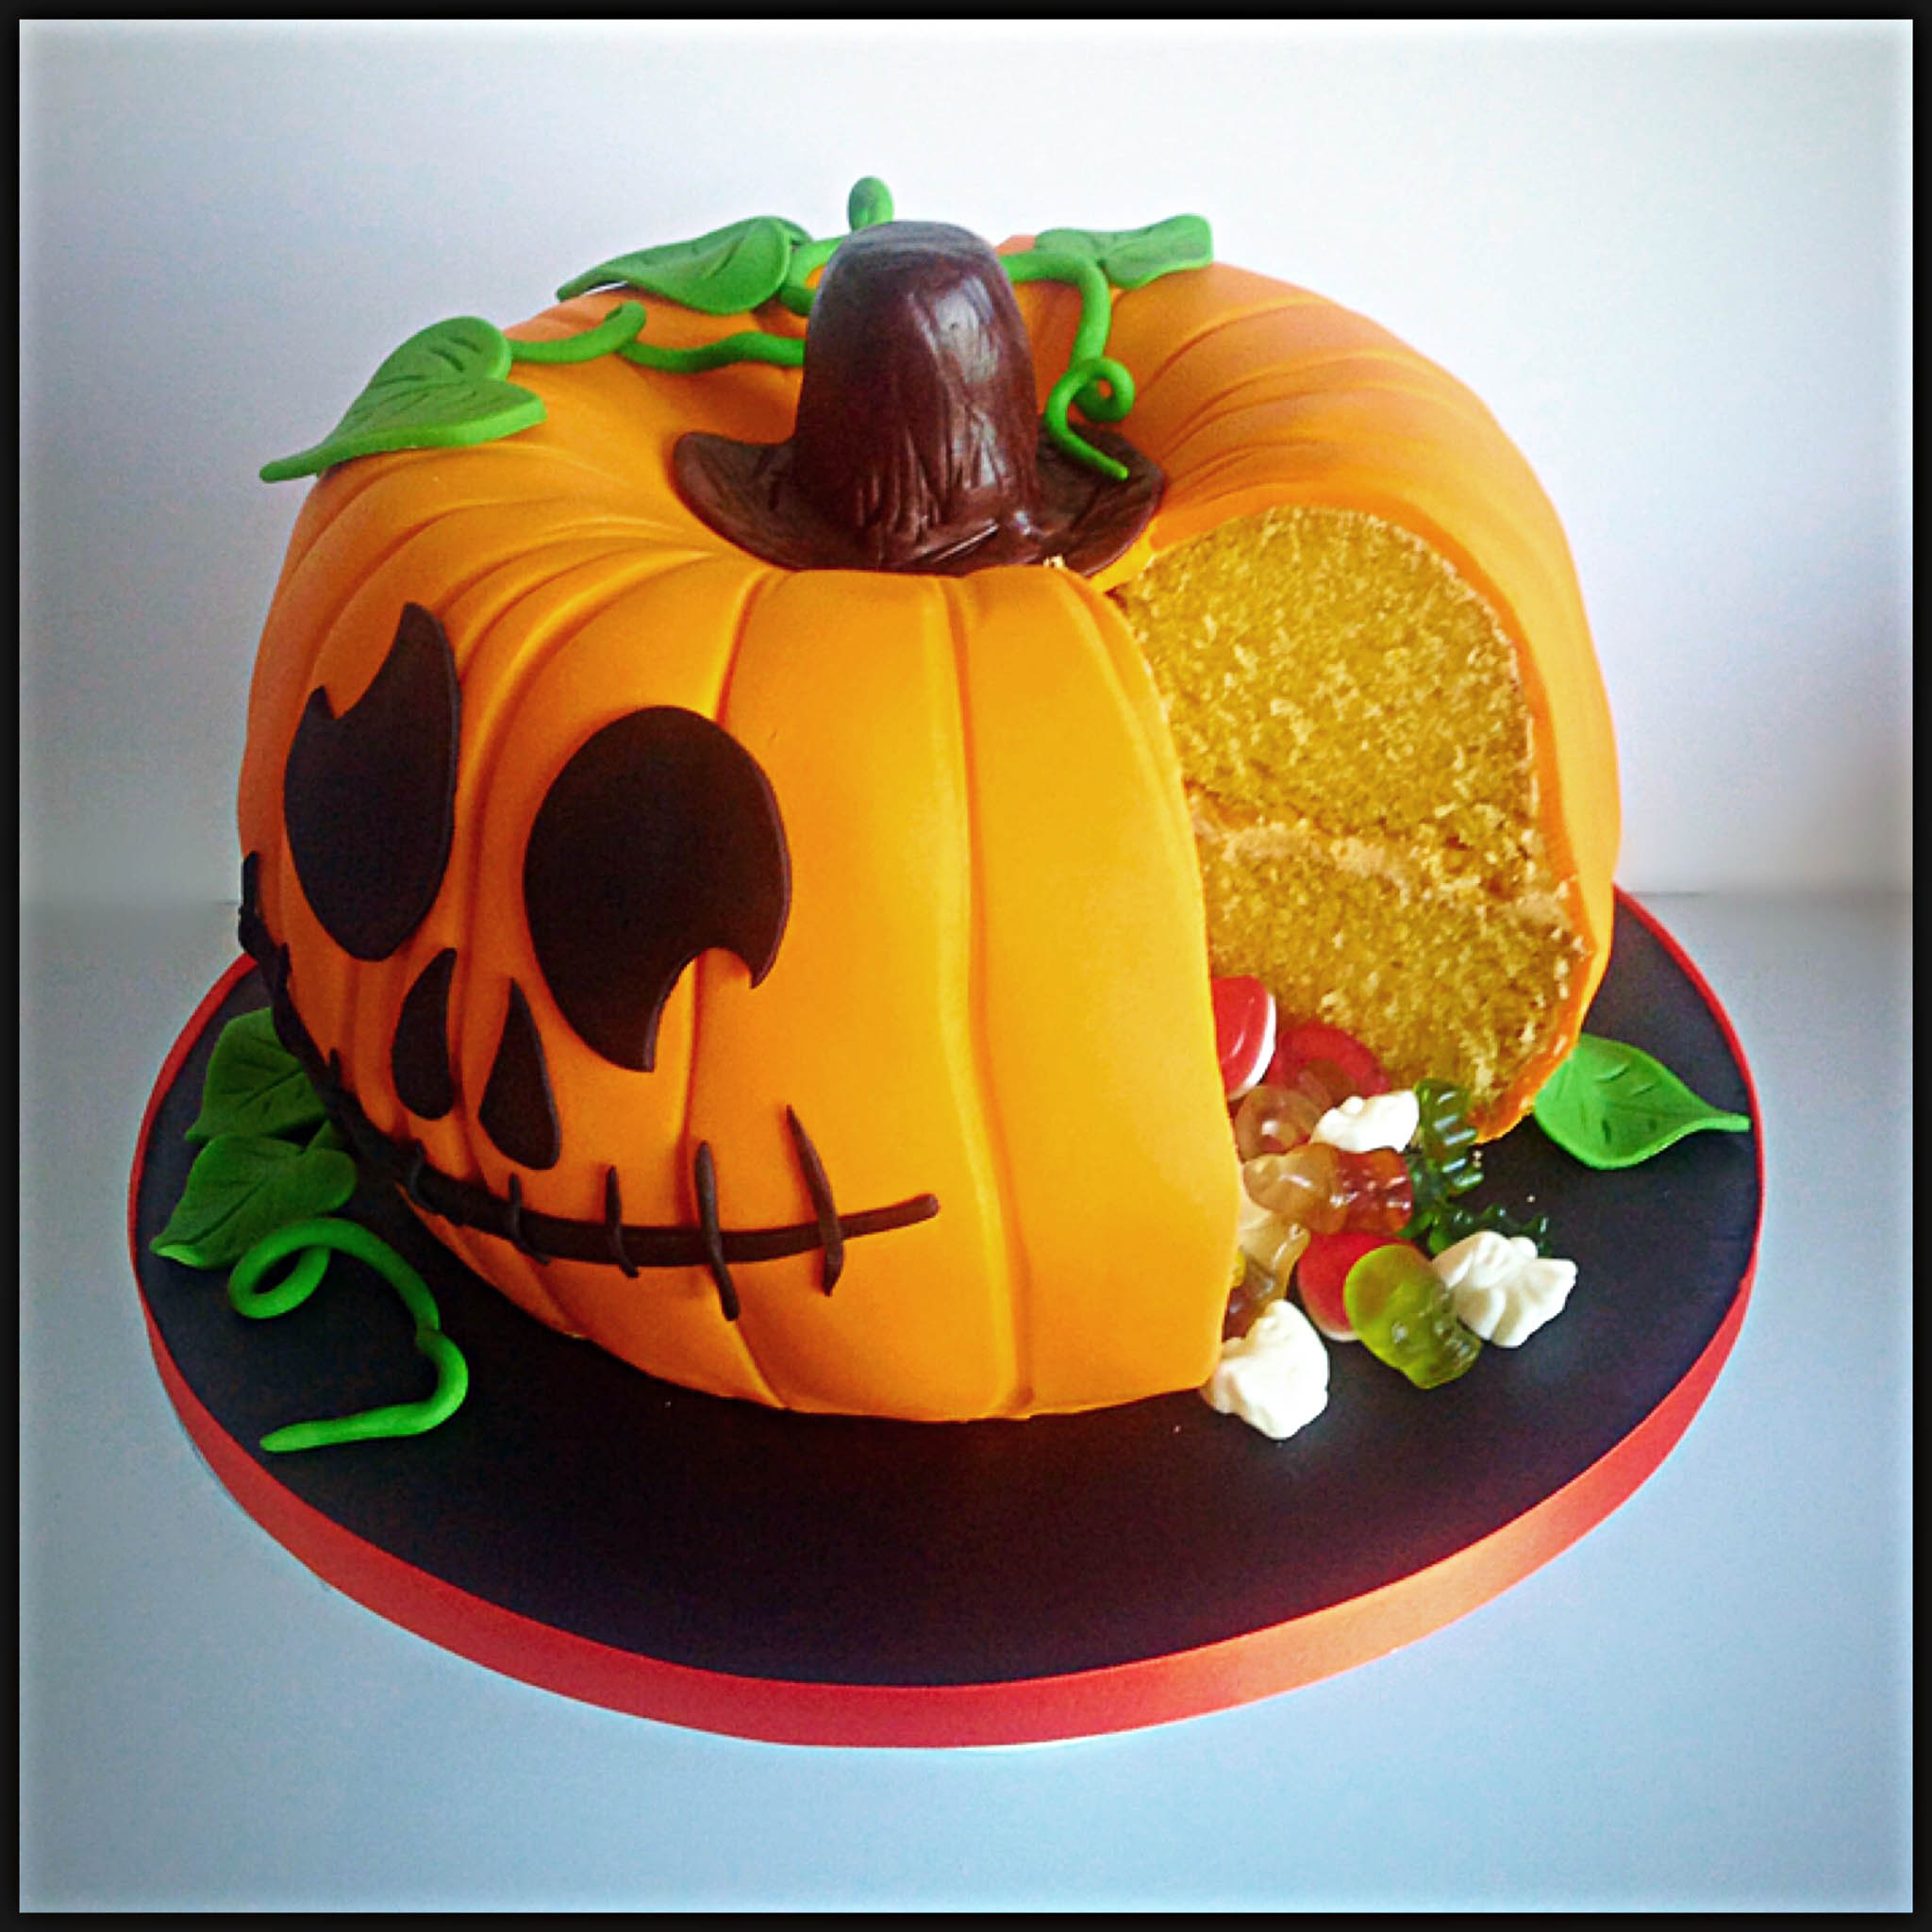
Pumpkin Topper Instructions
Using a small spatula, apply a dollop of chocolate buttercream to the top of your cupcake, then smooth it into a dome shape as seen below.


Roll out some orange fondant icing, and then using a cutter roughly an inch larger than your cupcake, cut out a circle.


Carefully place the circle of orange icing on top of the buttercream, then using your hands, mould it into a smooth dome on top of the cupcake.


Using a sugar shaping tool with a round ball end, make a little dent in the top of the icing.

Using a tool with a thinner edge, draw some lines down from the top to create the ridges of the pumpkin.


Roll some green fondant icing into a long sausage, then cut into pieces around 2 inches long. Wrap these around a cocktail stick to curl them.


Roll a small ball of green fondant icing in your hand into a leaf shape, then score the lines of the leaf design into it.


Fix the two leaf parts to the top of the pumpkin using some edible glue.

Using a small brush, brush some chocolate dust into the ridges of the pumpkin to give them a little more definition.

Hooray! Your pumpkins are now complete!


We hope you enjoyed our guide to making these beautiful Halloween cupcakes! Feel free to share with your friends and family, and send us your pictures to blog [at] partyrama.co.uk. Don’t forget to connect with us on social media on Facebook and Twitter!

Related Posts