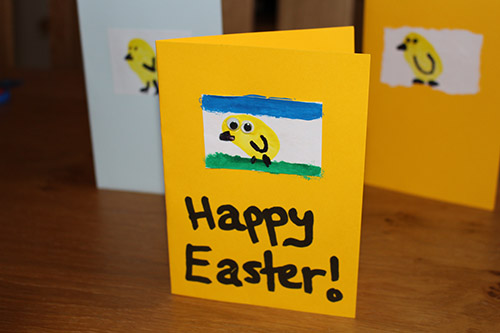
Thumbprint Easter Cards For Kids
Every Easter we like to sit down with the kids and make some wonderful Easter cards. We are huge advocates of creative activities at home, as well as at school, and this is a perfect example of a fun little project that costs very little, all ages can create to a good standard, and is a really nice way to add to the Easter celebrations.
You Will Need (per card):
- A sheet of coloured A4 card
- A sheet of white A4 card or paper
- A black felt tip pen/small marker pen
- Child friendly glue
- A small amount of water based yellow paint for the thumb print
- Scissors/Guillotine
Please remember, always supervise children when using scissors and sharp objects!
Instructions:
Cut a sheet of coloured A4 card in half, portrait way up.

Fold one of the halves in half again lengthways, to make a greeting card shape.

Cut or rip some of the white card into a square shape (feel free to experiment with this!)

Glue the small piece of card to the front of your folded card.

Dip your thumb into some yellow paint then press onto the white card, leaving a nice round yellow print on the card. Leave this to dry for 45 minutes or so until fully dry (if you can’t wait that long, feel free to quicken the drying process using a hair dryer)

Once dry, use the orange pen to draw a beak on the yellow blob, and use the black pen to draw feet, wings and an eye to create an Easter chick! Have the children add any other colour or decorations, write your message to the recipient on the inside you are done! Happy Easter everybody!
If you liked this Easter card idea, why not share with your friends and family? Don’t forget to tweet us your results over at http://www.twitter.com/partyrama 🙂
Related Posts